Watch it draw itself · tap to replay
How to Draw a Pelvis
Draw a pelvis in 10 easy steps, about 8 minutes. Free, with a printable worksheet.
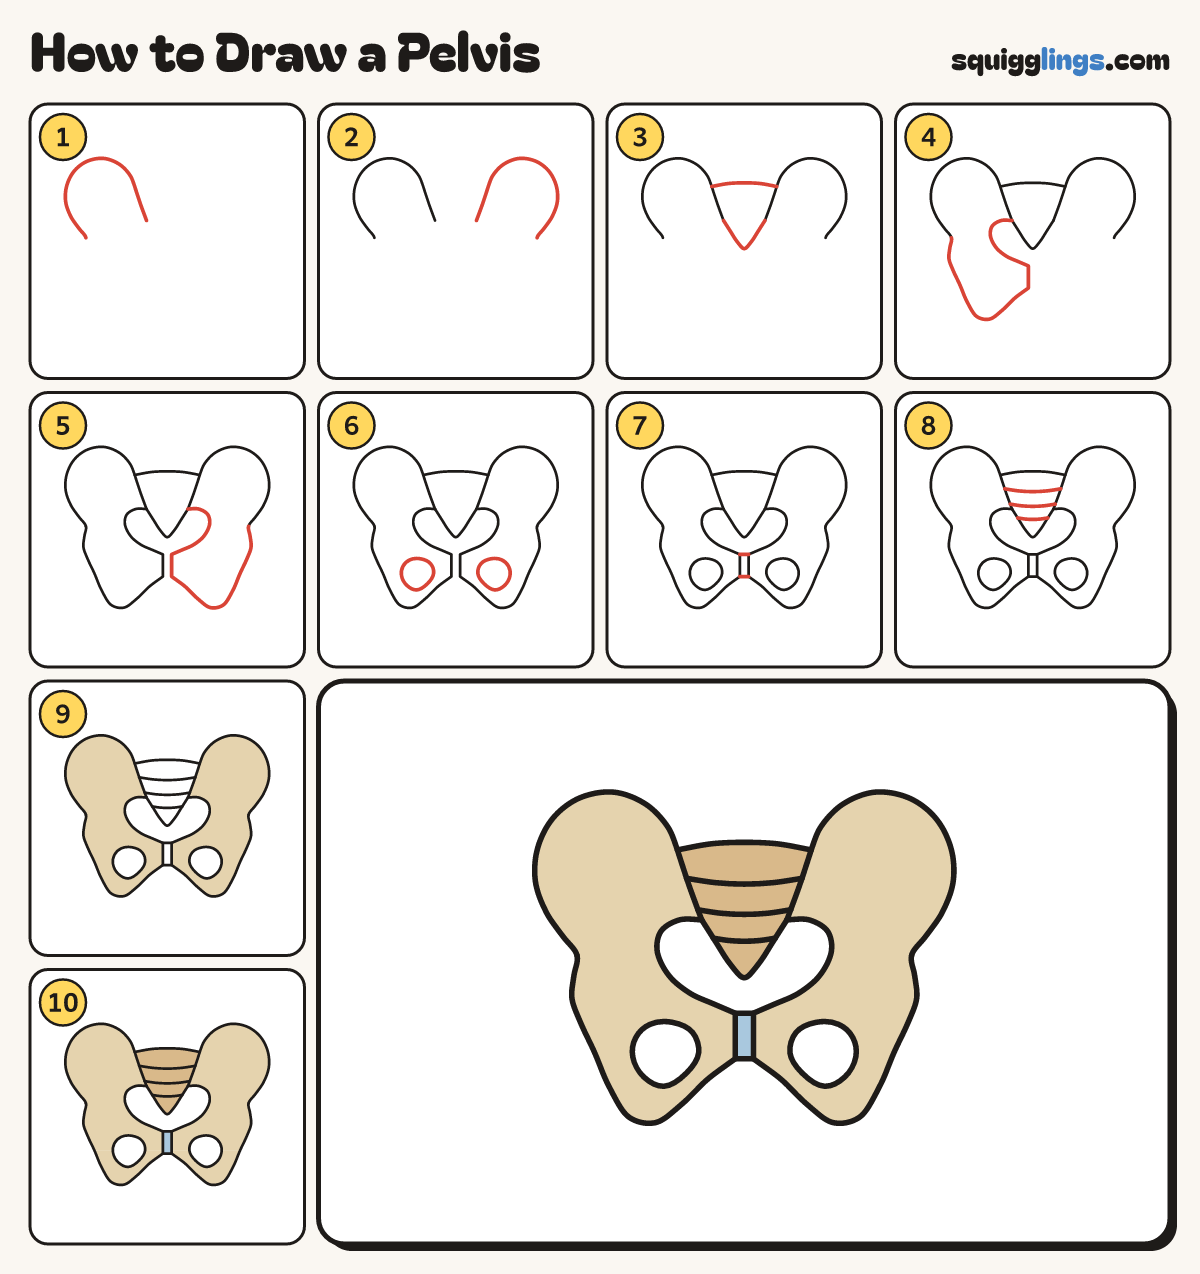
Each picture adds one red line. Draw that line, then scroll to the next picture. Rub out any dashed helper lines at the end. First up: left hip wing.
Step 1: Left hip wing
Start left of the middle. Draw a big ear shape up, over the top and down. Stop halfway down.
Tip Leave a gap in the middle of the page for the tail bone.
Step 2: Right hip wing
Start right of the middle. Draw the same ear shape the other way round. Stop halfway down.
Tip Both wings are the same size, like 2 elephant ears.
Step 3: Tail bone
Join the wings with a line across the top. Below it, draw a V from one wing to the other.
Tip Give the V a soft round tip.
Step 4: Left lower loop
Start at the outside end of the left wing. Draw a loop down and round. Stop at the tail bone.
Tip Near the middle of the page the loop has a short flat side.
Step 5: Right lower loop
Start at the outside end of the right wing. Draw the same loop and stop at the tail bone.
Tip Leave a thin gap between the 2 flat sides.
Step 6: Two egg holes
Inside each lower loop, draw an egg shape. These are holes in the bone.
Step 7: Middle cushion
Close the thin gap between the loops with 2 tiny lines, one at the top, one at the bottom.
Tip This soft cushion holds the 2 hip bones together.
Step 8: Tail bone lines
Draw 3 short lines across the tail bone, from one side to the other. Each one is shorter.
Step 9: Sandy hip bones
Go over your lines. Colour the 2 hip bones a pale sandy colour, around the egg holes.
Step 10: Tan and blue
Colour the tail bone tan and the little cushion sky blue. Your pelvis is done!
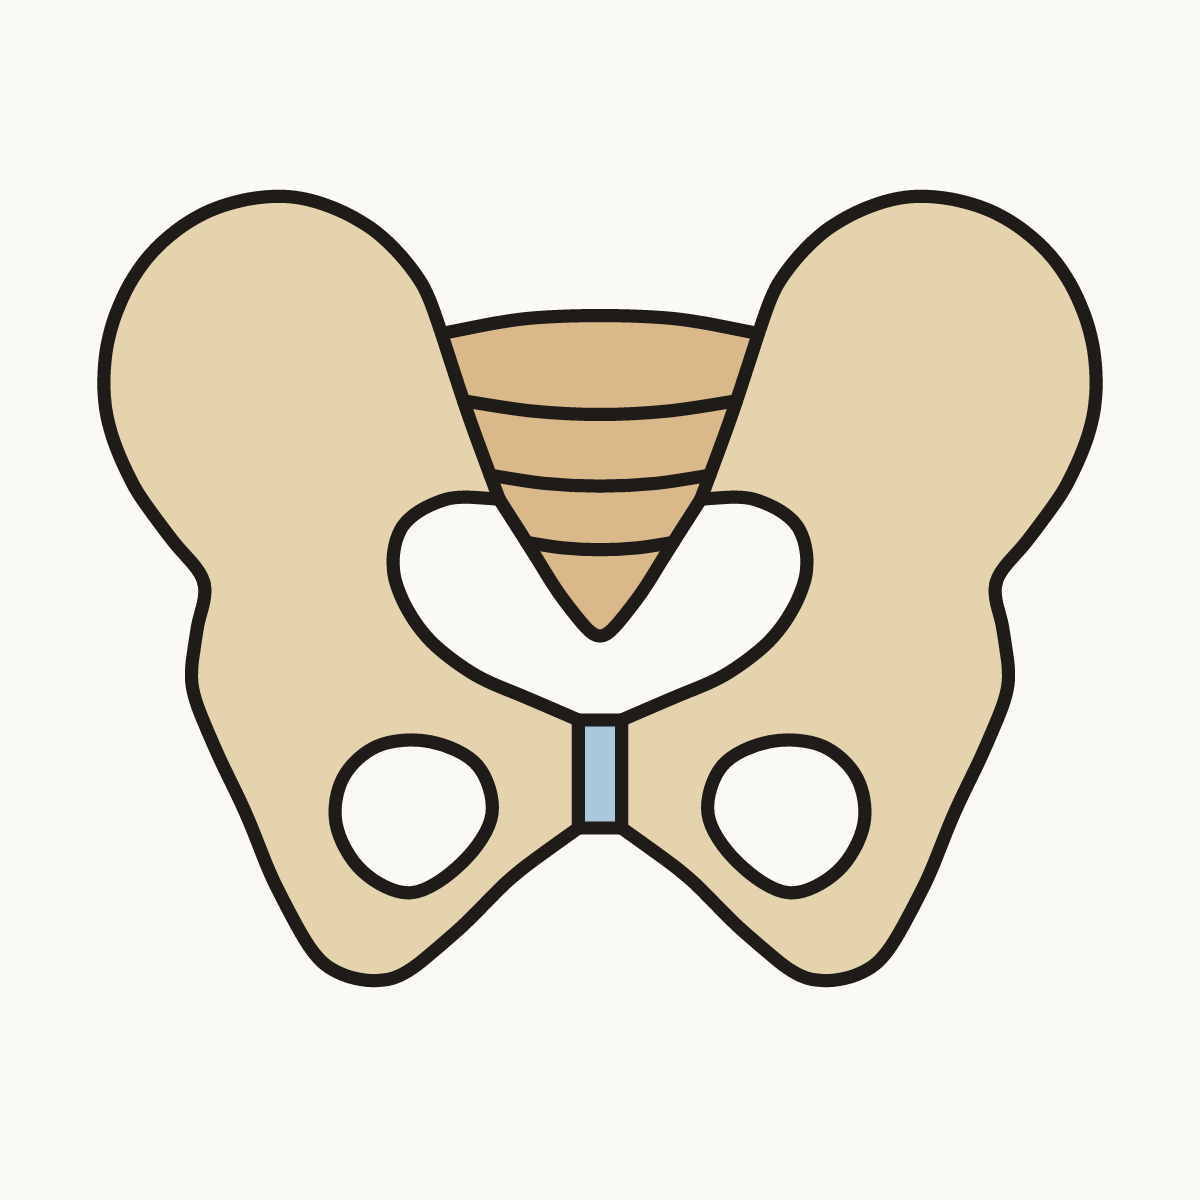
Your finished drawing
Follow the steps above and this is where you end up: a pelvis, drawn by you.
Every step in one picture