Watch it draw itself · tap to replay
How to Draw a Sea Sponge
Draw a sea sponge in 12 easy steps, about 9 minutes. Free, with a printable worksheet.
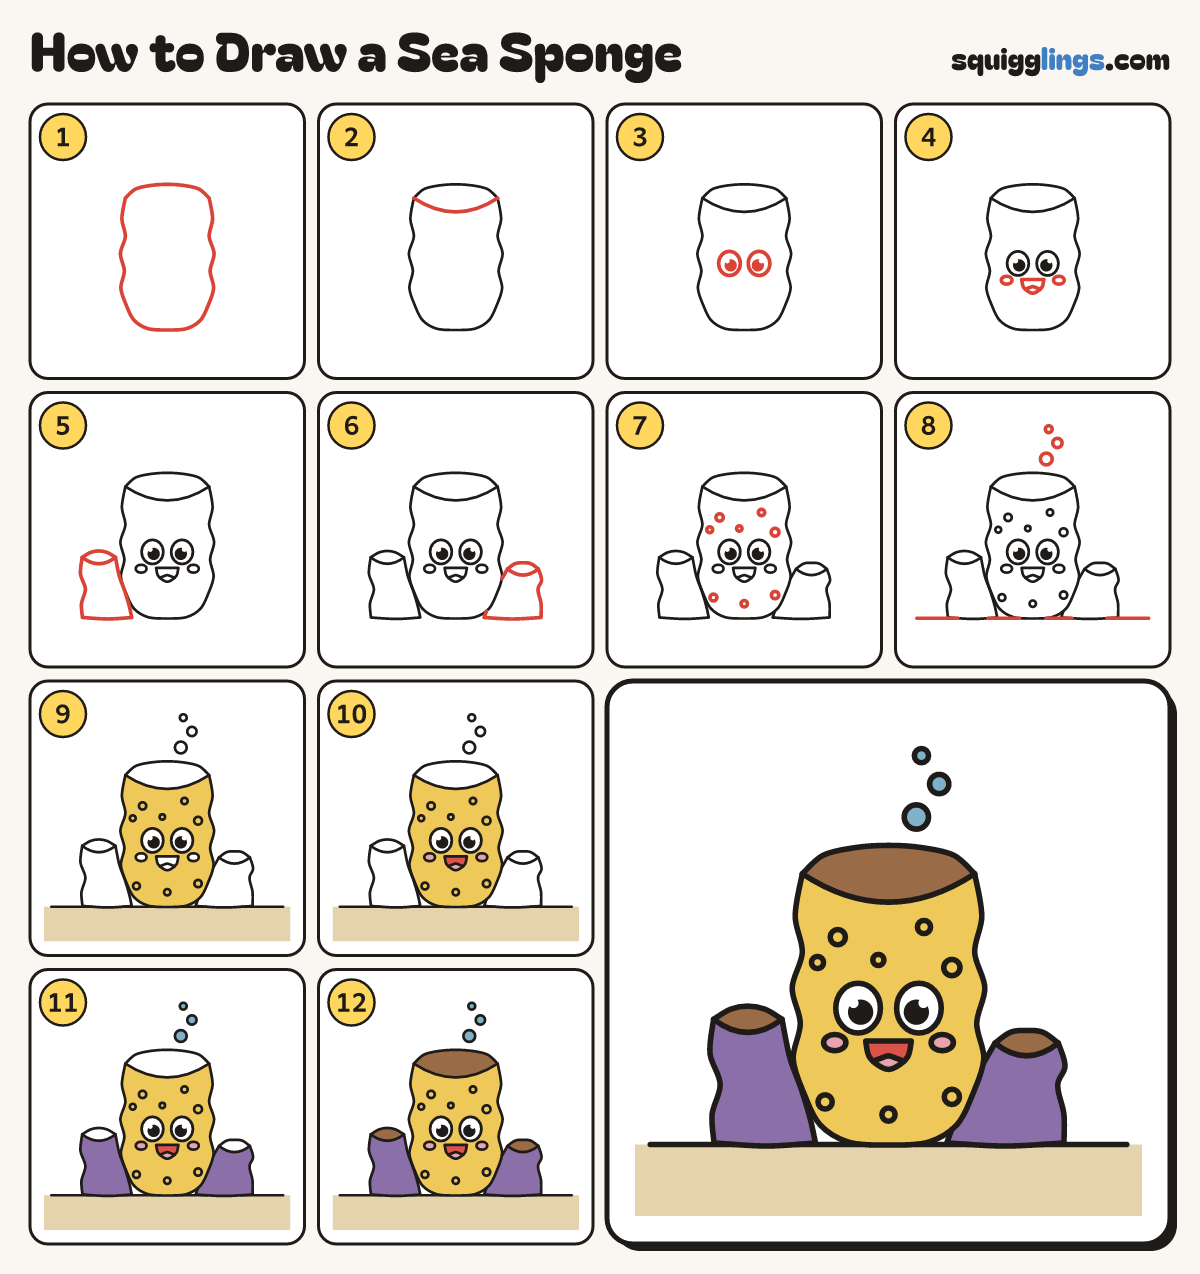
Each picture adds one red line. Draw that line, then scroll to the next picture. Rub out any dashed helper lines at the end. First up: the barrel.
Step 1: The barrel
Draw a wide flat arch near the top. From one end draw a wobbly barrel round to the other end.
Tip A sea sponge is a tall hollow barrel, not a kitchen sponge.
Step 2: The wide opening
Start at the left end of the arch. Draw a smile curve dipping down and stop at the right end.
Tip Water goes in through little holes and out through the top.
Step 3: Two big eyes
Below the middle of the barrel draw 2 big eggy eyes. Colour a black dot in each, leaving a speck.
Step 4: Open smile and cheeks
Draw a line under the eyes. From one end draw a U round to the other. Add tongue and cheeks.
Step 5: Left little tube
Bottom left, draw a tube: from a small arch, wobble down to the big sponge's bottom. Add a smile opening.
Tip The little tubes bud from the big sponge's base, like branches.
Step 6: Right little tube
Bottom right, draw a smaller tube: from an arch, wobble down to the big sponge's bottom. Add a smile opening.
Step 7: Breathing holes
Dot the barrel with 8 small round holes of different sizes, above and below the face, not on it.
Tip Sponges eat by pulling water in through their little holes.
Step 8: Sand and bubbles
Draw a sand line under all 3 sponges, from edge to edge. Add 3 bubbles rising from the opening.
Step 9: Yellow barrel, sandy floor
Colour the barrel yellow, leaving the opening, eyes, mouth and cheeks white. Colour the floor sandy yellow, to the edges.
Step 10: Pink cheeks, red mouth
Colour the tongue and the two cheeks pink, then colour the rest of the mouth red, around the tongue.
Step 11: Blue bubbles, purple tubes
Colour the 3 bubbles light blue and the 2 little tube sponges purple, leaving their openings white.
Step 12: Brown openings
Colour the insides of all 3 openings brown. Go over your lines and your sea sponge is done!
Your finished drawing
Follow the steps above and this is where you end up: a sea sponge, drawn by you.
Every step in one picture