Watch it draw itself · tap to replay
How to Draw a Sash
Draw a sash in 10 easy steps, about 8 minutes. Free, with a printable worksheet.
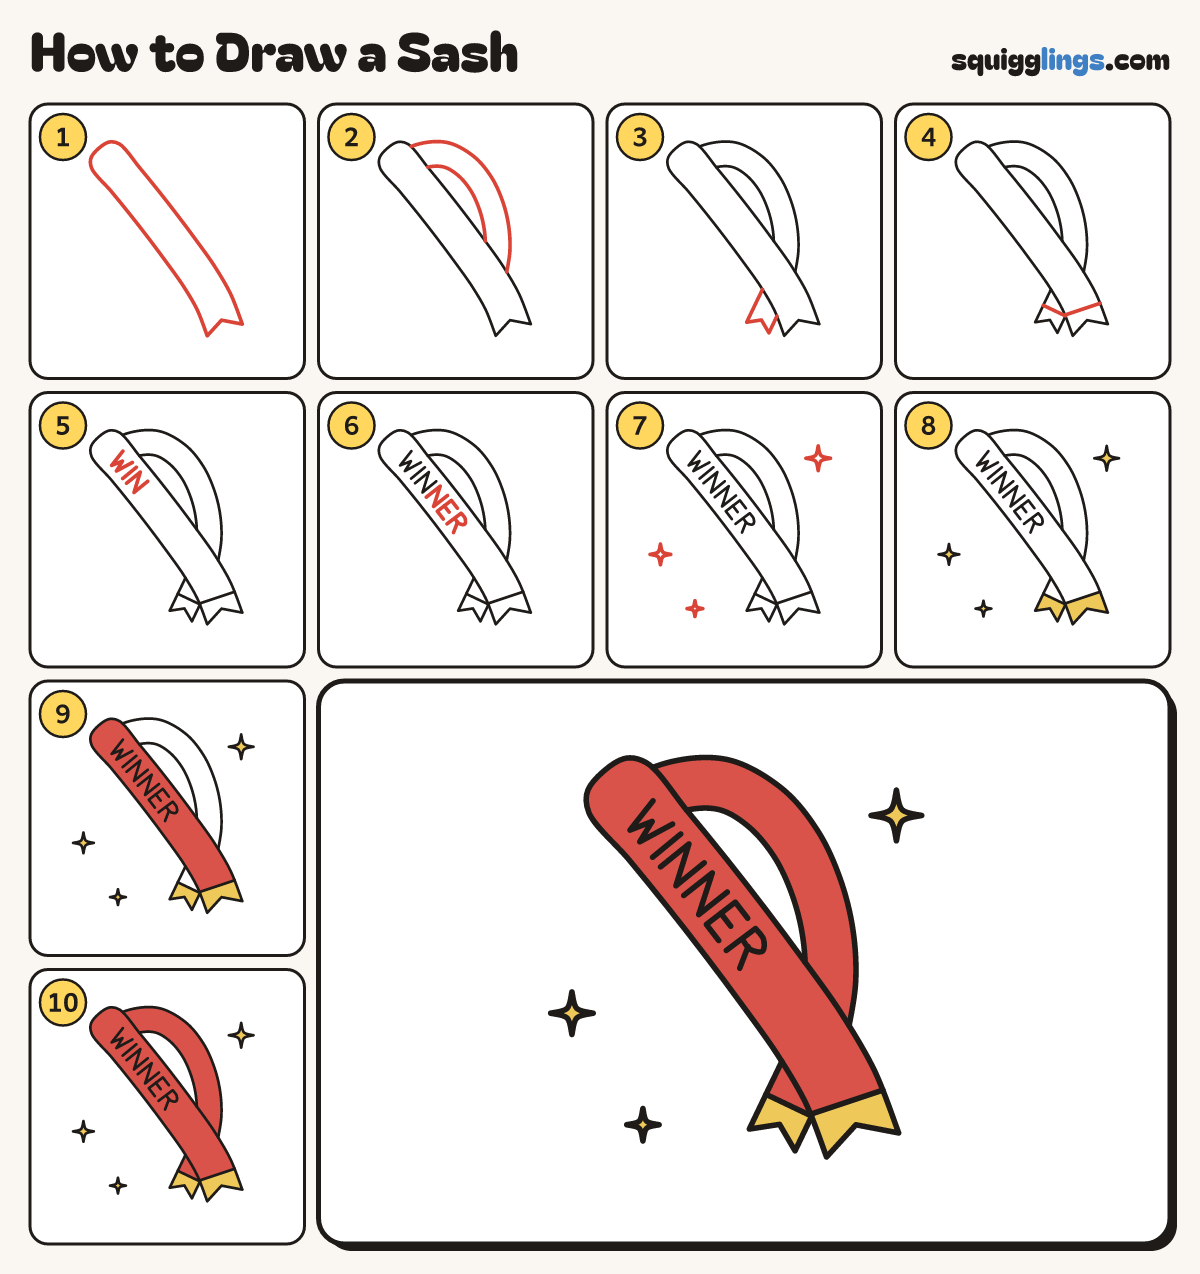
Each picture adds one red line. Draw that line, then scroll to the next picture. Rub out any dashed helper lines at the end. First up: front band.
Step 1: Front band
Draw a long wide band slanting from the top left to the bottom right. Cut a V in its end.
Tip A sash is a long loop of ribbon worn over one shoulder, down to the hip.
Step 2: Back band
Start behind the top of the band. Draw a thinner band curving round and down, behind the front band.
Tip Leave a long thin gap between the 2 bands. That is where you would wear it.
Step 3: Back tail
Under the front band draw the back band's tail peeking out. Cut a V in its end too.
Step 4: Gold trim
On each tail start on one edge near the end. Draw straight across and stop on the other edge.
Step 5: First letters
Along the front band write W, I and N in tall capital letters. Lean them with the band.
Tip Start near the top of the band so all 6 letters will fit.
Step 6: Last letters
Carry on with N, E and R, so your sash says WINNER.
Tip You can write your own word instead, like your name!
Step 7: Sparkles
Draw 3 four-point sparkles around the sash, away from its edges.
Step 8: Yellow trim
Colour the 2 tail ends below your lines yellow, like gold. Colour the sparkles yellow too.
Step 9: Red front band
Colour the front band red, around the letters, down to the yellow trim.
Step 10: Red back band
Colour the back band and its tail red too. Go over your lines. Your sash is done!
Your finished drawing
Follow the steps above and this is where you end up: a sash, drawn by you.
Every step in one picture