Watch it draw itself · tap to replay
How to Draw a Sand Dollar
Draw a sand dollar in 10 easy steps, about 8 minutes. Free, with a printable worksheet.
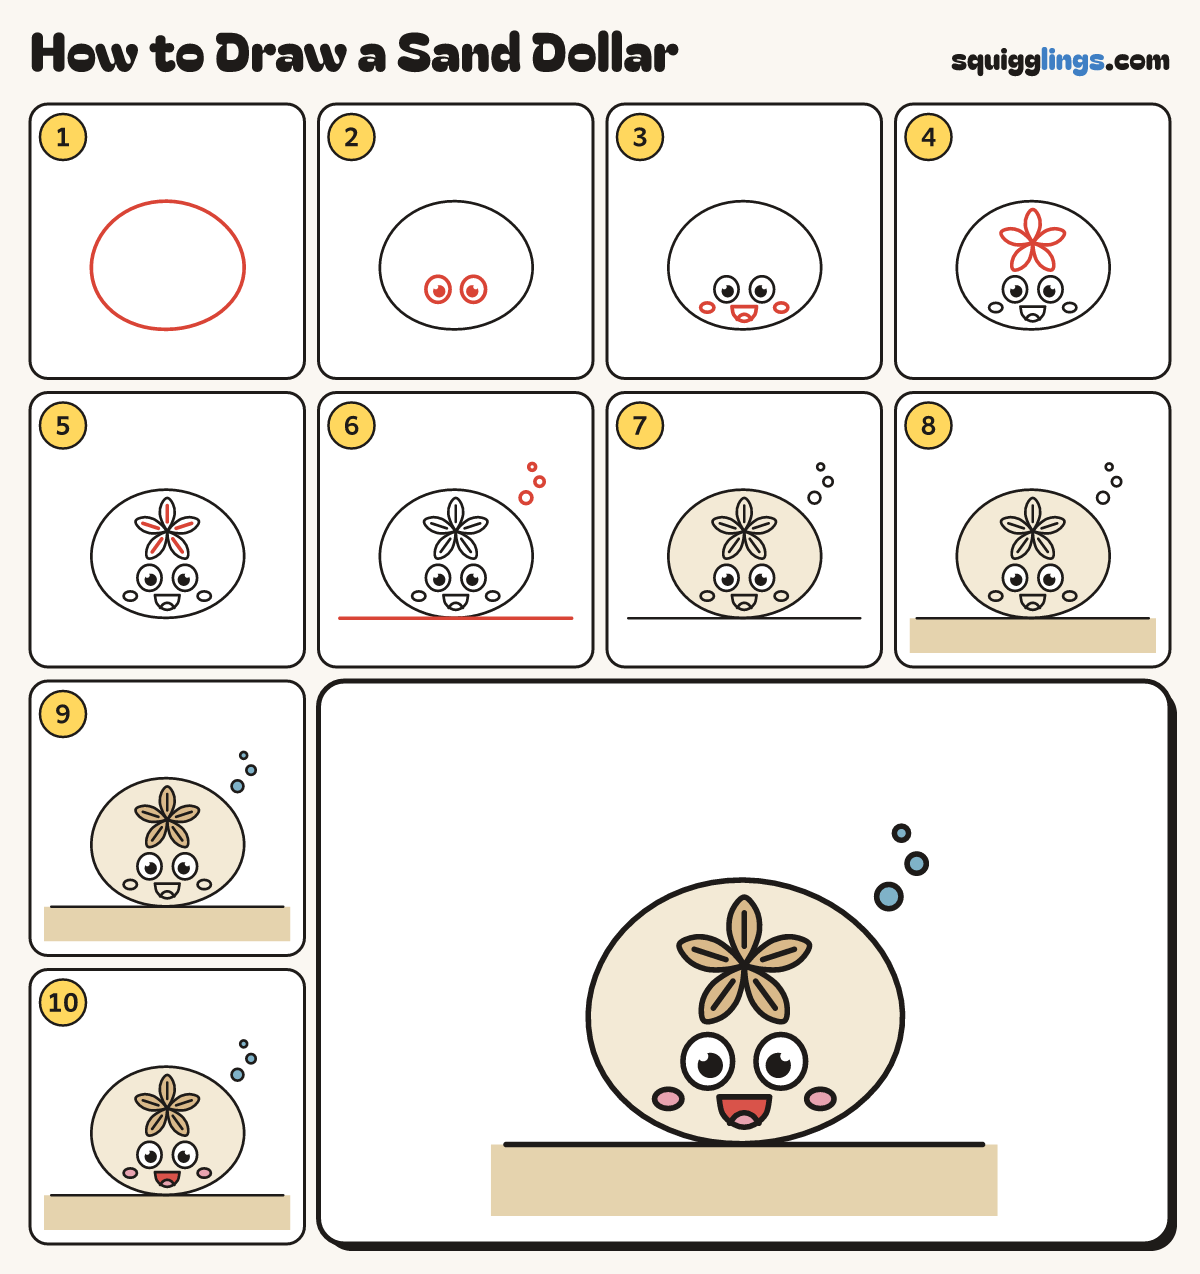
Each picture adds one red line. Draw that line, then scroll to the next picture. Rub out any dashed helper lines at the end. First up: the flat disc.
Step 1: The flat disc
In the middle of your paper draw 1 big round disc, a little wider than tall, soft and wobbly.
Tip A sand dollar is a flat round shell, like a big biscuit.
Step 2: Two big eyes
Low on the disc draw 2 big eggy eyes. Colour a black dot in each, leaving a white speck.
Step 3: Open smile and cheeks
Draw a line under the eyes. From one end draw a U round to the other. Add tongue and cheeks.
Step 4: Five petals
Above the eyes draw 5 same-size petals from one middle spot: 1 up, 1 each side, 2 down.
Tip The 5-petal flower is really 5 rows of tiny breathing holes.
Step 5: Petal lines
Draw 1 straight line down the middle of each petal, from near the centre out towards the tip.
Step 6: Sand and bubbles
Draw a sand line under the disc, edge to edge. Add 3 bubbles rising near its top right.
Step 7: Cream disc
Go over your lines, then colour the whole disc cream, leaving the petals and the eyes white.
Step 8: Sandy floor
Colour the floor under the sand line sandy yellow, right out to the edges of the paper.
Step 9: Tan petals, blue bubbles
Colour the five petals tan, and colour the three bubbles water blue.
Step 10: Pink cheeks, red mouth
Colour the tongue and the 2 cheeks pink, then colour the rest of the open mouth red.
Your finished drawing
Follow the steps above and this is where you end up: a sand dollar, drawn by you.
Every step in one picture