Watch it draw itself · tap to replay
How to Draw a Rubber Ducky
Draw a rubber ducky in 11 easy steps, about 8 minutes. Free, with a printable worksheet.
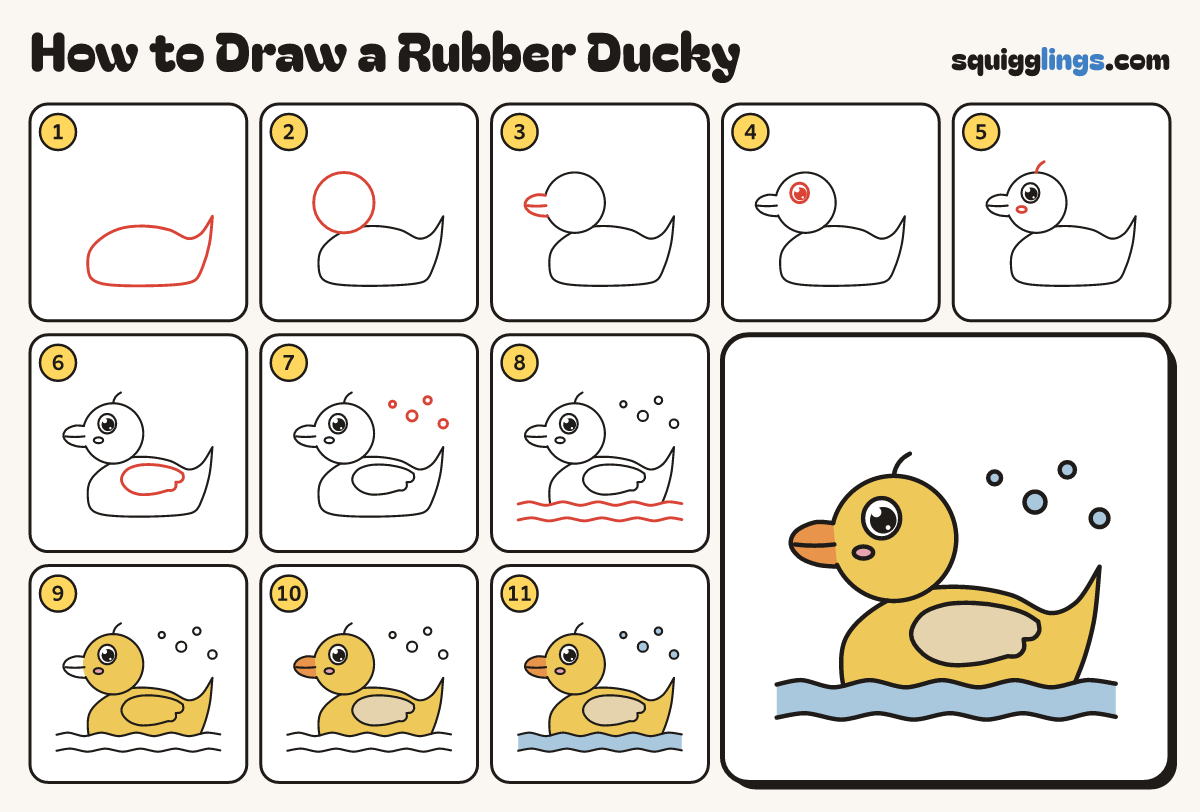
Each picture adds one red line. Draw that line, then scroll to the next picture. Rub out any dashed helper lines at the end. First up: boat body.
Step 1: Boat body
Low down, draw a boat body: flat bottom, round chest on the left, a back rising to a pointy tail.
Tip The tail is the pointy corner at the back, up in the air.
Step 2: Round head
At the front of the body, draw a big round head sitting on top of the chest, overlapping it.
Step 3: The bill
From the head's left, draw a flat bean bill out and back to the head, with a line across it.
Tip A duck's bill is wide and flat, like a spoon.
Step 4: One big eye
On the head, above the bill, draw 1 big egg eye with a black dot and a round white shine.
Step 5: Cheek and curl
Draw a small cheek under the eye, next to the bill. Add a little hair curl on the head.
Step 6: The wing
On the side of the body, draw a round wing with 2 soft feather bumps pointing to the tail.
Step 7: Bubbles
Draw 4 soap bubbles floating above the back of the duck, big and small.
Step 8: Bath water
Start left of the chest. Draw a wavy water line across the duck's bottom, past the tail. Add another below.
Tip Rub out the duck's bottom line between the 2 water lines.
Step 9: Yellow duck, pink cheek
Colour the head and body yellow down to the water, leaving the eye and wing white. Colour the cheek pink.
Step 10: Orange bill, sand wing
Colour the bill orange and the wing sand, so the wing shows against the yellow body.
Step 11: Sky bubbles and water
Colour the bubbles and the water sky blue. Your rubber ducky is floating in the bath!
Your finished drawing
Follow the steps above and this is where you end up: a rubber ducky, drawn by you.
Every step in one picture