Watch it draw itself · tap to replay
How to Draw a Rock Cycle
Draw a rock cycle in 13 easy steps, about 10 minutes. Free, with a printable worksheet.
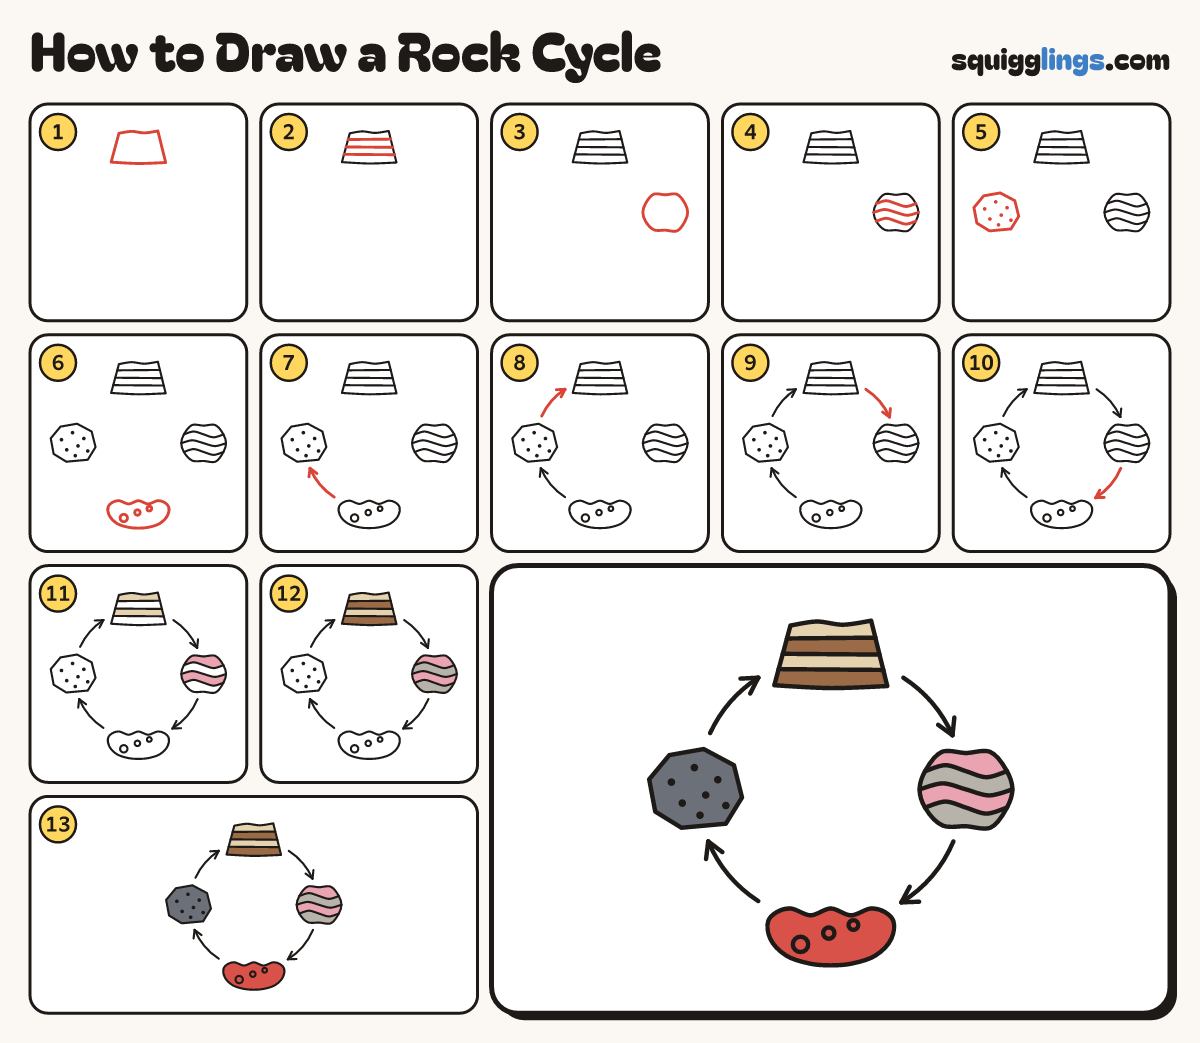
Each picture adds one red line. Draw that line, then scroll to the next picture. Rub out any dashed helper lines at the end. First up: layered rock.
Step 1: Layered rock
At the top, draw a wide block of rock with 4 corners, a little wider at the bottom.
Tip This is sedimentary rock: sand and mud pressed into layers.
Step 2: Flat layers
Start on the block's left side. Draw 3 straight lines across it, and stop each at the right side.
Step 3: Wavy rock
On the right, draw a round lumpy rock, a little smaller than the block.
Tip This is metamorphic rock: rock that was squeezed and baked deep underground.
Step 4: Wavy bands
Start on the round rock's left side. Draw 3 wavy lines across, and stop each at the right side.
Tip The squeezing bends the flat layers into waves.
Step 5: Speckled rock
On the left, draw a chunky rock with straight edges and 8 corners. Dot 7 speckles inside it.
Tip This is igneous rock, made when melted rock cools and turns hard.
Step 6: Magma pool
At the bottom, draw a wide pool with a wavy top and a round bottom. Add 3 rising bubbles.
Tip Magma is rock so hot that it has melted.
Step 7: Cooling arrow
Start left of the magma. Draw a curved arrow up to the left, and stop under the speckled rock.
Tip Magma cools down and hardens into igneous rock.
Step 8: Crumbling arrow
Start above the speckled rock. Draw a curved arrow up to the right, and stop beside the layered rock.
Tip Wind and rain break rock into bits, which settle in layers.
Step 9: Squeezing arrow
Start right of the layered rock. Draw a curved arrow down to the right, and stop above the wavy rock.
Tip Buried deep down, heat and squeezing change the rock.
Step 10: Melting arrow
Start under the wavy rock. Draw a curved arrow down to the left, and stop beside the magma.
Tip Deeper still, the rock melts into magma, and the cycle starts again.
Step 11: Sand and pink
Colour the first and third layers a sandy yellow. Colour the first and third wavy bands pink.
Step 12: Brown and grey
Colour the other 2 layers brown. Colour the other 2 wavy bands light grey.
Step 13: Dark rock, red magma
Colour the speckled rock dark grey and the magma pool red. Go over your lines.
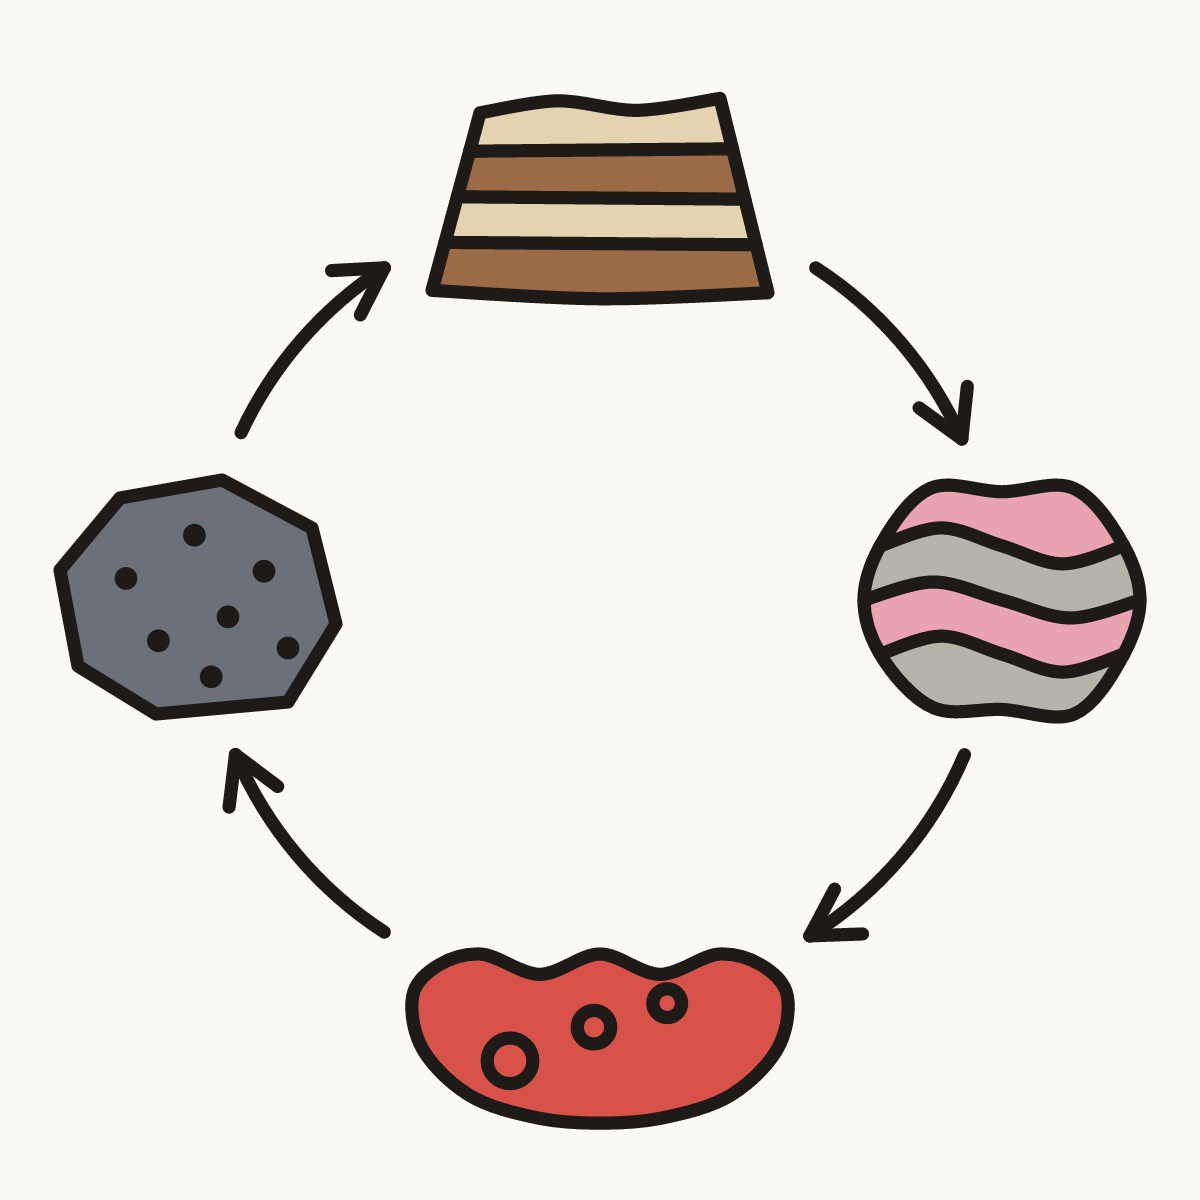
Your finished drawing
Follow the steps above and this is where you end up: a rock cycle, drawn by you.
Every step in one picture