Watch it draw itself · tap to replay
How to Draw a Roadster
Draw a roadster in 11 easy steps, about 8 minutes. Free, with a printable worksheet.
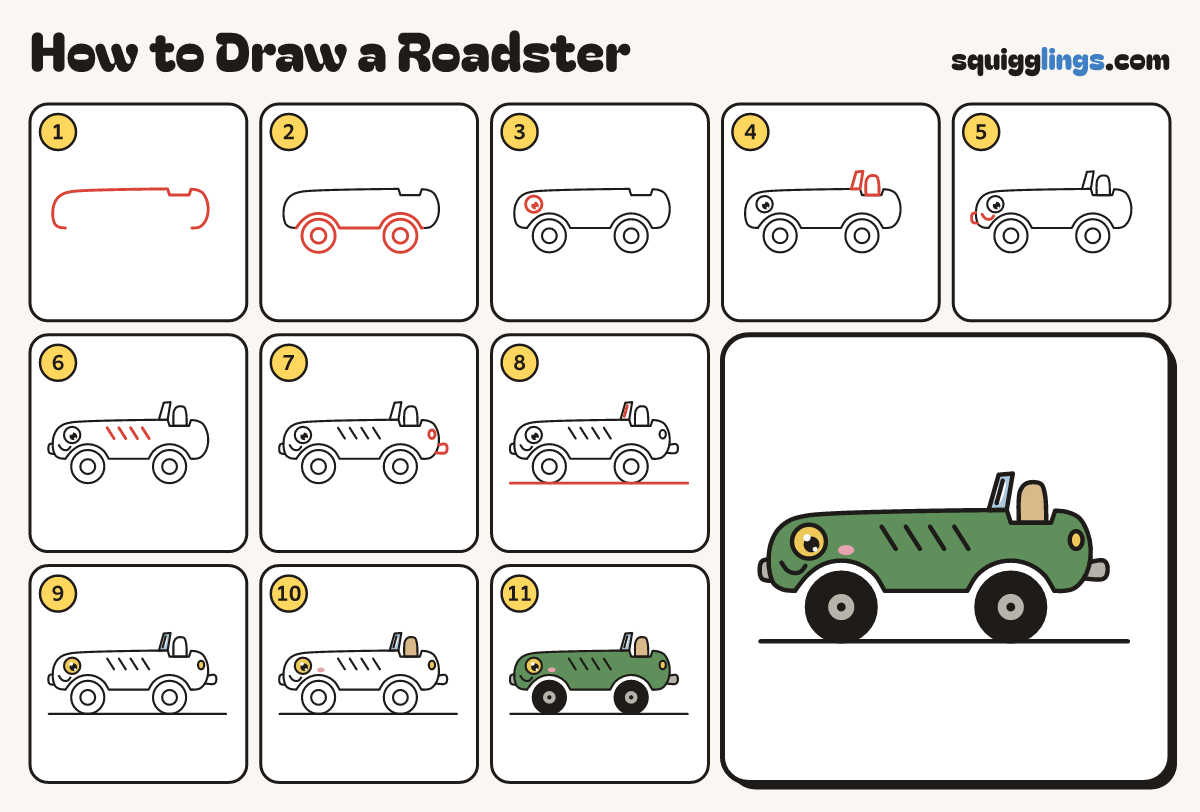
Each picture adds one red line. Draw that line, then scroll to the next picture. Rub out any dashed helper lines at the end. First up: long low body.
Step 1: Long low body
Start low left. Draw a nose, a LONG flat bonnet, a seat dip, a short back, and stop low down.
Tip The bonnet is the star: long and low, with the seat dip far back.
Step 2: Belly, arches and tyres
Start where you stopped. Draw a rainbow for the back wheel, a flat belly, another rainbow, stop at the start.
Step 3: Big headlight eye
On the nose draw a round headlight with a thick line: the car's eye. Add a pupil with 2 specks.
Step 4: Windscreen and seat
In front of the dip draw a small slanted windscreen. Inside the dip draw 1 rounded seat back poking up.
Tip A roadster has 1 tiny seat set far back.
Step 5: Smile and bumper
Start under the headlight. Draw a U smile towards the nose, stopping before the edge. Add a front bumper.
Step 6: Bonnet vents
Along the long bonnet, behind the headlight, draw 4 short slanted lines in a row, all leaning the same way.
Step 7: Tail light and pipe
Draw a standing oval on the tail for the light. Start low on the bum, draw a short pipe, stop.
Step 8: Road and shine
Draw a road line from before the nose to past the pipe. Add a short shine line on the windscreen.
Step 9: Yellow lights, sky glass
Go over your lines. Colour the headlight and tail light yellow, and the windscreen sky blue, leaving the shine white.
Step 10: Pink cheek, tan seat
Colour a soft pink cheek behind the headlight, low down. Colour the seat back tan.
Step 11: Green car, black tyres
Colour the bumper, pipe and hubs grey. Colour the body green, around the lights and cheek, and the tyres black.
Your finished drawing
Follow the steps above and this is where you end up: a roadster, drawn by you.
Every step in one picture