Watch it draw itself · tap to replay
How to Draw a Riding Mower
Draw a riding mower in 12 easy steps, about 9 minutes. Free, with a printable worksheet.
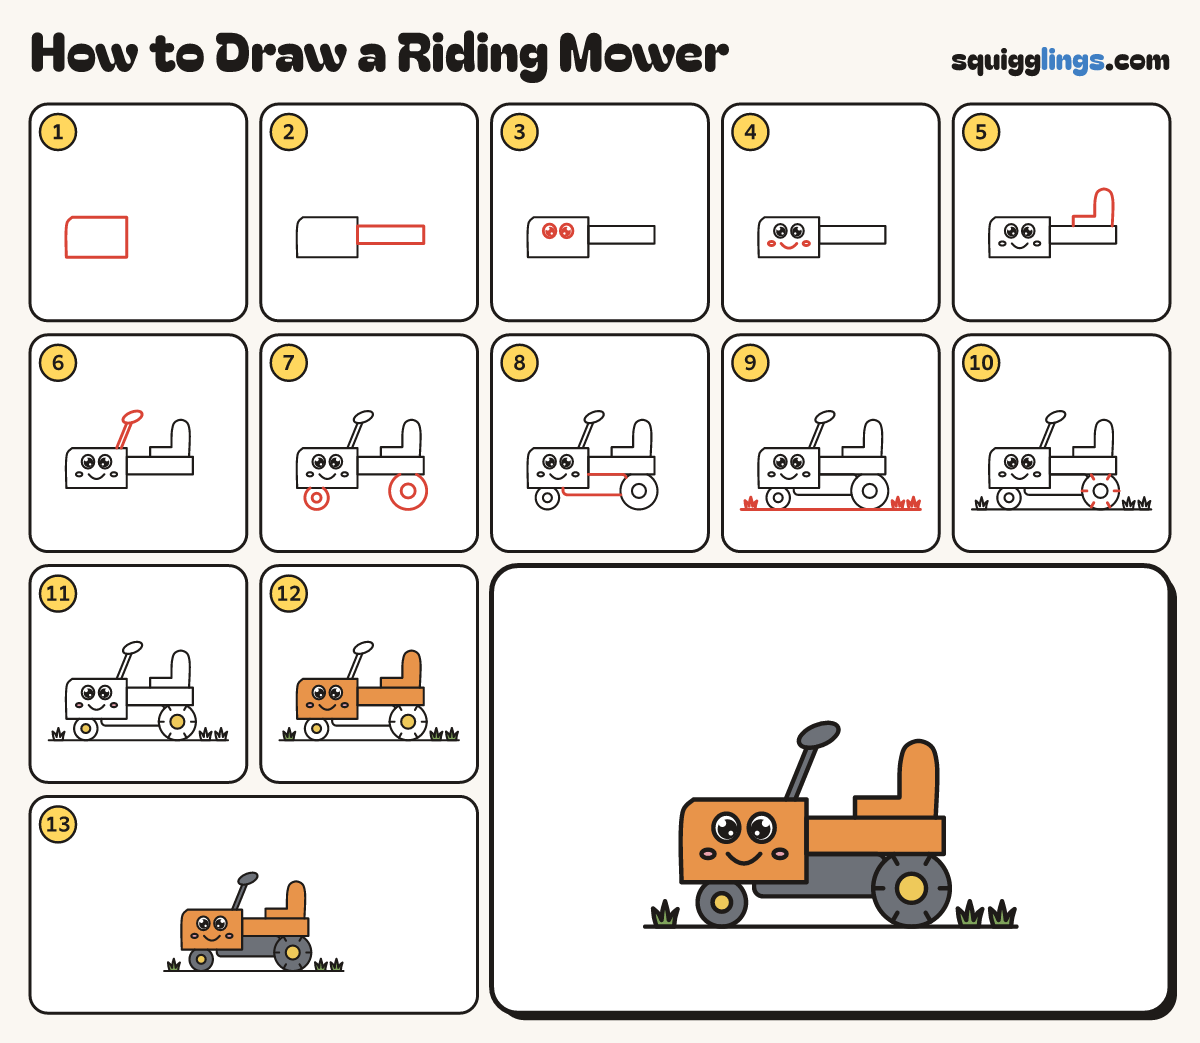
Each picture adds one red line. Draw that line, then scroll to the next picture. Rub out any dashed helper lines at the end. First up: hood and hump.
Step 1: Hood and hump
Start low left. Draw up round the nose, along the hood, down into a dip, then over a round hump.
Tip The mower drives to the left. Leave room under the hump for a big wheel.
Step 2: Belly and wheels
Start at the nose foot. Draw a small arch, then a flat belly. Stop below the dip. Add 2 wheels.
Tip A small wheel hangs in the arch. A big wheel fills the hump.
Step 3: Two big eyes
On the hood, draw 2 big egg eyes an eye apart. Put a big black dot in each.
Step 4: Smile and cheeks
Under the eyes, draw a U smile from eye to eye, and a small oval cheek beside each end.
Step 5: The seat
On the hump, draw an L-shaped seat: a thick cushion, then a tall back rest with a round top.
Step 6: Steering wheel
From the hood top, draw a stick slanting up towards the seat. Draw a tilted oval ring around its end.
Step 7: The mower deck
Under the belly, between the wheels, draw a long low box with round corners: the deck that hides the blades.
Tip The deck is flat and low: its bottom stops just above the grass.
Step 8: Hubs and treads
Draw a hub circle in each wheel. Add 8 short lines in from the big tyre's edge, like a clock.
Step 9: Ground and grass
Draw a long ground line under both wheels. Add a grass tuft of 3 blades at each end.
Step 10: Yellow and pink
Go over your lines. Colour the hubs and the deck yellow and the cheeks pink. Leave the eyes white.
Step 11: Orange body, green grass
Colour the body orange, from the nose to the hump, around the eyes and cheeks. Colour the grass green.
Step 12: Slate tyres and seat
Colour both tyres slate around the hubs, then the seat and the steering stick. Your mower is ready to mow!
Your finished drawing
Follow the steps above and this is where you end up: a riding mower, drawn by you.
Every step in one picture