Watch it draw itself · tap to replay
How to Draw a Rice Plant
Draw a rice plant in 10 steps, about 8 minutes. Free, with a printable worksheet.
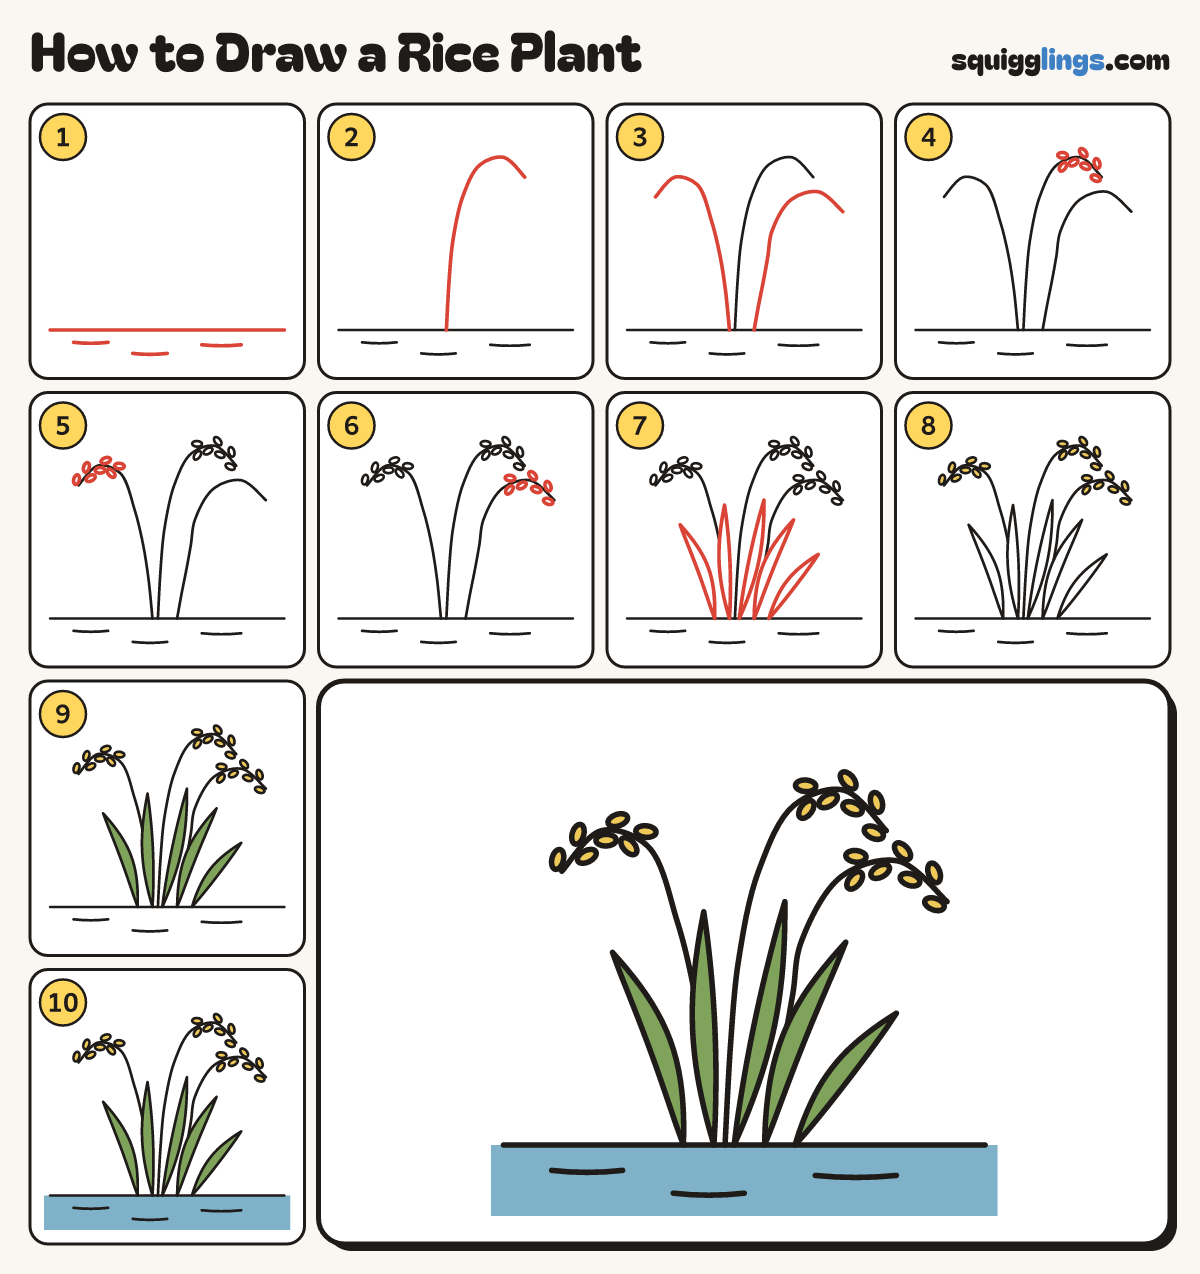
Each picture adds one red line. Draw that line, then scroll to the next picture. Rub out any dashed helper lines at the end. First up: the water.
Step 1: The water
Near the bottom draw a water line from edge to edge, with 3 short ripples under it.
Tip Rice grows in flooded fields. The heavy grains make the heads droop.
Step 2: The middle stalk
From the water line draw a thin stalk up, arching right like a fishing rod, stopping in the air.
Step 3: Two more stalks
From the water line draw one stalk arching left and a shorter one arching right, stopping in the air.
Step 4: Grains on the middle
Along the arched top of the middle stalk draw 7 tiny oval grains, hanging off each side of the curve.
Step 5: Grains on the left
Do the same along the arched top of the left stalk.
Step 6: Grains on the right
Add grains along the arched top of the right stalk too.
Step 7: Grass blades
Round the stalks draw 5 thin blades from the water line to a fine point. Rub out stalk lines inside.
Step 8: Yellow grains
Go over your lines, then colour all the grains yellow.
Step 9: Green blades
Colour all the grass blades leaf green.
Step 10: Blue water
Colour the water blue, from the water line down to the bottom edge. Your rice plant is done!
Your finished drawing
Follow the steps above and this is where you end up: a rice plant, drawn by you.
Every step in one picture