Watch it draw itself · tap to replay
How to Draw an Echeveria
Draw an echeveria in 10 steps, about 8 minutes. Free, with a printable worksheet.
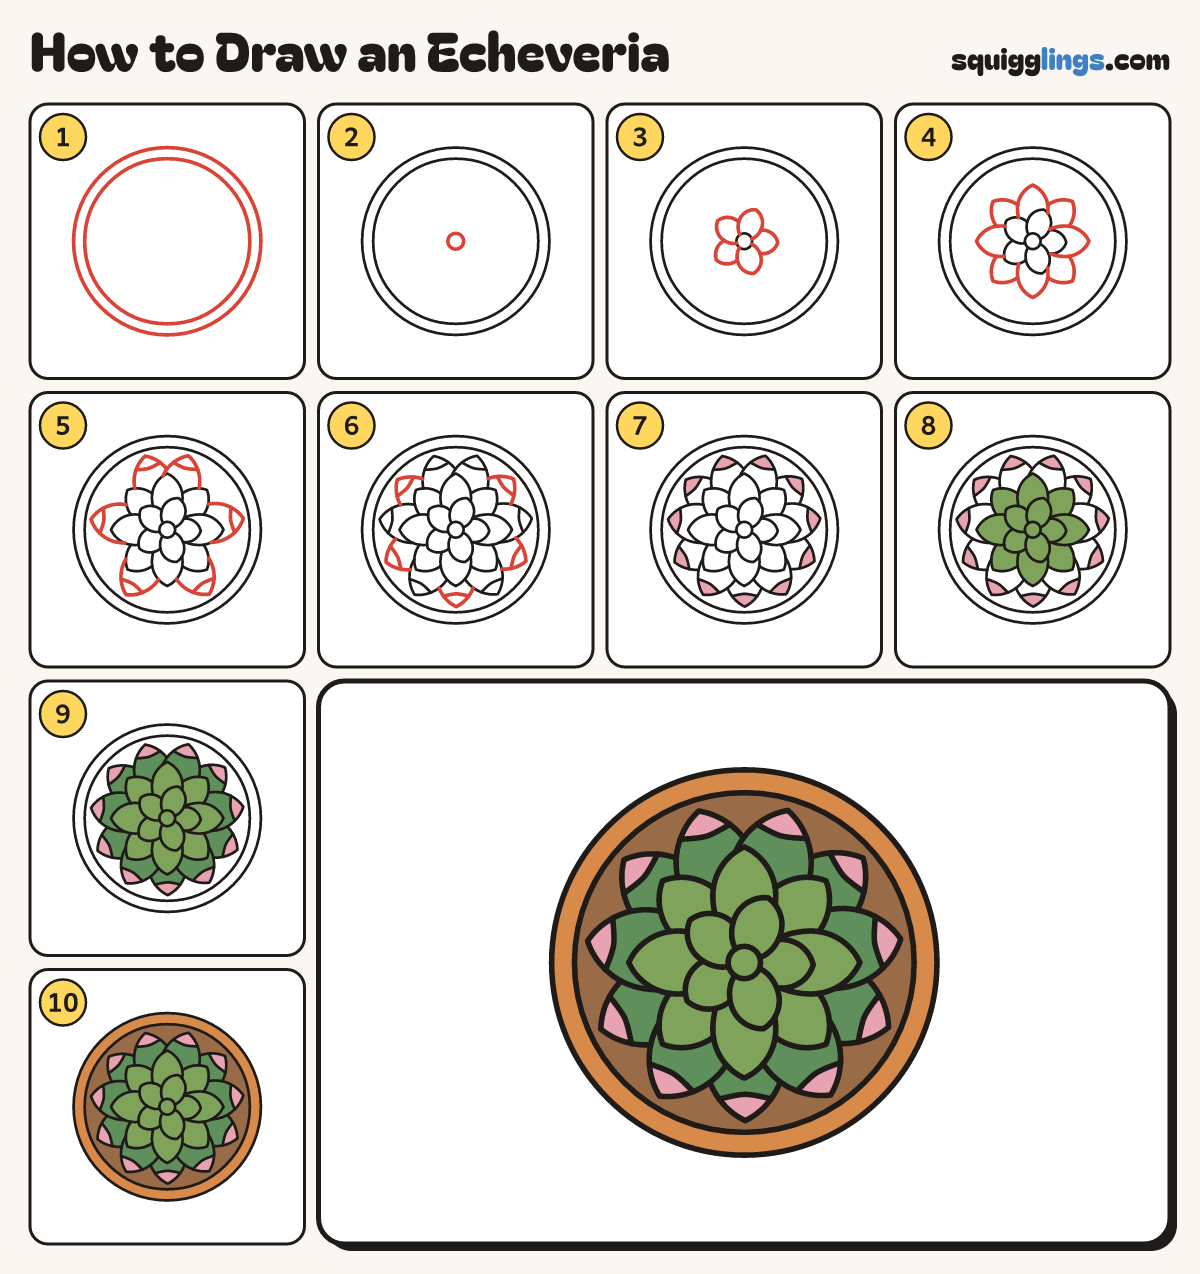
Each picture adds one red line. Draw that line, then scroll to the next picture. Rub out any dashed helper lines at the end. First up: the pot.
Step 1: The pot
In the middle draw a big circle for the pot rim, and a second circle just inside it.
Tip An echeveria looks like a green rose made of fat leaves, seen from above.
Step 2: The centre
In the middle of the pot draw a tiny circle, as big as a pea.
Step 3: 5 inner leaves
Round the centre draw 5 small round leaves like fat spoons, each with a tiny point, spaced evenly.
Step 4: 8 middle leaves
Round those draw a bigger ring of 8 fat spoon leaves, pointing out between the inner ones.
Step 5: Outer leaves
Round those draw 6 big fat spoon leaves with tiny points. Draw a small curved line across each tip.
Step 6: Fill the ring
Draw 5 more big leaves in the gaps, tucked behind, each with a tip line, so 11 go round.
Step 7: Pink tips
Colour the tip of each outer leaf pink, up to its little line.
Step 8: Light green leaves
Colour the centre, the 5 inner leaves and the 8 middle leaves light green.
Step 9: Green outer leaves
Colour the 11 outer leaves a darker green, around the pink tips.
Step 10: Terracotta pot
Colour the pot rim ginger and the soil brown, around the leaves. Your echeveria is done!
Your finished drawing
Follow the steps above and this is where you end up: an echeveria, drawn by you.
Every step in one picture