Watch it draw itself · tap to replay
How to Draw Ribs
Draw ribs in 10 easy steps, about 8 minutes. Free, with a printable worksheet.
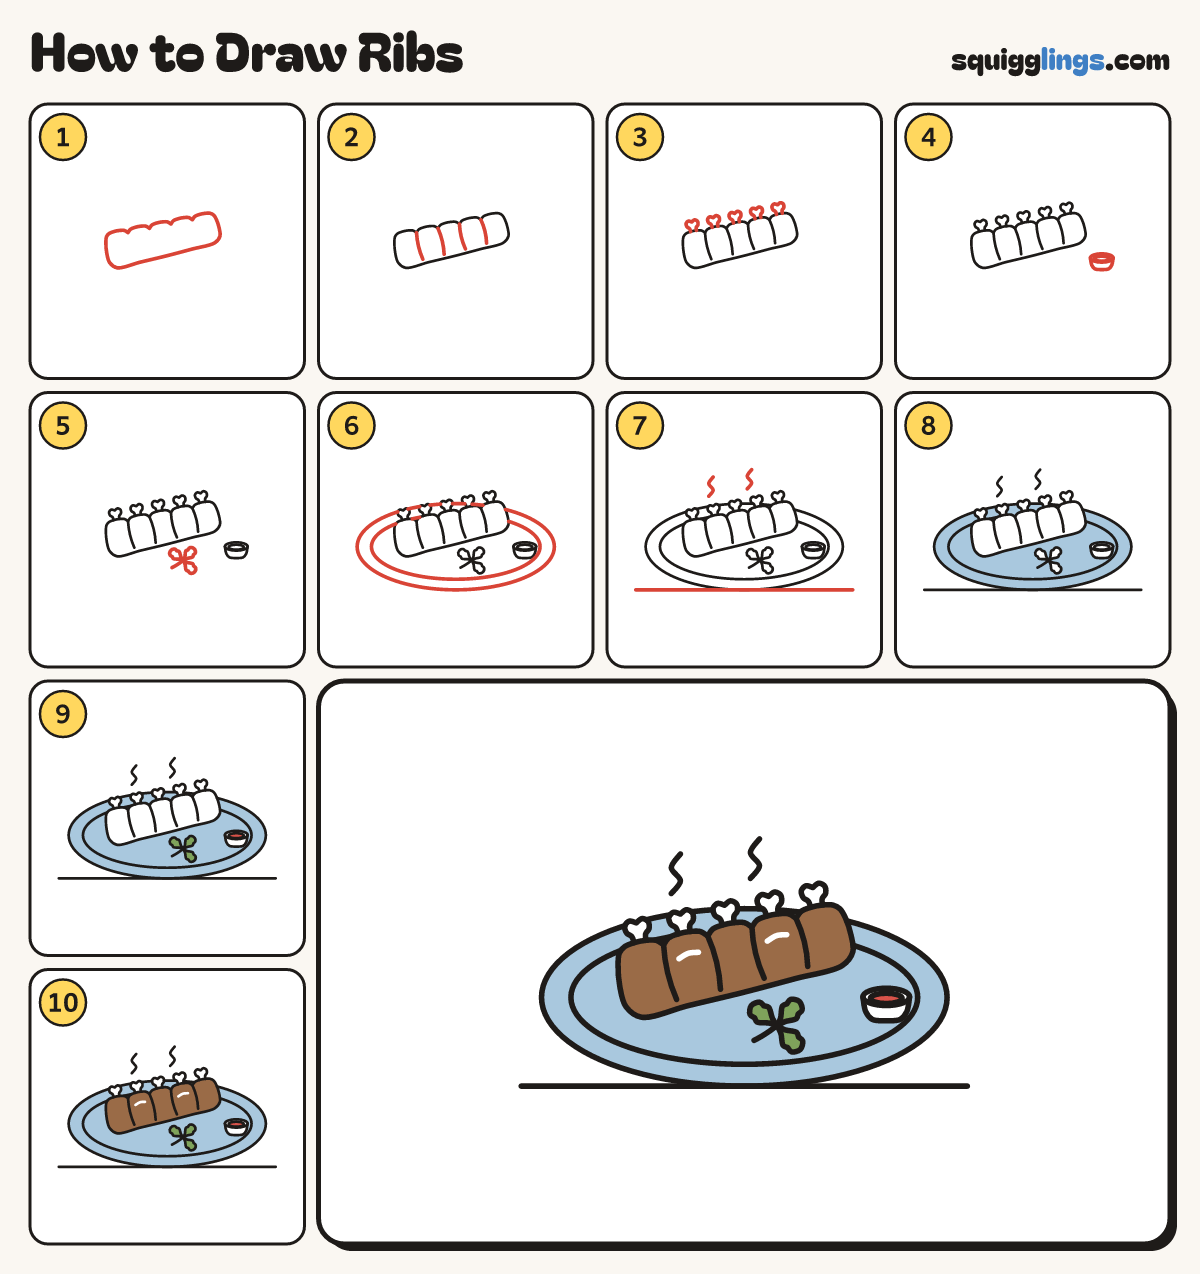
Each picture adds one red line. Draw that line, then scroll to the next picture. Rub out any dashed helper lines at the end. First up: the rack.
Step 1: The rack
Across the middle, draw a long rounded slab leaning up to the right, with 5 low humps along its top.
Tip Each hump is one rib with meat on it.
Step 2: Rib lines
Start at each dip between the humps and draw a curved line down, stopping before the bottom edge.
Step 3: Bone ends
On top of each hump, draw a short bone poking up, with a knobbly round end.
Step 4: Sauce cup
Draw a flat oval on the right. Start at one end, draw a U under it, ending at the other.
Step 5: Parsley
Start in front of the rack. Draw a short stalk, and end it with 3 small bumpy leaves.
Step 6: A plate
Behind the ribs and cup, draw a big oval plate, wider than everything. Add a second oval inside.
Step 7: Steam and table
Draw 2 wiggly steam lines rising above the ribs. Draw a long line under the plate, just touching it.
Step 8: Sky plate
Go over your lines. Colour the plate sky blue around the ribs, bones, cup and parsley.
Step 9: Red sauce, green parsley
Colour the sauce in the cup red and the parsley leaves green.
Step 10: Brown ribs
Colour the meat brown, leaving the bone ends and 2 little shines white. Your ribs are done!
Your finished drawing
Follow the steps above and this is where you end up: ribs, drawn by you.
Every step in one picture