Watch it draw itself · tap to replay
How to Draw a Rhode Island Map
Draw a rhode island map in 13 easy steps, about 10 minutes. Free, with a printable worksheet.
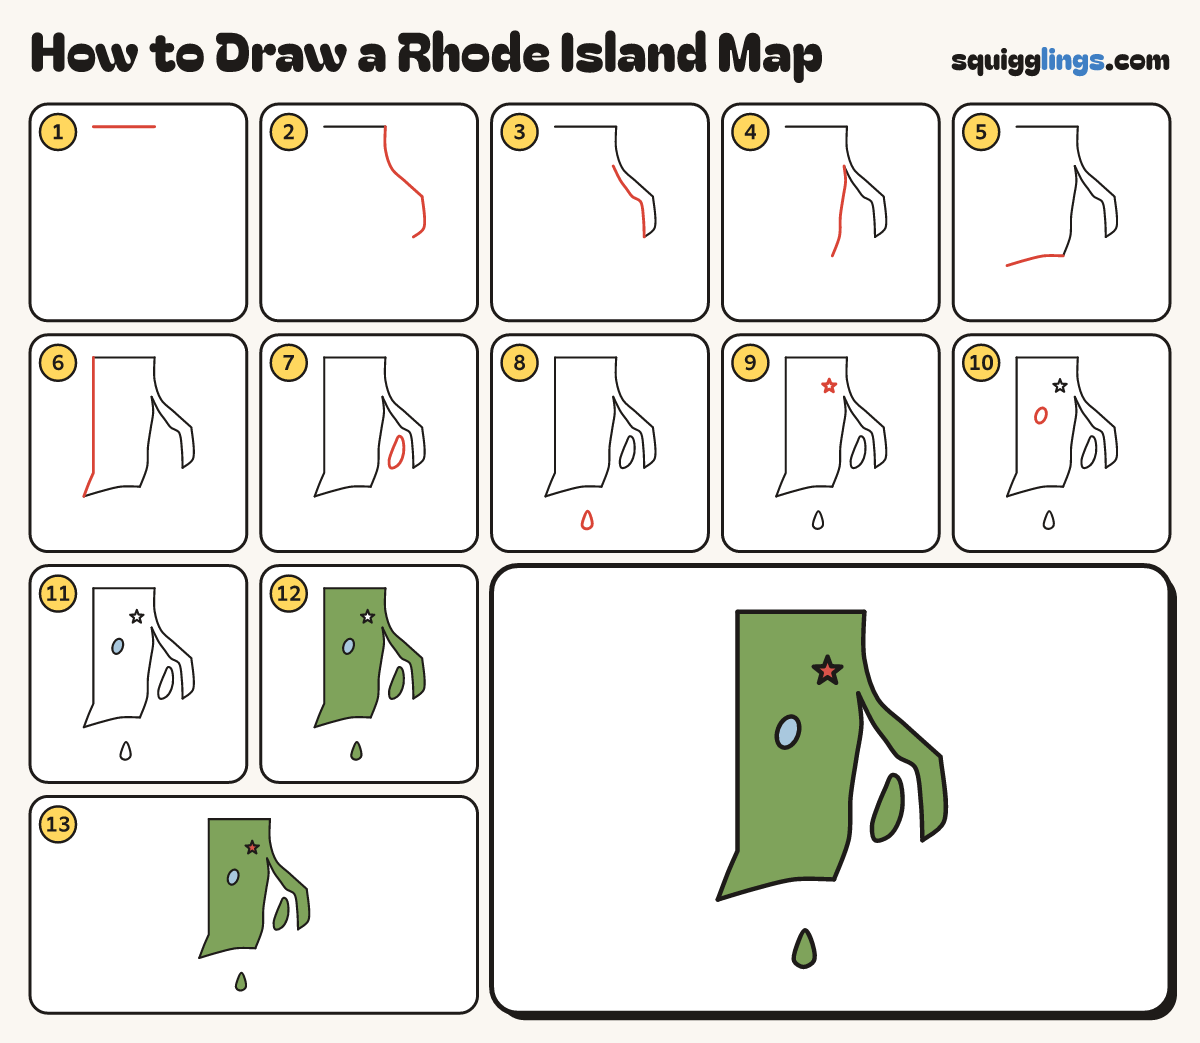
Each picture adds one red line. Draw that line, then scroll to the next picture. Rub out any dashed helper lines at the end. First up: the flat top.
Step 1: The flat top
Start near the top left corner. Draw a straight line to the right. Stop past the middle.
Step 2: The east side
Carry on from there. Go down, slant out to the right, then drop down to a small point.
Tip The slant is the bumpy part. Take it slowly.
Step 3: Into the bay
Carry on from the point. Draw a line up, bending left, deep into the map. Stop well below the top.
Tip This gap is Narragansett Bay, where the sea comes in.
Step 4: Out of the bay
Start there. Draw a line back down, leaning a little left. Stop a little lower than the small point.
Step 5: The south coast
Carry on from there. Draw a long line to the left, dipping a little. Stop at the far left.
Step 6: The west side
Carry on from there. Hook up to the right, then go straight up. Join your first line.
Step 7: The long island
Inside the bay, near its right side, draw a long thin island, fatter at the bottom.
Tip Leave a gap of sea all the way round it.
Step 8: Block Island
Below the south coast, under the middle, draw a small island shaped like a pear.
Step 9: The capital star
Above the top of the bay draw a star for the capital city, Providence.
Step 10: The lake
Left of the star, a little lower, draw a small oval lake.
Step 11: Blue lake
Go over your lines, then colour the lake blue.
Step 12: Green land
Colour the land and both islands green, around the star and the lake. Leave the bay white.
Step 13: Red star
Colour the star red. Your map of Rhode Island is done!
Your finished drawing
Follow the steps above and this is where you end up: a rhode island map, drawn by you.
Every step in one picture