Watch it draw itself · tap to replay
How to Draw a Rearing Horse
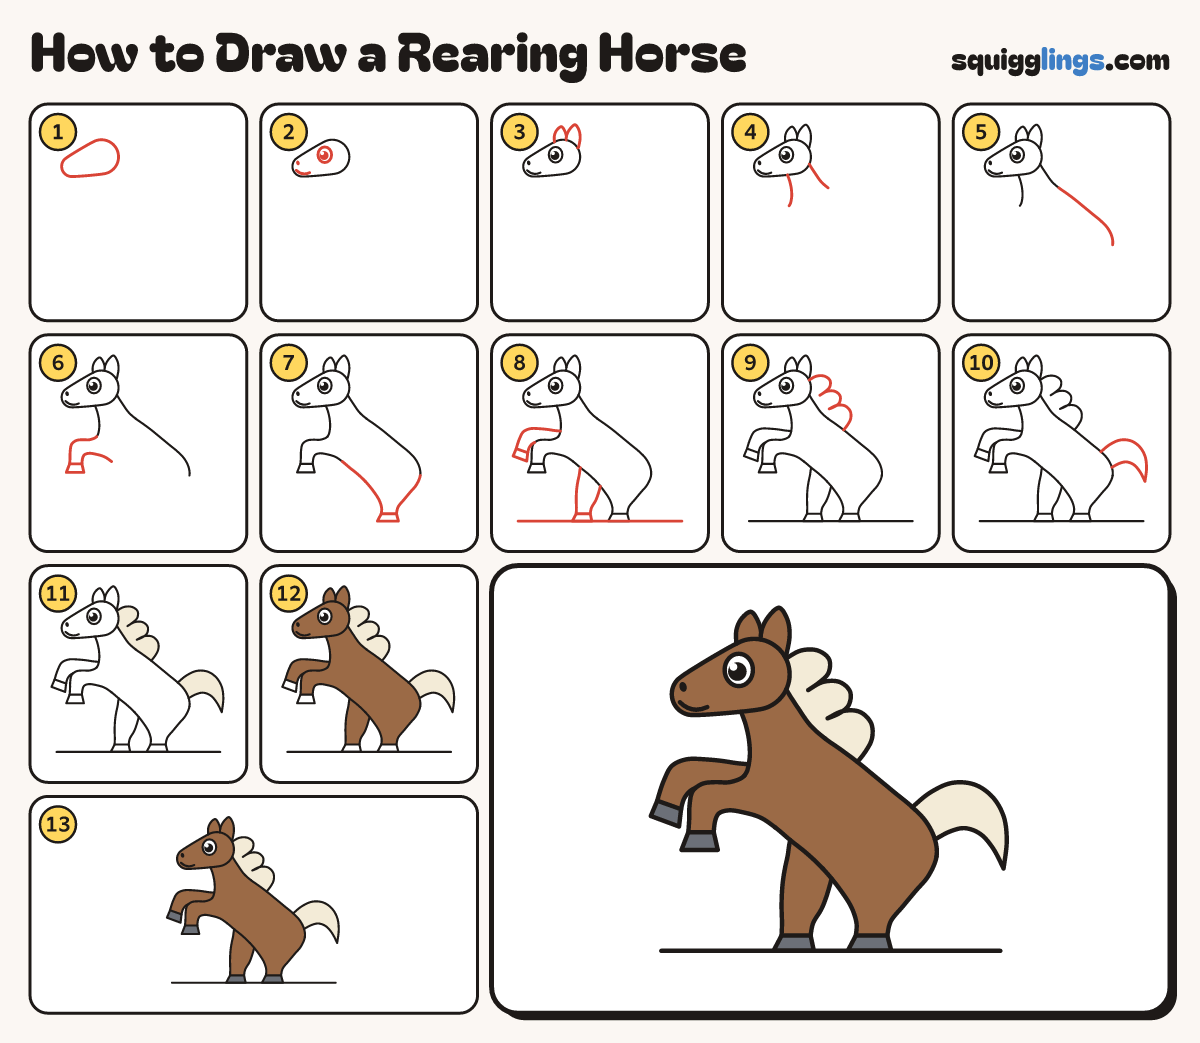
Draw a rearing horse in 13 easy steps, about 10 minutes. Free, with a printable worksheet.
Each picture adds one red line. Draw that line, then scroll to the next picture. Rub out any dashed helper lines at the end. First up: the head.
Step 1: The head
Near the top left draw a sideways head like a fat peanut: a big round cheek, a smaller nose end.
Tip The nose end points left and a little down. Leave lots of room below.
Step 2: Eye and smile
Draw 1 big oval eye with a black dot. Add a nostril dot and a smile on the nose end.
Tip Leave a tiny white shine in the eye. Keep the eye away from every line.
Step 3: Two ears
On top of the head draw a pointed leaf ear. Draw a second ear peeking out beside it.
Step 4: Thick neck
Behind the ear, draw a line sloping down to the right. From under the cheek, draw a short line down.
Tip The neck gets wider as it goes down.
Step 5: Back and bottom
Carry on from the long neck line. Slope the back down to the right, curl round the bottom and stop.
Tip The back slopes steeply because the horse is standing up tall.
Step 6: Pawing front leg
Start at the chest. Draw a leg reaching left, bend it down to a hoof, and come back under it.
Tip The leg bends at the knee, like an upside-down L.
Step 7: Strong back leg
Start at the front leg. Draw the tummy, a big bent leg and a hoof. Stop at the bottom.
Tip The back leg is wide at the top and bends halfway down. It holds the horse up.
Step 8: The far legs
Behind each leg draw another leg peeking out. Then draw a ground line under the back hooves.
Tip Only draw the parts you can see. One far leg paws the air, one stands.
Step 9: Flying mane
Start behind the ear. Draw 3 fat locks of hair blowing back, and stop on the back.
Tip Each lock is a soft wave with a round tip.
Step 10: Flying tail
From the top of the bottom draw a long tail streaming out to a point, then back to the bottom.
Tip Thick where it grows, pointed at the tip.
Step 11: Cream mane and tail
Go over your lines. Colour the mane and the tail cream.
Step 12: Colour it brown
Colour the horse brown, around the mane and tail. Leave the eye and the 4 hooves white.
Step 13: Grey hooves
Colour the 4 hooves dark grey. Your rearing horse is done!
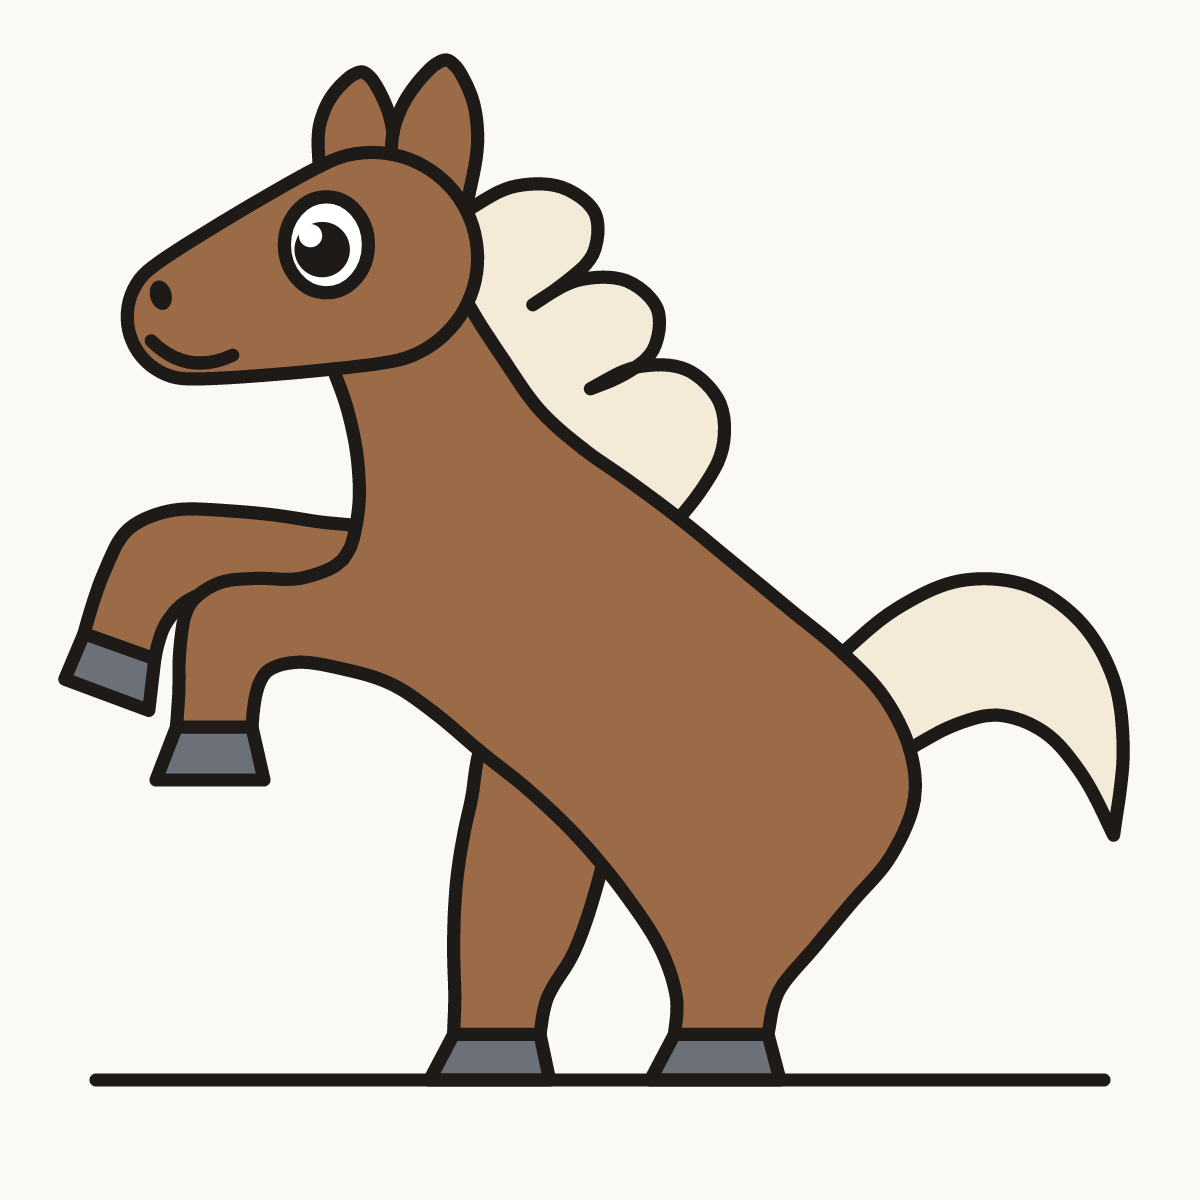
Your finished drawing
Follow the steps above and this is where you end up: a rearing horse, drawn by you.
Every step in one picture