Watch it draw itself · tap to replay
How to Draw a Pupusa
Draw a pupusa in 11 easy steps, about 8 minutes. Free, with a printable worksheet.
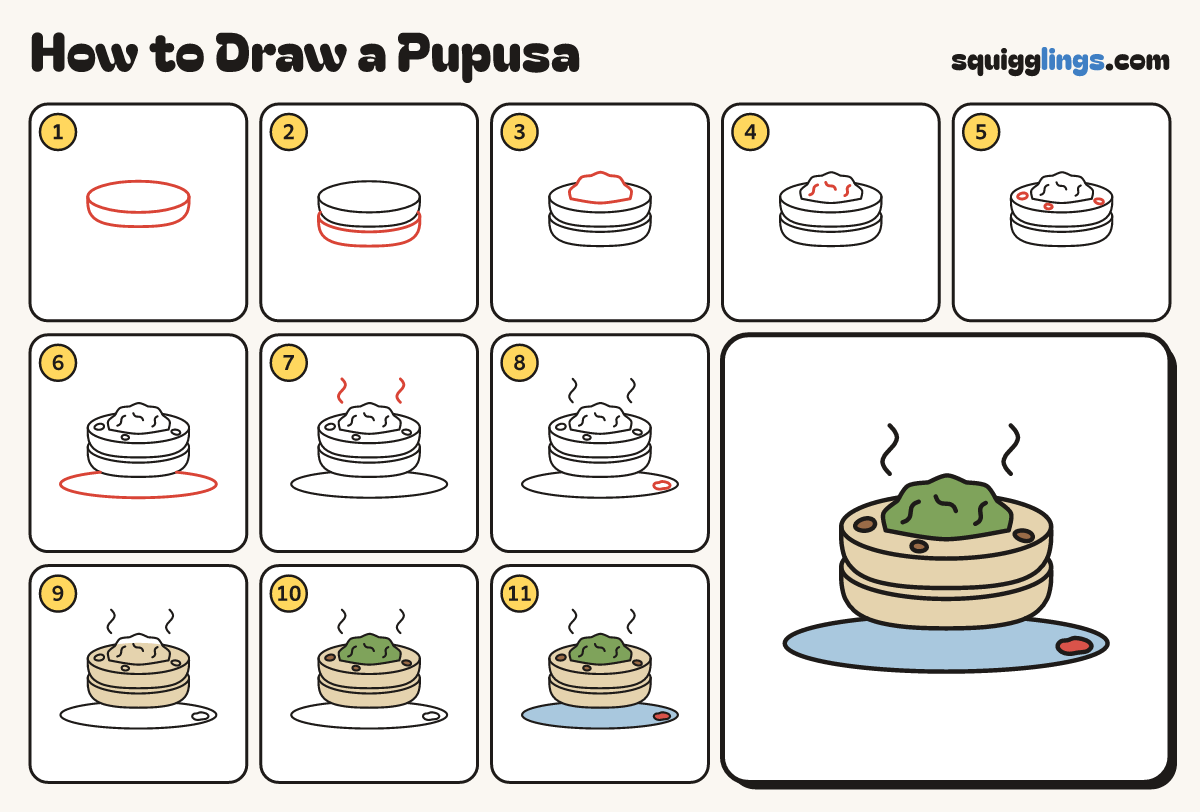
Each picture adds one red line. Draw that line, then scroll to the next picture. Rub out any dashed helper lines at the end. First up: the top pupusa.
Step 1: The top pupusa
Above the middle draw a wide oval. From its left end draw a thick edge round to its right end.
Step 2: Second pupusa
Under the first pupusa draw a thin smile, then a deeper smile below. Both start and stop at its sides.
Step 3: A pile of slaw
Start on the top pupusa at the left. Draw a bumpy mound over to the right, then close it underneath.
Step 4: Wavy slaw lines
Inside the pile draw 3 short wavy lines, each slanting a different way, for shredded cabbage.
Step 5: Toasty spots
Draw 3 small uneven ovals on the top pupusa for toasty spots, away from the pile.
Step 6: A plate
Start on the left of the bottom pupusa. Draw a wide flat plate round behind it and under the front.
Step 7: Steam
Above the stack draw 2 wavy lines going up, like wiggly worms, one each side of the pile.
Step 8: Salsa puddle
On the plate to the right of the pupusas draw a small flat blob for a puddle of salsa.
Step 9: Sand pupusas
Go over your lines, then colour both pupusas sand, leaving the spots for now.
Step 10: Brown spots, green slaw
Colour the toasty spots brown and the pile of slaw leaf green.
Step 11: Sky plate, red salsa
Colour the plate sky blue around the pupusas and salsa, then the salsa red. Your pupusas are done!
Your finished drawing
Follow the steps above and this is where you end up: a pupusa, drawn by you.
Every step in one picture