Watch it draw itself · tap to replay
How to Draw a Pterodactyl
Draw a pterodactyl in 12 easy steps, about 9 minutes. Free, with a printable worksheet.
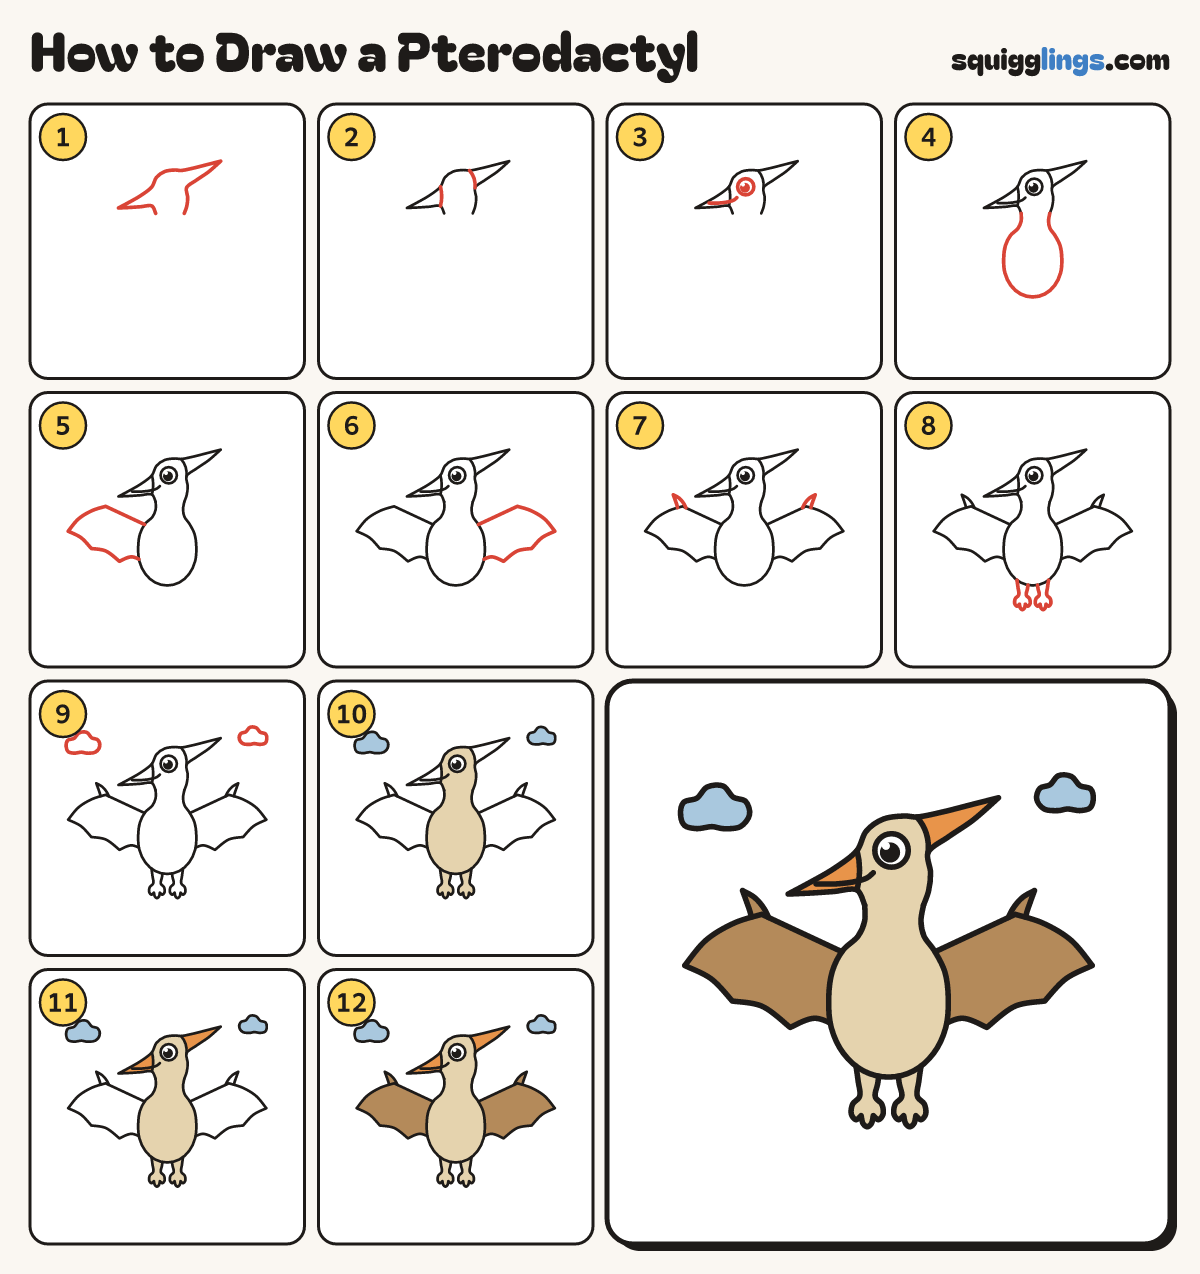
Each picture adds one red line. Draw that line, then scroll to the next picture. Rub out any dashed helper lines at the end. First up: pointy head.
Step 1: Pointy head
Start under the beak. Draw a pointy beak, a round top and a long crest. Stop, leaving a gap underneath.
Tip The beak and the crest point opposite ways, like a pickaxe.
Step 2: Beak and crest lines
Draw a short curved line where the beak joins the head, and one where the crest joins.
Step 3: Eye and smile
Draw a big eye with a black dot and a shine. Add a smile along the beak, curling up.
Step 4: Neck and body
From the gap under the head, draw a thick neck into a big bean body, then back to the gap.
Step 5: Left wing
From the left shoulder, go up to a bend, out to a sharp tip, then scoop back to the body.
Tip A pterodactyl wing is thin skin, like a bat wing, with no feathers.
Step 6: Right wing
Draw the same wing from the right shoulder, up to a bend, out to a tip, and back.
Step 7: Wrist claws
On the bend of each wing draw a small pointy claw sticking up.
Step 8: Little feet
Under the body draw 2 short legs that get thinner, each with a foot of 3 round toes.
Step 9: 2 small clouds
Draw a small puffy cloud in the top left corner and one in the top right corner.
Step 10: Blue clouds, sand body
Colour the clouds light blue. Colour the head, body and feet sand, and leave the eye white.
Step 11: Orange beak and crest
Colour the beak and the crest orange, right up to the curved lines.
Step 12: Brown wings
Colour the wings and claws brown, right up to the body. Go over your lines and your pterodactyl flies!
Your finished drawing
Follow the steps above and this is where you end up: a pterodactyl, drawn by you.
Every step in one picture