Watch it draw itself · tap to replay
How to Draw a Protein Bar
Draw a protein bar in 12 easy steps, about 9 minutes. Free, with a printable worksheet.
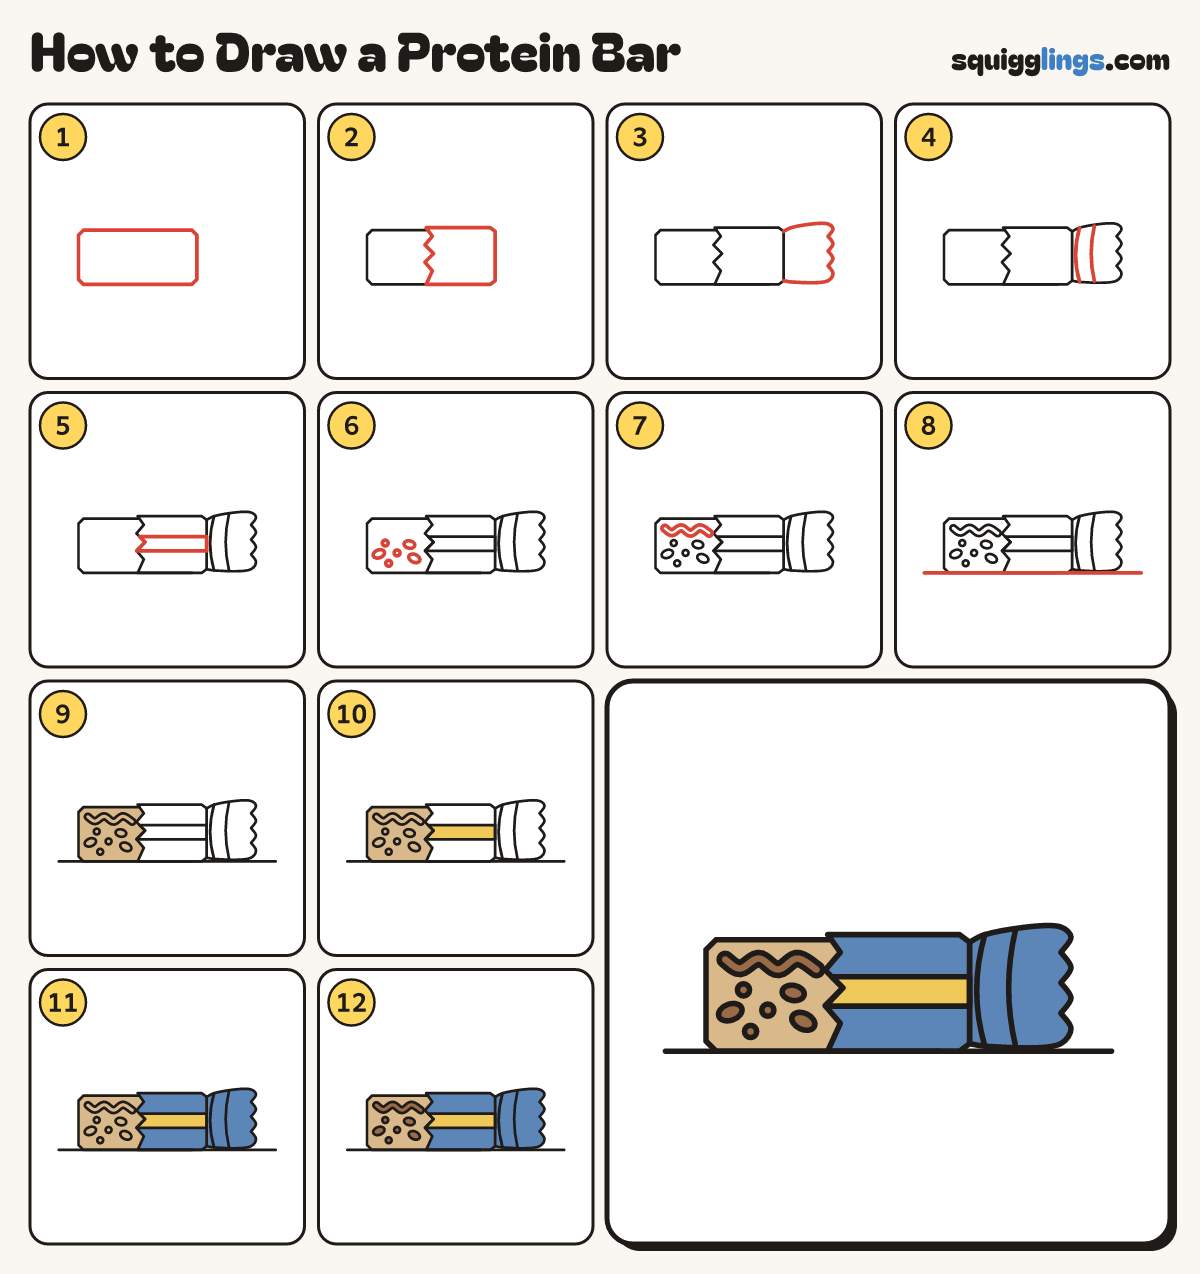
Each picture adds one red line. Draw that line, then scroll to the next picture. Rub out any dashed helper lines at the end. First up: the bar.
Step 1: The bar
In the middle draw a long flat box lying down, as wide as your hand, with tiny cut corners.
Step 2: The wrapper
Over the right two thirds of the bar draw a wrapper a little bigger than the bar, zigzag on left.
Tip The zigzag is where the wrapper was torn open.
Step 3: The crimped end
From the wrapper's top corner draw a line fanning out, zigzag down, then fan back to its bottom corner.
Step 4: Twist lines
Draw 2 short curved lines across the crimped end, bowing toward the wrapper, for the pinch.
Step 5: A stripe
Across the middle of the wrapper draw a long thin box from the zigzag to the right edge: the stripe.
Step 6: Nuts and oats
Below the top of the bare end draw 3 little tilted ovals for nuts and 3 tiny rounds for oats.
Step 7: Chocolate drizzle
Along the top of the bare end draw a thick wavy band, from near the left corner to the zigzag.
Step 8: Ground
Draw a ground line under the bar from well left to well right.
Step 9: Tan bar
Go over your lines, then colour the bare end of the bar tan. Skip the nuts, oats and drizzle.
Step 10: Yellow stripe
Colour the stripe on the wrapper yellow.
Step 11: Blue wrapper
Colour the wrapper and its crimped end blue, going around the stripe.
Step 12: Brown nuts and drizzle
Colour the nuts, the oats and the drizzle brown. Your protein bar is ready for a snack!
Your finished drawing
Follow the steps above and this is where you end up: a protein bar, drawn by you.
Every step in one picture