Watch it draw itself · tap to replay
How to Draw a Protea
Draw a protea in 11 easy steps, about 8 minutes. Free, with a printable worksheet.
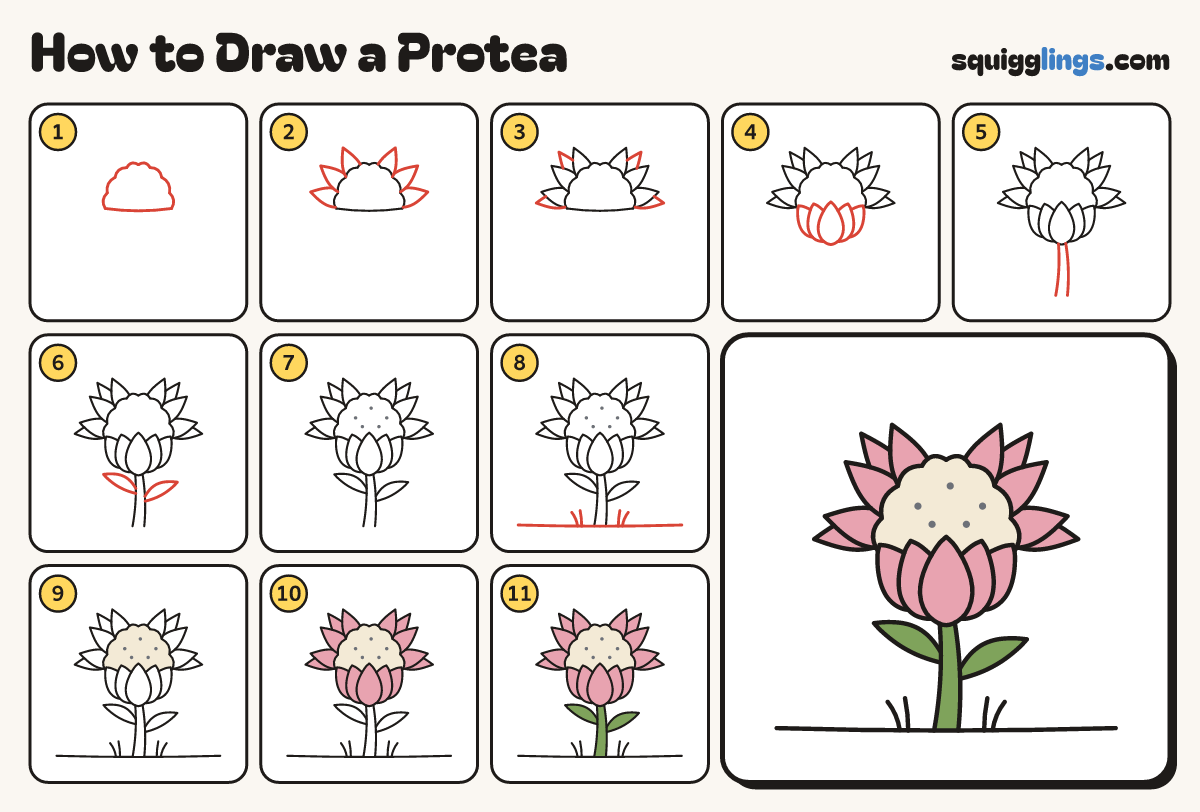
Each picture adds one red line. Draw that line, then scroll to the next picture. Rub out any dashed helper lines at the end. First up: the fuzzy dome.
Step 1: The fuzzy dome
Start on the left, above the middle. Draw a bumpy dome over to the right, then a saggy line back.
Step 2: Inner petals
Round the dome draw 6 long pointy petals standing up behind it like a crown, leaning outwards.
Tip The outer petals lean out most. They hide behind the dome where they meet.
Step 3: Outer petals
Behind those draw 4 more pointy petals, 2 each side, one peeking from a gap and one flaring out low.
Step 4: The pointy cup
Over the saggy line draw a cup of 5 pointy petals, their tips poking up into the dome.
Tip Rub out the bit of saggy line inside each petal tip.
Step 5: The stem
Start under the cup. Draw 2 gently bent lines for a thick stem, stopping near the bottom, wider there.
Step 6: Narrow leaves
On each side of the stem draw a long narrow pointy leaf pointing up and out, one a little lower.
Step 7: Dots on the dome
Dot 5 little spots on the dome, spread out.
Step 8: Ground and grass
Draw the ground from near one edge to the other, then 2 grass blades each side, clear of the stem.
Step 9: Cream dome
Colour the dome cream, going round the dots.
Step 10: Pink petals
Colour every petal pink, right out to the points, and the cup too.
Step 11: Green stem and leaves
Colour the stem and the leaves green. Go over your lines and your protea is done!
Your finished drawing
Follow the steps above and this is where you end up: a protea, drawn by you.
Every step in one picture