Watch it draw itself · tap to replay
How to Draw a Hellebore
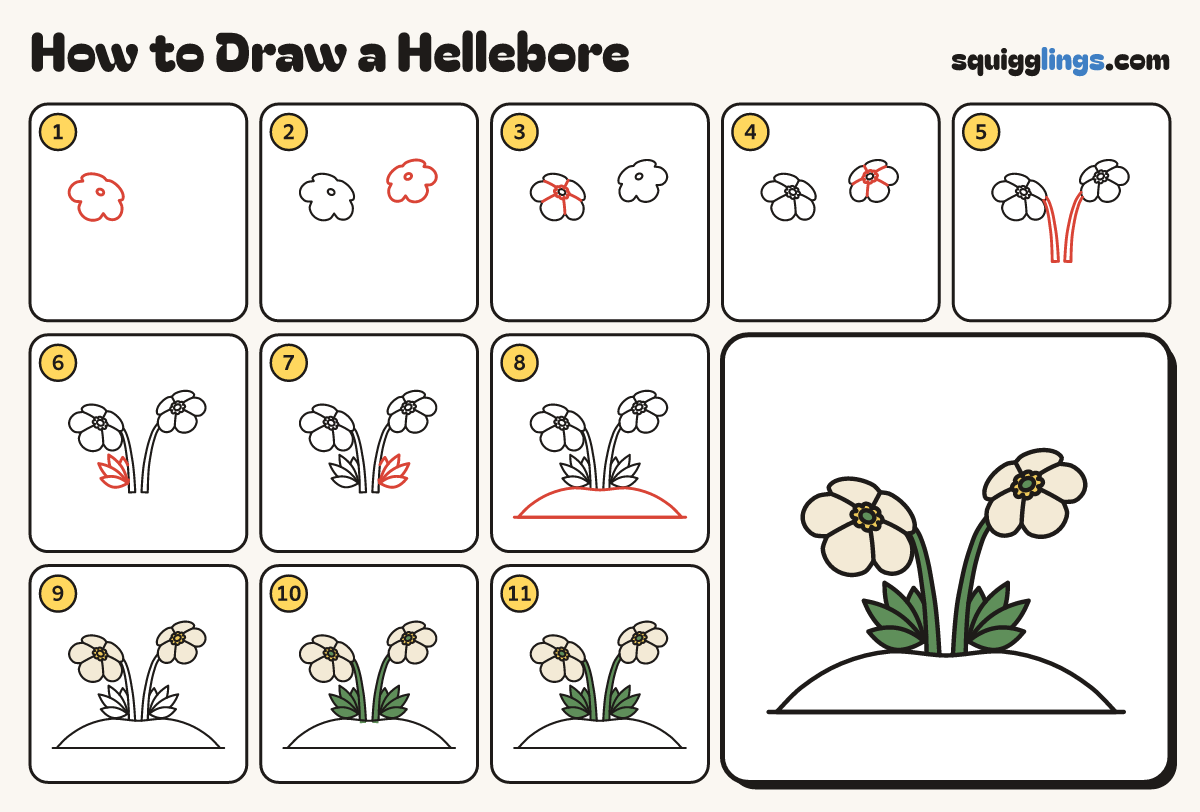
Draw a hellebore in 11 easy steps, about 8 minutes. Free, with a printable worksheet.
Each picture adds one red line. Draw that line, then scroll to the next picture. Rub out any dashed helper lines at the end. First up: the first flower.
Step 1: The first flower
Left of the middle draw a tiny oval. Round it draw a wide flower with 5 round bumps, tipped down-left.
Tip Hellebores nod: each flower tips down like a shallow cup looking at the snow.
Step 2: A second flower
To the upper right draw a smaller flower the same way, tipped down to the right.
Step 3: Stamens
Draw a ring of little bumps round the first flower's middle. Join each petal dip to it.
Step 4: More stamens
Draw a ring of little bumps round the second flower's middle too, and join each dip to it.
Step 5: Curved stems
Start near the bottom. Draw a stem up to each flower, thinner at the top, curving over behind it.
Step 6: Left leaves
At the foot of the left stem draw 4 narrow pointed leaves fanning out to the left, like fingers.
Step 7: Right leaves
At the foot of the right stem draw another hand of 4 leaves fanning out to the right.
Step 8: Snow and ground
Start near the left edge. Draw a gentle snow hill, ending near the right edge. Add a ground line under.
Step 9: Cream petals
Go over your lines, then colour every petal soft cream and the stamens yellow.
Step 10: Green stems and leaves
Colour the stems, the leaves and the tiny middles green.
Step 11: White snow
Colour the snow white, and your hellebore is done!
Your finished drawing
Follow the steps above and this is where you end up: a hellebore, drawn by you.
Every step in one picture