Watch it draw itself · tap to replay
How to Draw a Power Line
Draw a power line in 12 easy steps, about 9 minutes. Free, with a printable worksheet.
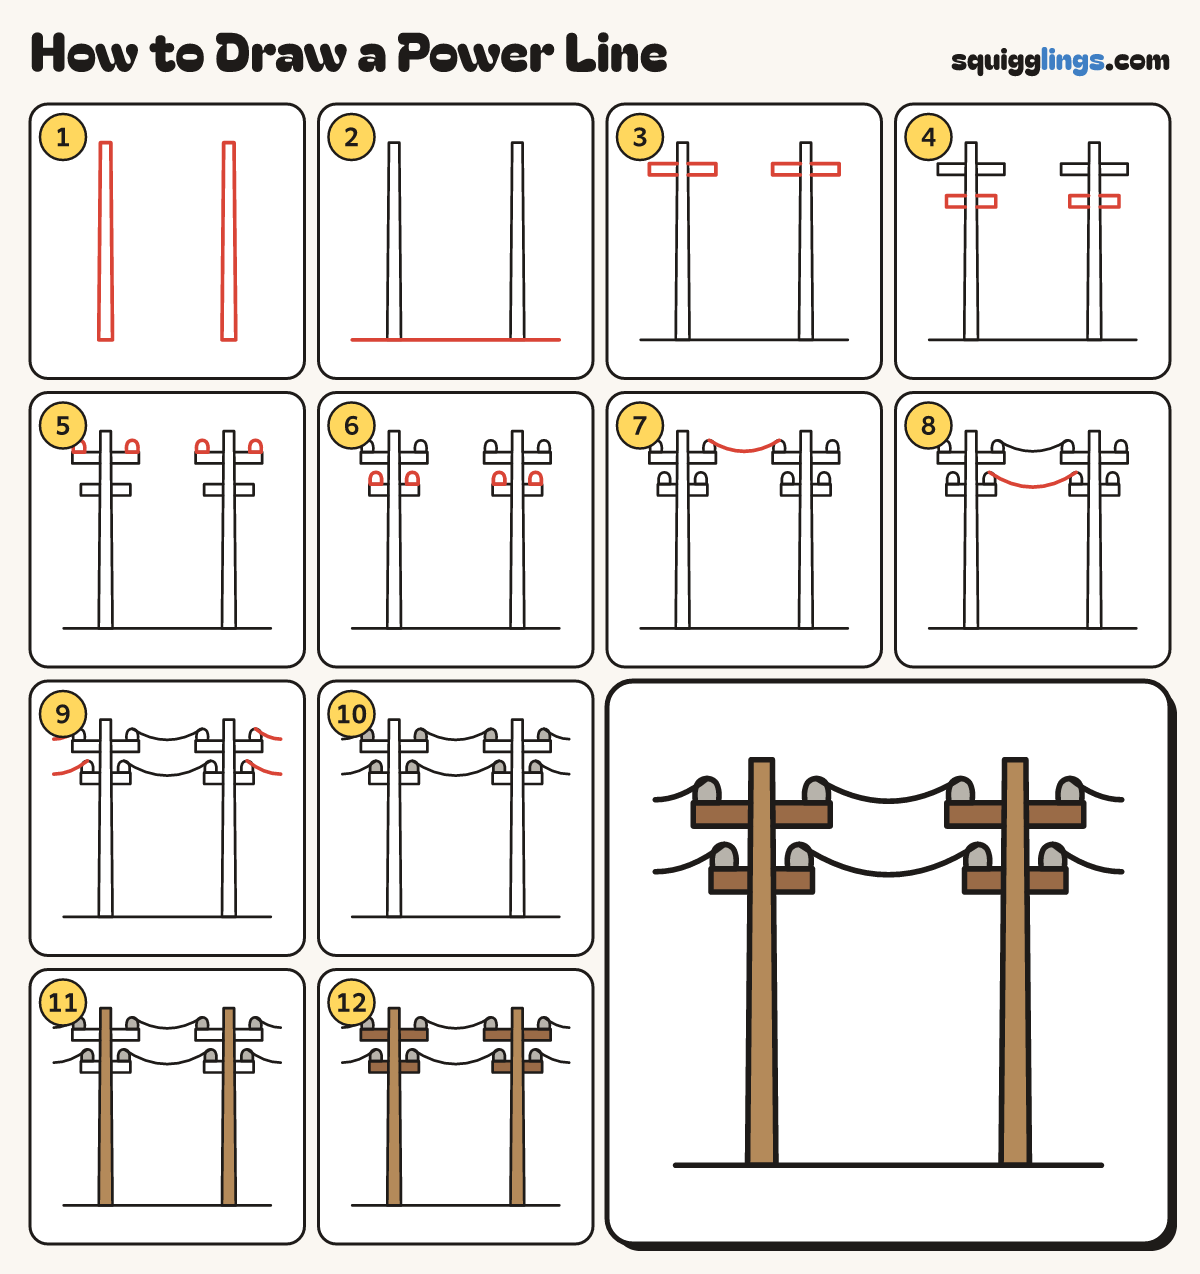
Each picture adds one red line. Draw that line, then scroll to the next picture. Rub out any dashed helper lines at the end. First up: two tall poles.
Step 1: Two tall poles
Draw 2 tall thin poles, one on each side of your paper. Make each a little wider at the bottom.
Tip Power lines carry electricity from pole to pole, all the way to your home.
Step 2: The ground
Draw a long ground line along the bottom of both poles, from left to right.
Step 3: Long top bars
Near the top of each pole draw a long flat bar across it, hidden where it passes behind the pole.
Tip Leave a little of the pole poking up above the bar.
Step 4: Shorter lower bars
A little lower, draw a shorter flat bar across each pole in the same way.
Step 5: Top knobs
On top of each long bar draw 2 small round-topped knobs, one near each end.
Tip The knobs hold the wires up so the electricity stays in the wire.
Step 6: Lower knobs
Do the same on each shorter bar: 2 small knobs, one near each end.
Step 7: Top wire
Start on the left pole's top inside knob. Draw a sagging line. Stop on the right pole's top inside knob.
Tip Wires are heavy, so they always hang in a soft curve, never a straight line.
Step 8: Lower wire
Join the 2 lower inside knobs with a deeper sagging line. Start on the left and stop on the right.
Step 9: Wires going on
Start at each outside knob. Draw a line curving down and out. Stop near the edge of your paper.
Tip These wires carry on to the next pole, off the edge of your picture.
Step 10: Grey knobs
Colour all 8 knobs grey.
Step 11: Wooden poles
Colour the 2 tall poles light brown, like wood.
Step 12: Brown bars
Go over your lines, then colour the 4 bars dark brown.
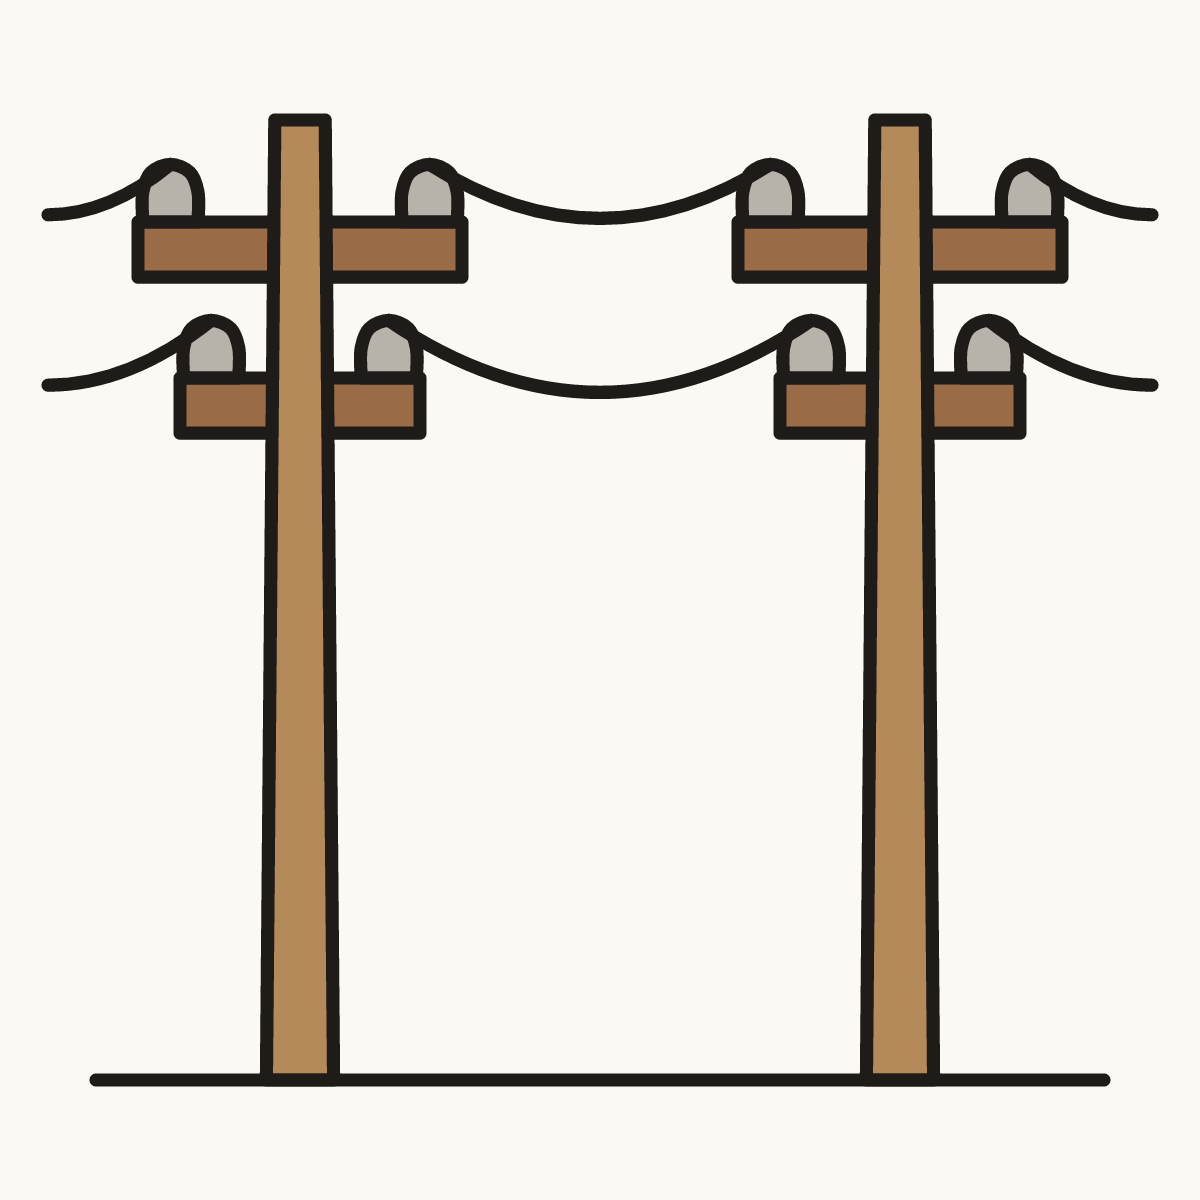
Your finished drawing
Follow the steps above and this is where you end up: a power line, drawn by you.
Every step in one picture