Watch it draw itself · tap to replay
How to Draw a Pizza
Draw a pizza in 10 easy steps, about 8 minutes. Free, with a printable worksheet.
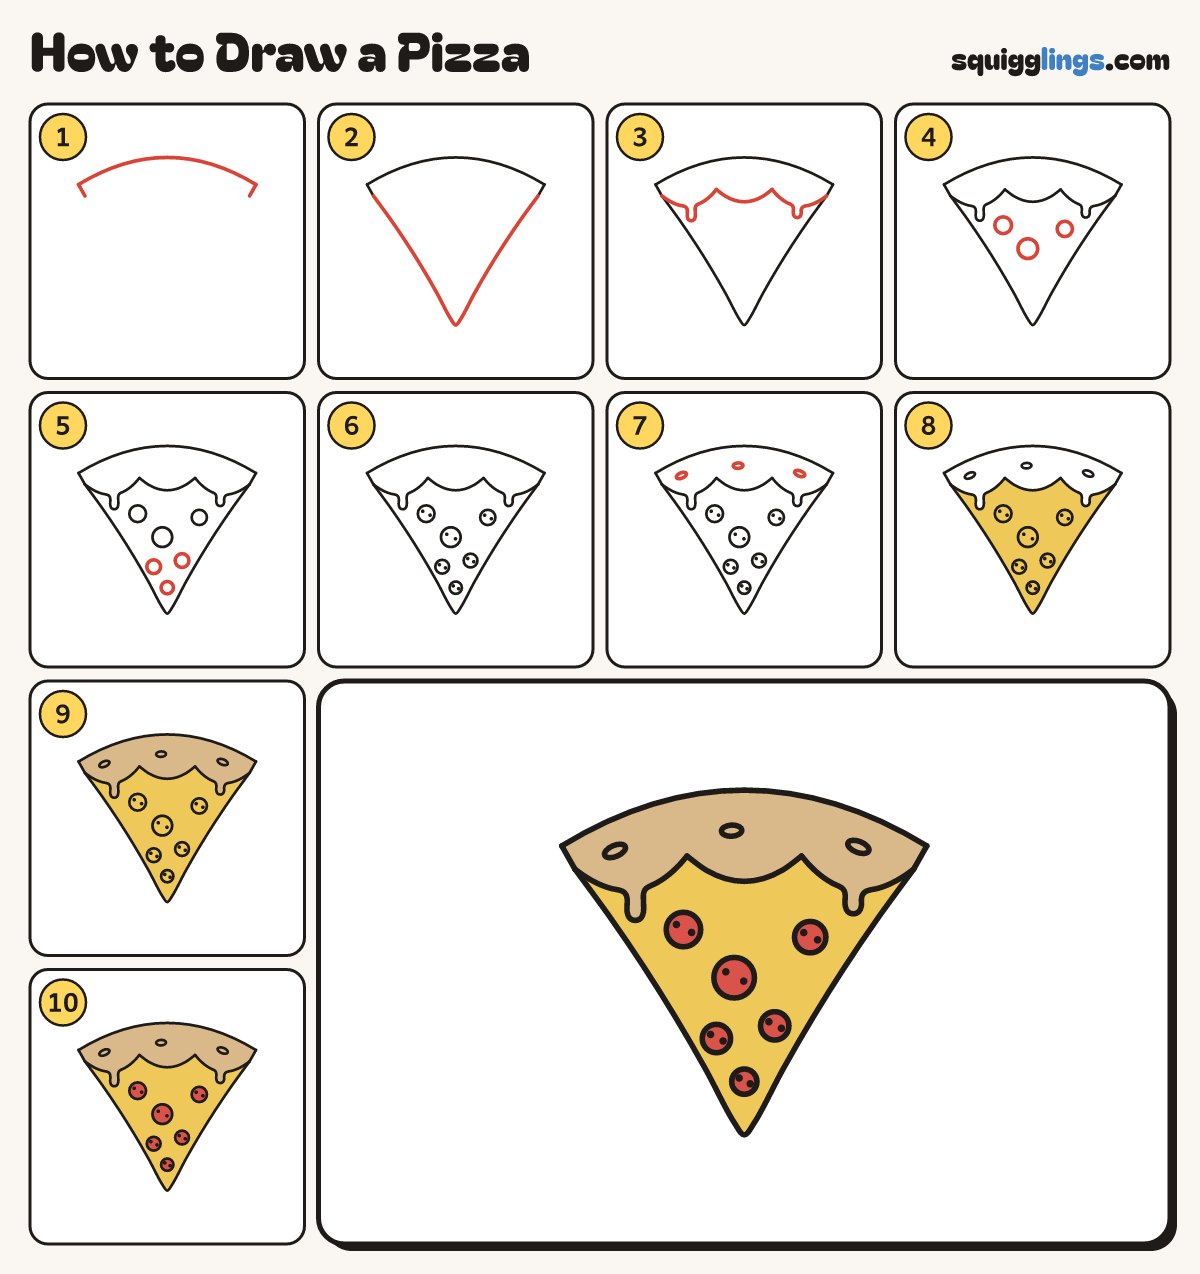
Each picture adds one red line. Draw that line, then scroll to the next picture. Rub out any dashed helper lines at the end. First up: the crust.
Step 1: The crust
Start on the left and draw a wide low rainbow to the right. Add a tiny line at each end.
Tip The tiny lines show how thick the crust is.
Step 2: The slice
Start under the left tiny line. Draw a line down to a soft point, then back up on the right.
Tip A tall slice with a soft round point.
Step 3: Melty cheese
Start under the left tiny line. Draw 3 scoops, dripping under the outer two, and stop under the right one.
Tip Draw each drip in the same line, like a round finger hanging down, well inside the slice.
Step 4: Pepperoni
Draw 3 big round pepperoni: one beside each drip and one in the middle below them.
Tip Keep a gap between each pepperoni and the drips and edges.
Step 5: More pepperoni
Draw 3 smaller pepperoni lower down: one left, one right, and a small one near the point.
Step 6: Pepperoni dots
Put 2 tiny dots in each pepperoni, one up on the left and one down on the right.
Tip Scatter the dots so they do not look like little faces.
Step 7: Toasty crust
Draw 3 small ovals along the crust band for toasty bubbles: one left, one middle, one right.
Tip Keep them small and far apart.
Step 8: Yellow cheese
Go over your lines. Colour the slice yellow below the cheese line, going around the pepperoni.
Step 9: Tan crust
Colour the crust band tan, drips and all.
Step 10: Red pepperoni
Colour the 6 pepperoni red.
Your finished drawing
Follow the steps above and this is where you end up: a pizza, drawn by you.
Every step in one picture