Watch it draw itself · tap to replay
How to Draw a Pirate Hat
Draw a pirate hat in 10 easy steps, about 8 minutes. Free, with a printable worksheet.
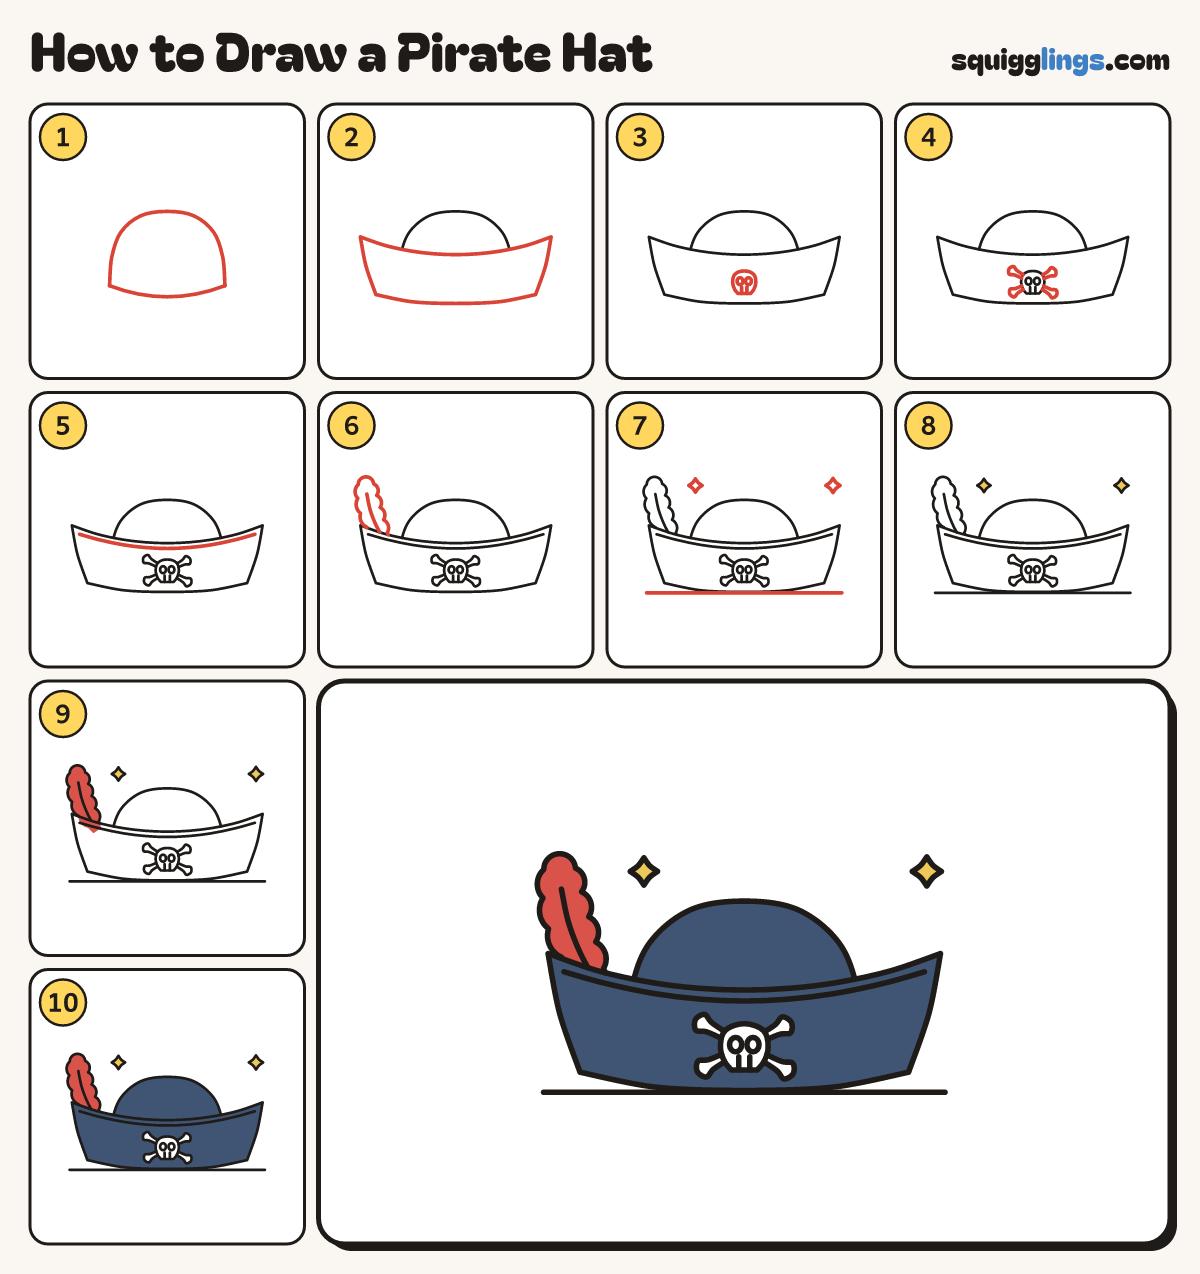
Each picture adds one red line. Draw that line, then scroll to the next picture. Rub out any dashed helper lines at the end. First up: hat top.
Step 1: Hat top
Start low on the left. Draw a dome over to the right, stopping level with the start. Join the bottoms.
Step 2: Turned-up brim
Draw a big brim across the dome, rising to a point at each side. Join the bottoms with a smile.
Tip Rub out the dome lines inside the brim.
Step 3: The skull
In the middle of the brim, draw a skull: a round top, 2 oval eye holes and 2 teeth lines.
Step 4: Crossed bones
Behind the skull, draw 2 chunky bones crossing like an X, with round knobs on the ends.
Step 5: Brim edge
Start near the left point, inside the brim top. Draw a matching curve along the dip to the right point.
Step 6: A feather
Start on the left of the brim. Sweep up a bumpy feather to a round tip. Add a middle line.
Step 7: Sparkles and table
Draw a sparkle star off each top corner. Then draw a table line under the brim, touching its lowest point.
Step 8: Yellow sparkles
Colour the 2 sparkles yellow.
Step 9: White skull, red feather
Leave the skull and bones white. Colour the feather red.
Step 10: Navy hat
Colour the dome and brim navy blue, around the skull and bones, and your pirate hat is done!
Your finished drawing
Follow the steps above and this is where you end up: a pirate hat, drawn by you.
Every step in one picture