Watch it draw itself · tap to replay
How to Draw a Pipefish
Draw a pipefish in 12 easy steps, about 9 minutes. Free, with a printable worksheet.
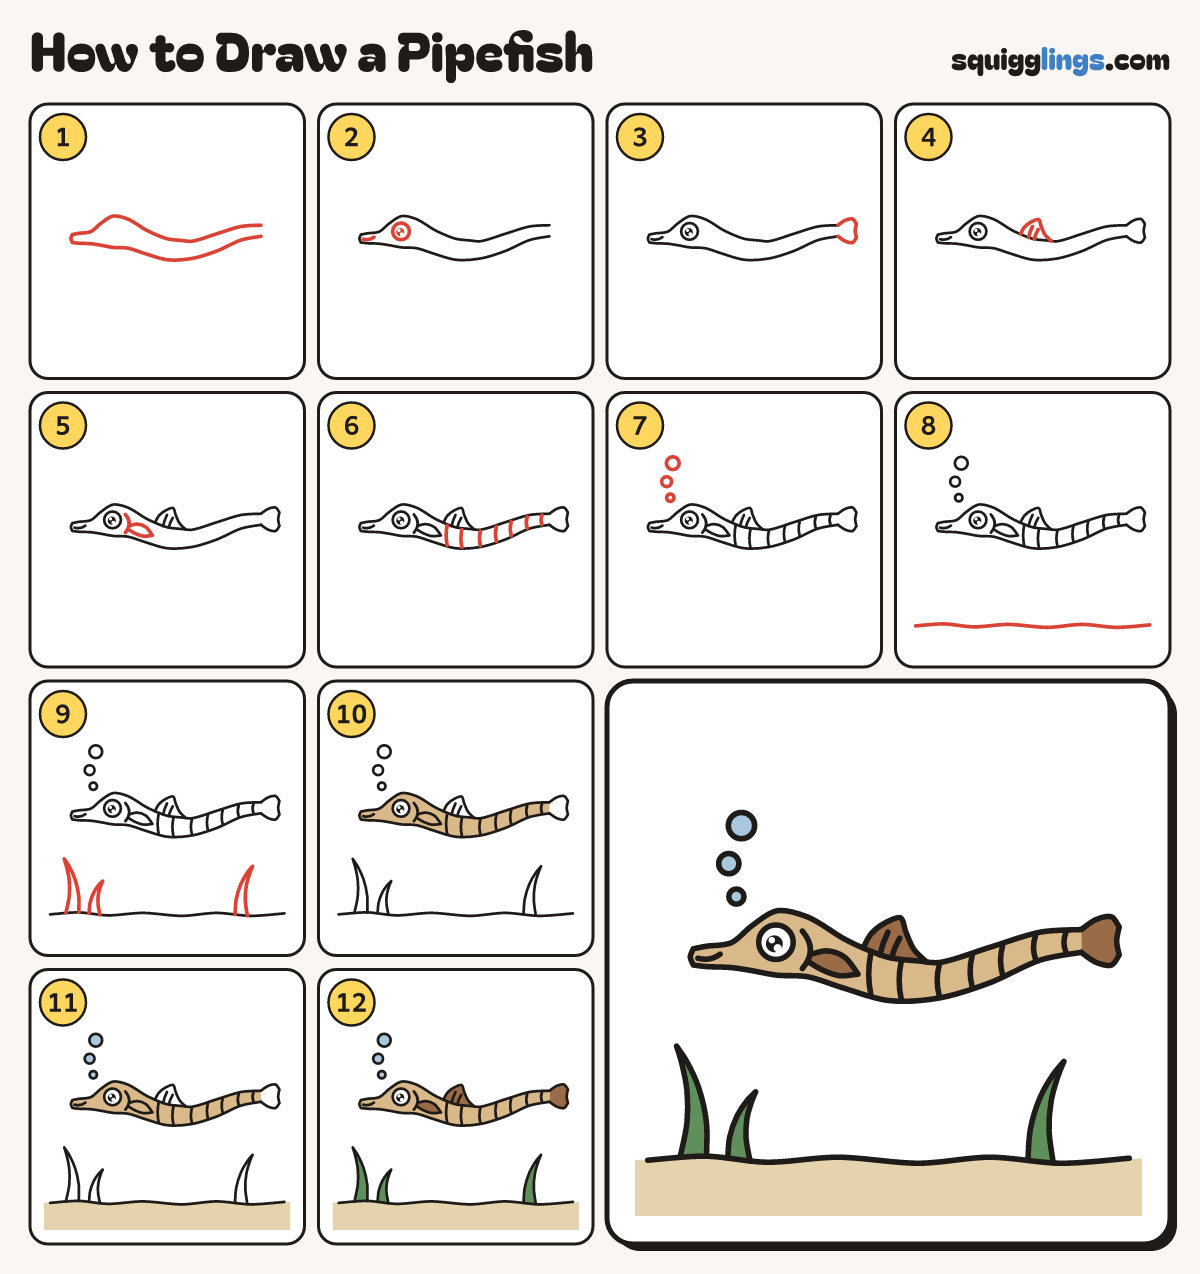
Each picture adds one red line. Draw that line, then scroll to the next picture. Rub out any dashed helper lines at the end. First up: head and long body.
Step 1: Head and long body
Start on the right. Draw a long back, domed head and snout, then the tummy back to the start.
Tip A pipefish is a seahorse pulled straight. Leave the right end open.
Step 2: Eye and tiny smile
In the head, draw one round eye with a black dot. Inside the snout tip, draw a tiny smile.
Step 3: Tiny fan tail
At the open end, start on the top line. Draw a tiny fan out and round to the bottom line.
Step 4: Small back fin
Start halfway along the back, rise to a soft point, slope down to the back. Add 2 lines inside.
Step 5: Gill and side fin
Behind the eye, draw a C gill. From it, draw a leaf fin pointing back, ending on the gill.
Step 6: Body rings
Behind the side fin, draw 7 short curved lines across the body, spaced like rings on a hose.
Tip Keep the rings evenly spaced and never through the eye.
Step 7: Bubbles
Above the head, draw 3 bubbles floating up: a small one, a bigger one, and the biggest at the top.
Step 8: Sandy floor
Draw the sandy floor as one gently wavy line right across the paper, from edge to edge.
Step 9: Short seagrass
Stand 3 bendy seagrass blades on the sand, 2 left, 1 right, each rising from the sand to a point.
Tip Make each blade a different height, with clear water above every tip.
Step 10: Colour it tan
Go over your lines. Colour the body, head and snout tan, around the side fin. Leave the eye white.
Step 11: Sandy floor, blue bubbles
Colour the floor under the sand line sandy and the bubbles light blue.
Step 12: Brown fins, green grass
Colour the tail, back fin and side fin brown, and the 3 seagrass blades green.
Your finished drawing
Follow the steps above and this is where you end up: a pipefish, drawn by you.
Every step in one picture