Watch it draw itself · tap to replay
How to Draw a Pillow Fort
Draw a pillow fort in 14 easy steps, about 11 minutes. Free, with a printable worksheet.
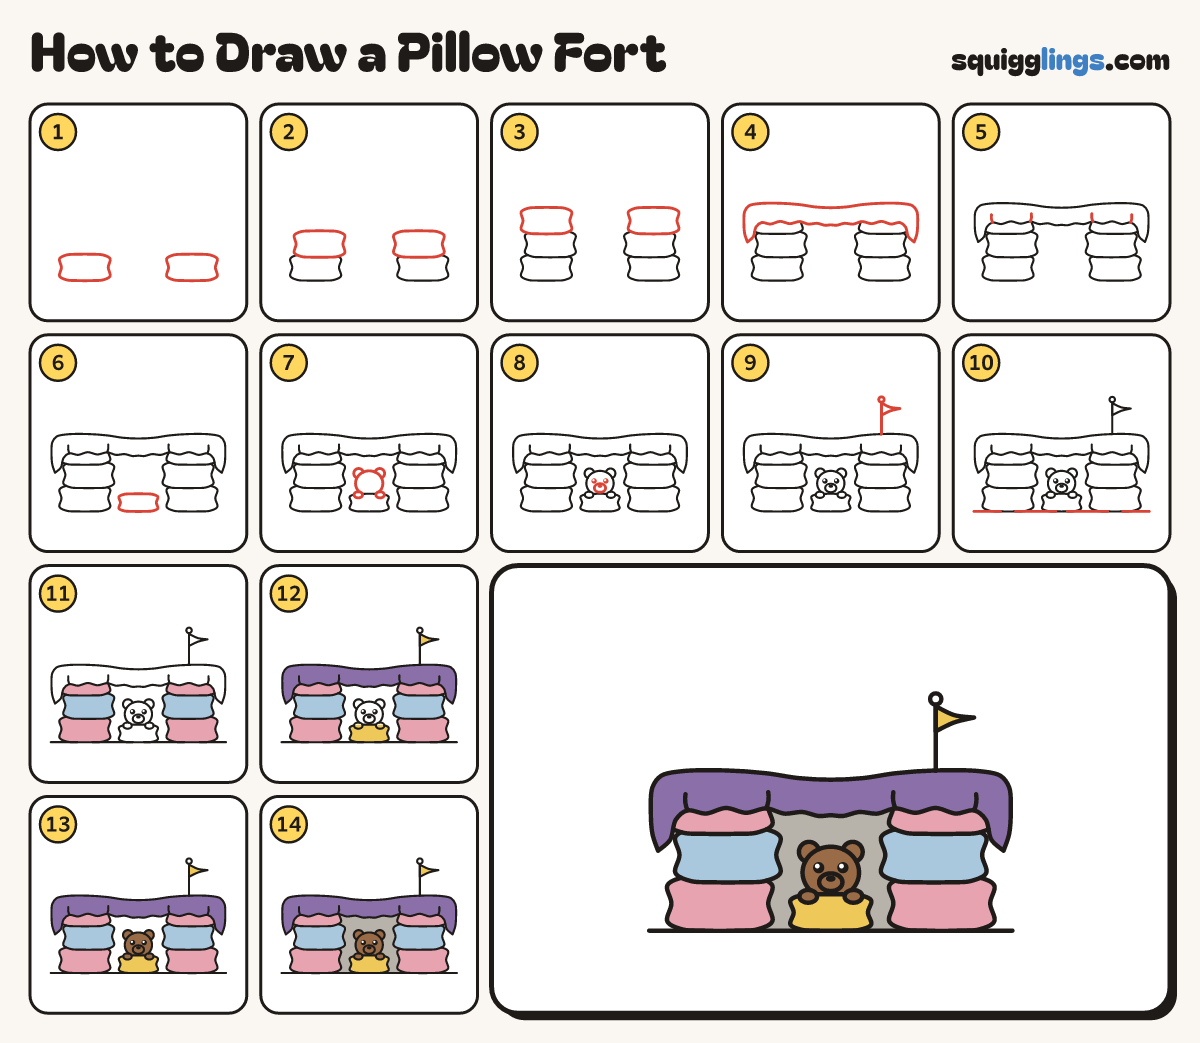
Each picture adds one red line. Draw that line, then scroll to the next picture. Rub out any dashed helper lines at the end. First up: bottom pillows.
Step 1: Bottom pillows
Near the bottom, draw 2 fat pillows lying flat, one left and one right, with a wide gap between.
Tip A pillow has 4 soft corner tips and puffy sides.
Step 2: Middle pillows
On top of each pillow, draw another one, shifted in toward the gap a little.
Step 3: Top pillows
Draw one more pillow on top of each stack, shifted back out, so each wall is 3 pillows tall.
Step 4: Blanket roof
Over both walls, draw a blanket: a sagging top line, 2 hanging ends and a wavy edge along the bottom.
Step 5: Folds
From the wavy edge, draw 4 short fold lines up the blanket, 2 above each wall.
Step 6: A cushion
In the doorway, draw a small flat cushion lying on the ground.
Step 7: Teddy's head
Behind the cushion, draw a round teddy head with 2 round ears. Add 2 little paws on the cushion.
Step 8: Teddy's face
Draw 2 dot eyes with a shine, a small oval muzzle and a black nose on it.
Step 9: A flag
Start on top of the right wall. Draw a pole straight up, stopping at a knob. Add a little flag.
Step 10: The ground
Draw the ground line from left of the fort to right of it, under the pillows.
Step 11: Pink and sky pillows
Colour the bottom and top pillows pink and the middle pillows sky blue.
Step 12: Yellow and purple
Colour the cushion and the flag yellow. Colour the blanket purple.
Step 13: Brown teddy
Colour the teddy's head, ears and paws brown, around the eyes and nose.
Step 14: Dark doorway
Colour the inside of the doorway grey, around the teddy and the cushion. Your pillow fort is done!
Your finished drawing
Follow the steps above and this is where you end up: a pillow fort, drawn by you.
Every step in one picture