Watch it draw itself · tap to replay
How to Draw Piano Keys
Draw piano keys in 11 steps, about 8 minutes. Free, with a printable worksheet.
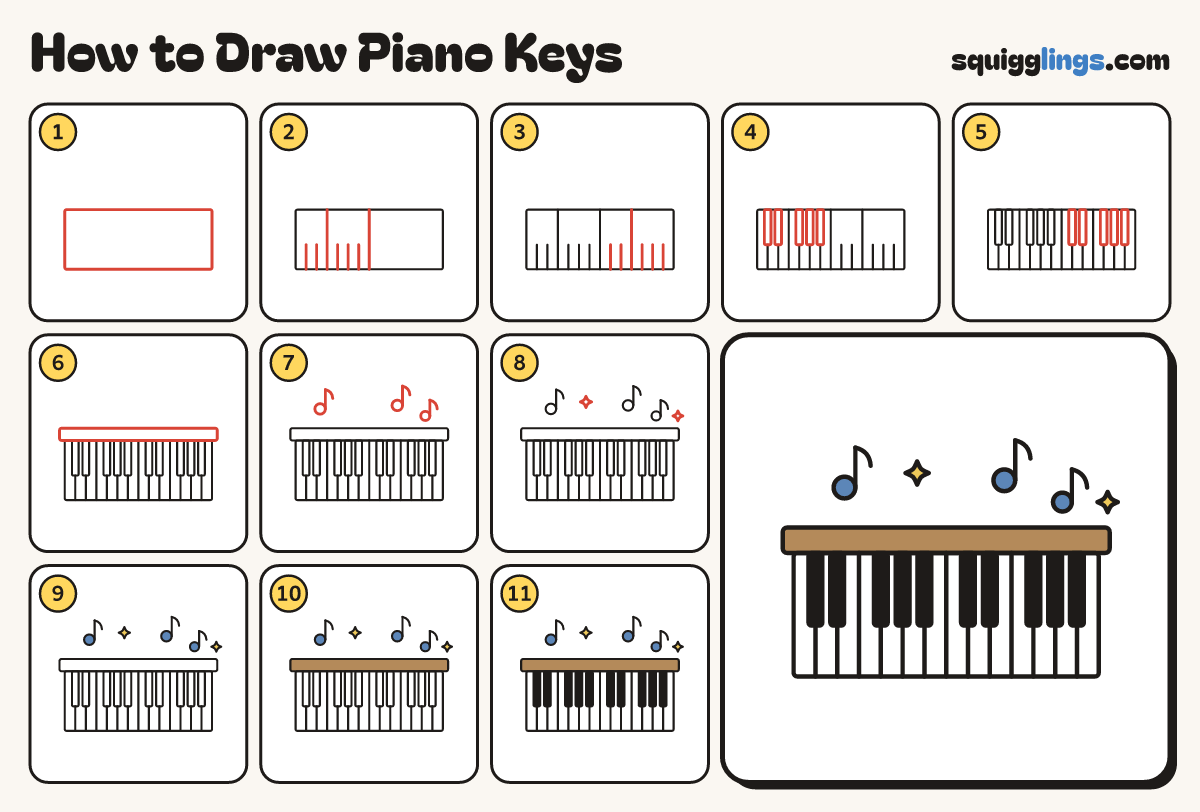
Each picture adds one red line. Draw that line, then scroll to the next picture. Rub out any dashed helper lines at the end. First up: the keyboard box.
Step 1: The keyboard box
From the middle down, draw one long flat box, most of the way across the paper, about a hand tall.
Tip Make it really wide: a piano has lots of keys in a row.
Step 2: Seven key lines
From the left, draw 7 straight lines down to the bottom edge, a finger apart, starting below the top.
Tip The 3rd and 7th lines go right to the top. The gaps leave room for black keys.
Step 3: More key lines
Keep going right with 6 more lines the same distance apart. The 3rd new line goes right to the top.
Tip Now the box is cut into 14 white keys.
Step 4: Left black keys
On the left half, hang 5 short thin boxes from the top edge, over the short lines: 2, then 3.
Tip Half as tall as white keys. Skip a line between the 2 and 3.
Step 5: Right black keys
On the right half, do the same again: 2 black keys, skip a line, then 3.
Step 6: The top rail
Above the keys, draw a long flat strip a little wider than the keyboard, sitting right on top of it.
Step 7: Music notes
Above the rail, draw 3 music notes floating up: a round dot with a stem and a little flag.
Step 8: Sparkles
Draw a sparkle star between the first 2 notes, and another one just after the last note.
Step 9: Blue notes, yellow sparkles
Go over your lines, then colour the sparkles yellow and the music notes blue.
Step 10: Wooden rail
Colour the top rail wood brown.
Step 11: Black keys
Colour all the short black keys black. Leave the long keys white. Ready to play a tune!
Your finished drawing
Follow the steps above and this is where you end up: piano keys, drawn by you.
Every step in one picture