Watch it draw itself · tap to replay
How to Draw a Phoenix Rising
Draw a phoenix rising in 12 easy steps, about 9 minutes. Free, with a printable worksheet.
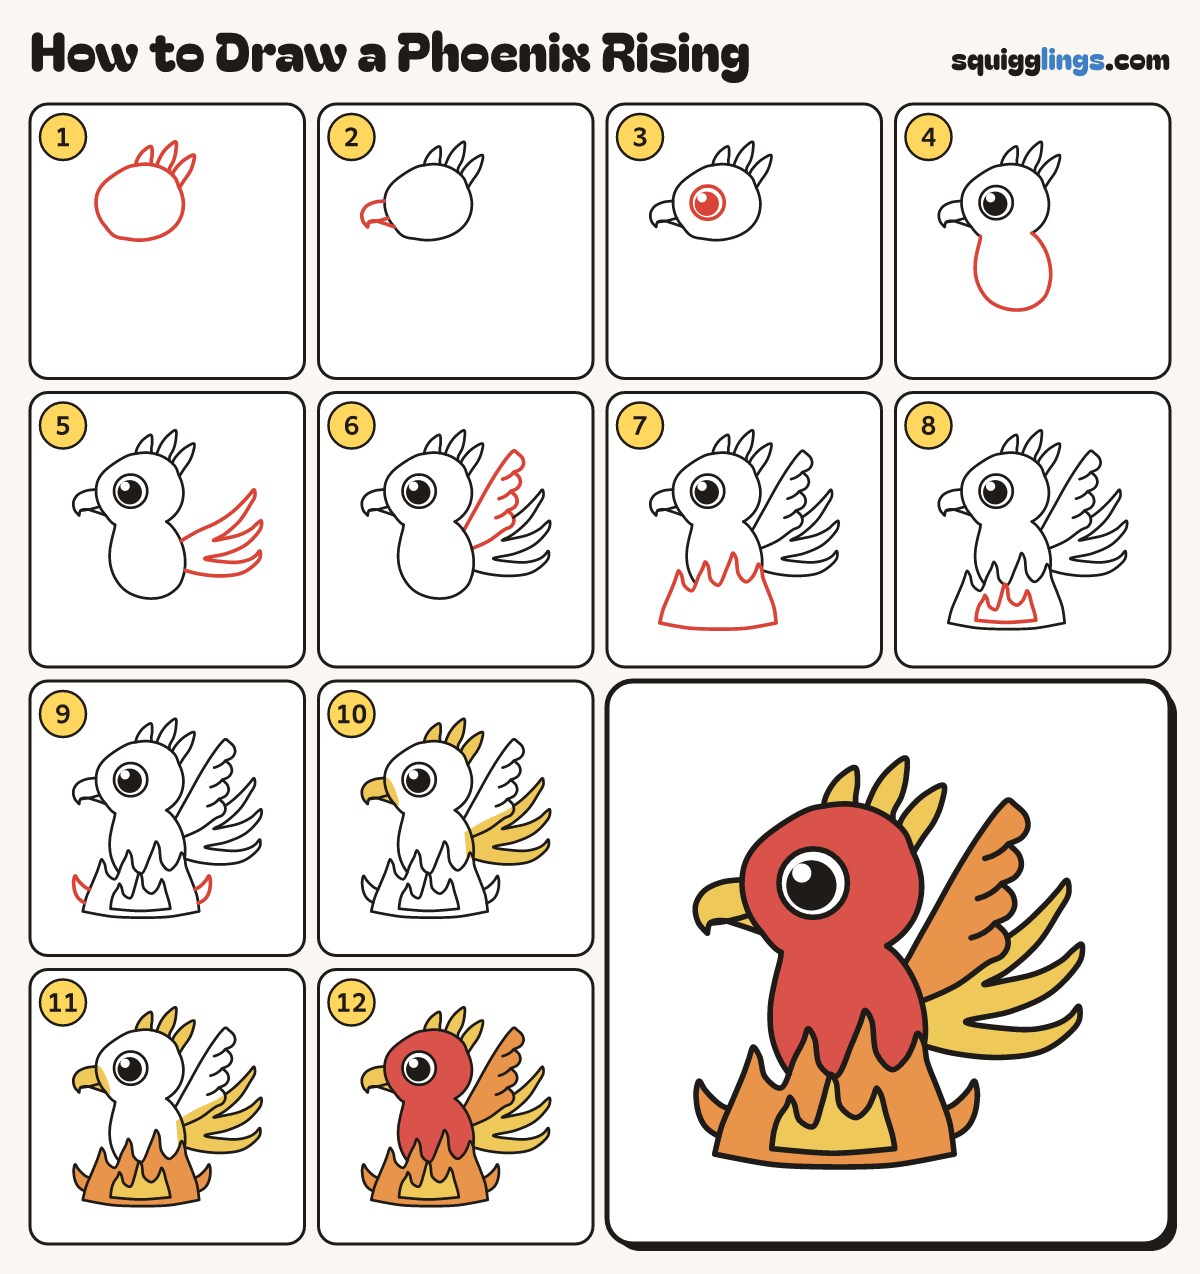
Each picture adds one red line. Draw that line, then scroll to the next picture. Rub out any dashed helper lines at the end. First up: round head.
Step 1: Round head
Near the top, in the middle, draw a big round head, a little wider than tall.
Step 2: Head flames
On top of the head draw 3 pointed flames: a tall one in the middle, one leaning out each side.
Step 3: Big eyes
On the head draw 2 big round eyes. Fill each with a black dot, leaving a white speck.
Step 4: Hooked beak
Between the eyes draw a small beak that comes down to a point. Add a curved line across it.
Tip Start the line on one side of the beak and stop on the other.
Step 5: Plump body
Under the head draw an egg for the body, a little smaller than the head.
Step 6: Raised wings
From each shoulder curve up and out to a round tip. Come back to the body in 4 feather bumps.
Tip Both wings reach up as high as the top of the head.
Step 7: Flame tail
Under the body draw 5 long pointed feathers in a fan: one straight down, two each side.
Step 8: Fire below
Under the tail draw a fire with 3 pointed flames, tallest in the middle. It hides the lowest feather tips.
Step 9: Flame inside
Inside the middle flame draw one small flame with a pointed top.
Step 10: Yellow flames and tail
Colour the head flames, the beak, the tail feathers and the little flame inside yellow.
Step 11: Orange wings and fire
Colour both wings orange. Colour the big flames orange, around the little yellow flame.
Step 12: Red bird
Go over your lines. Colour the head and body red, around the beak. Leave the eyes white.
Your finished drawing
Follow the steps above and this is where you end up: a phoenix rising, drawn by you.
Every step in one picture