Watch it draw itself · tap to replay
How to Draw Peas
Draw peas in 10 easy steps, about 8 minutes. Free, with a printable worksheet.
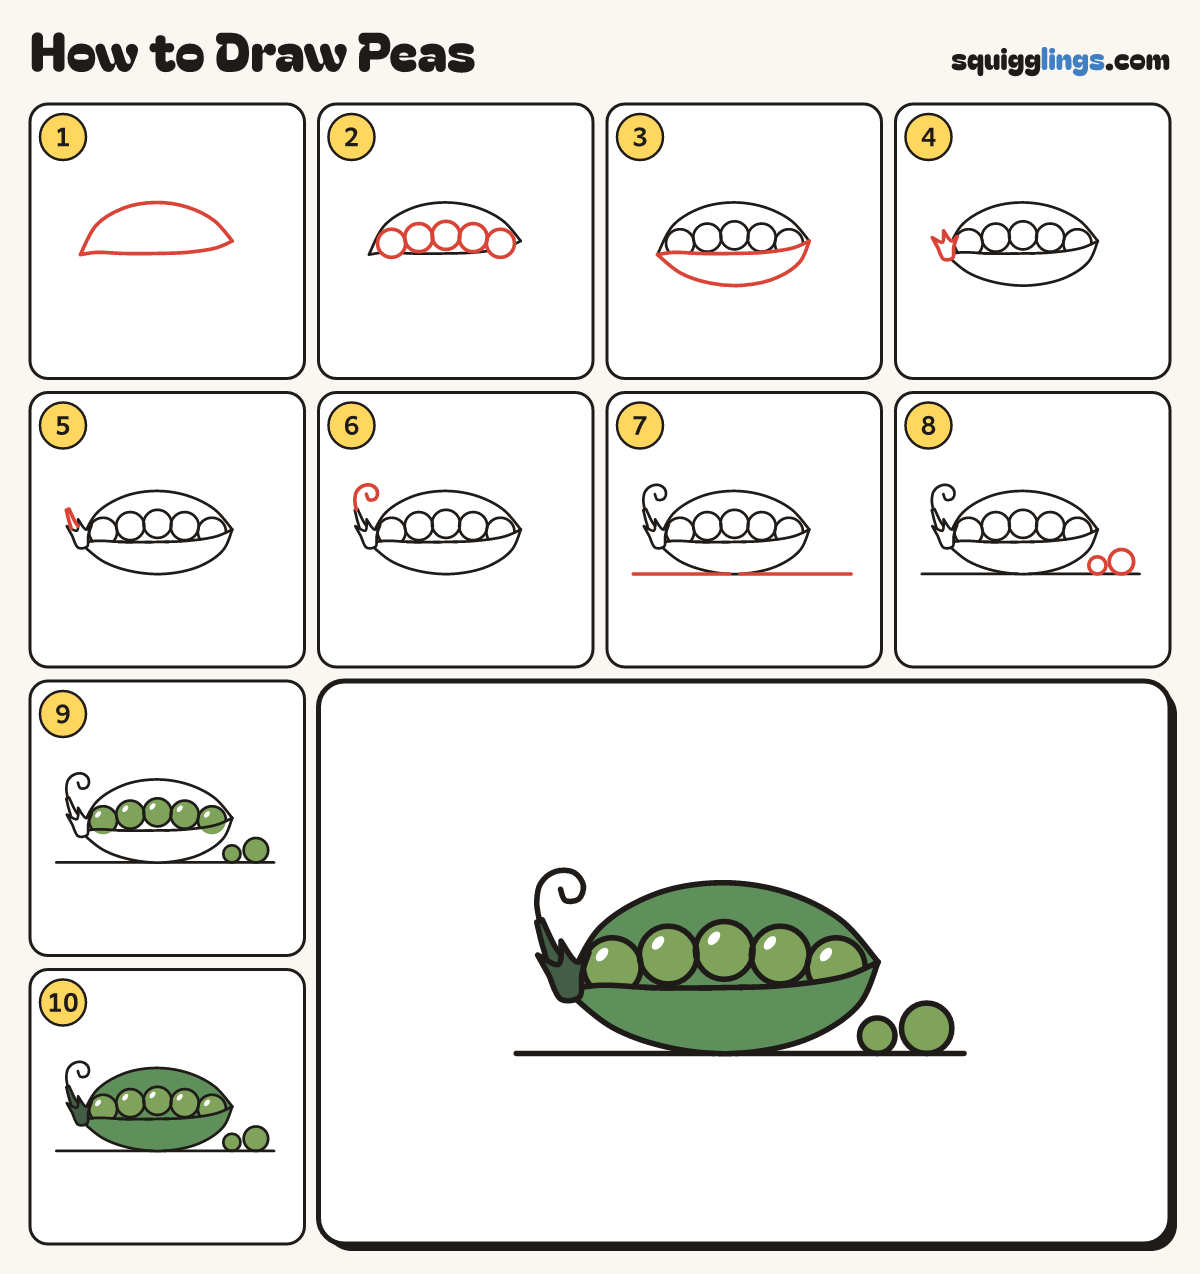
Each picture adds one red line. Draw that line, then scroll to the next picture. Rub out any dashed helper lines at the end. First up: back of the pod.
Step 1: Back of the pod
Across the middle of your paper draw a long low hill, pointed at both ends, with a straight bottom.
Tip Like a long boat seen from the side.
Step 2: Five peas
Sitting in the pod draw 5 round peas in a row, each as big as a grape.
Step 3: Front of the pod
From the left end draw a long shallow U under the peas to the right end. The peas sit inside.
Step 4: The cap
On the left end draw a little pointed cap with 3 points, like a tiny crown.
Step 5: Short stem
From the middle of the cap draw a short stem leaning up and left, thinner at the top.
Step 6: Curly tendril
From the stem tip draw a thin line up and over to the right, curling in like a snail.
Step 7: The ground
Draw a ground line under the pod, from left of the cap to well past the right end.
Step 8: Loose peas
On the ground right of the pod draw 2 loose peas, 1 small, 1 big, not touching.
Step 9: Leaf-green peas
Colour the peas leaf green, leaving a little white shine at the top left of each pea in the pod.
Step 10: Green pod and cap
Go over your lines. Colour the pod green around the peas, and the cap and stem dark green.
Your finished drawing
Follow the steps above and this is where you end up: peas, drawn by you.
Every step in one picture