Watch it draw itself · tap to replay
How to Draw a Paw Print
Draw a paw print in 5 easy steps, about 5 minutes. Free, with a printable worksheet.
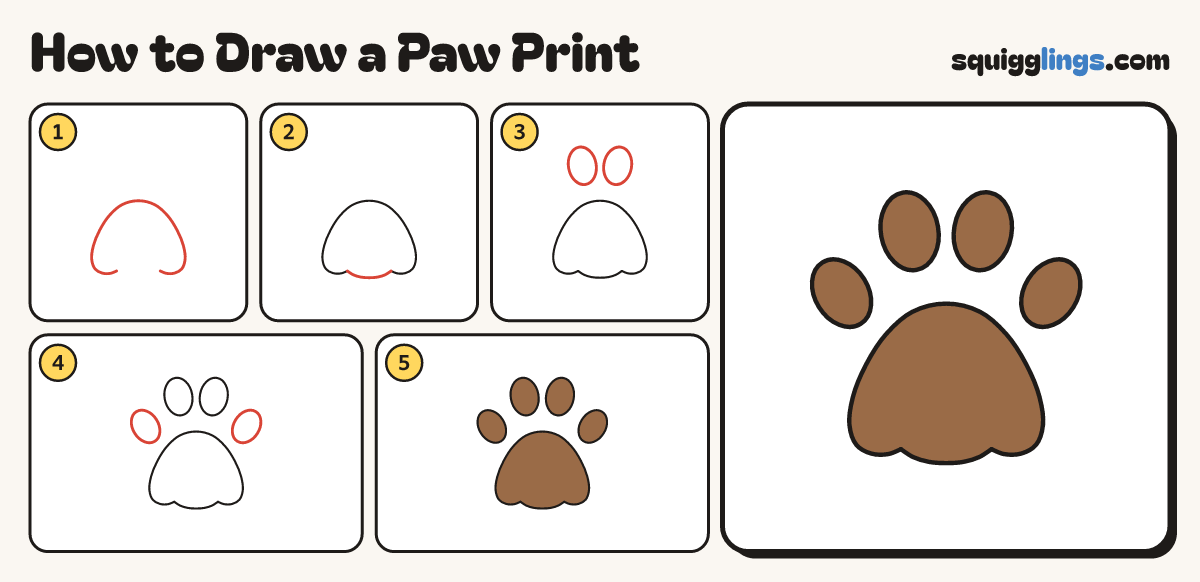
Each picture adds one red line. Draw that line, then scroll to the next picture. Rub out any dashed helper lines at the end. First up: pad top.
Step 1: Pad top
Start low on the left. Draw a bump, a big rainbow hill, a bump, and stop low on the right.
Tip Keep the hill wide at the bottom, like a soft triangle.
Step 2: Middle bump
Start at the right end. Draw one fat bump underneath, a little lower, and stop at the left end.
Tip Now the pad has 3 soft bumps along the bottom.
Step 3: Two top toes
Above the pad, draw 2 tall egg toes side by side, a finger above the pad.
Tip Leave a gap between the toes and the pad: a paw print never touches.
Step 4: Two side toes
Draw one more egg toe on each side, lower down and leaning out, so the 4 toes make a rainbow.
Step 5: Brown print
Go over your lines, then colour the big pad and all 4 toes brown.
Your finished drawing
Follow the steps above and this is where you end up: a paw print, drawn by you.
Every step in one picture