Watch it draw itself · tap to replay
How to Draw a Parka Fur Hood
Draw a parka fur hood in 13 easy steps, about 10 minutes. Free, with a printable worksheet.
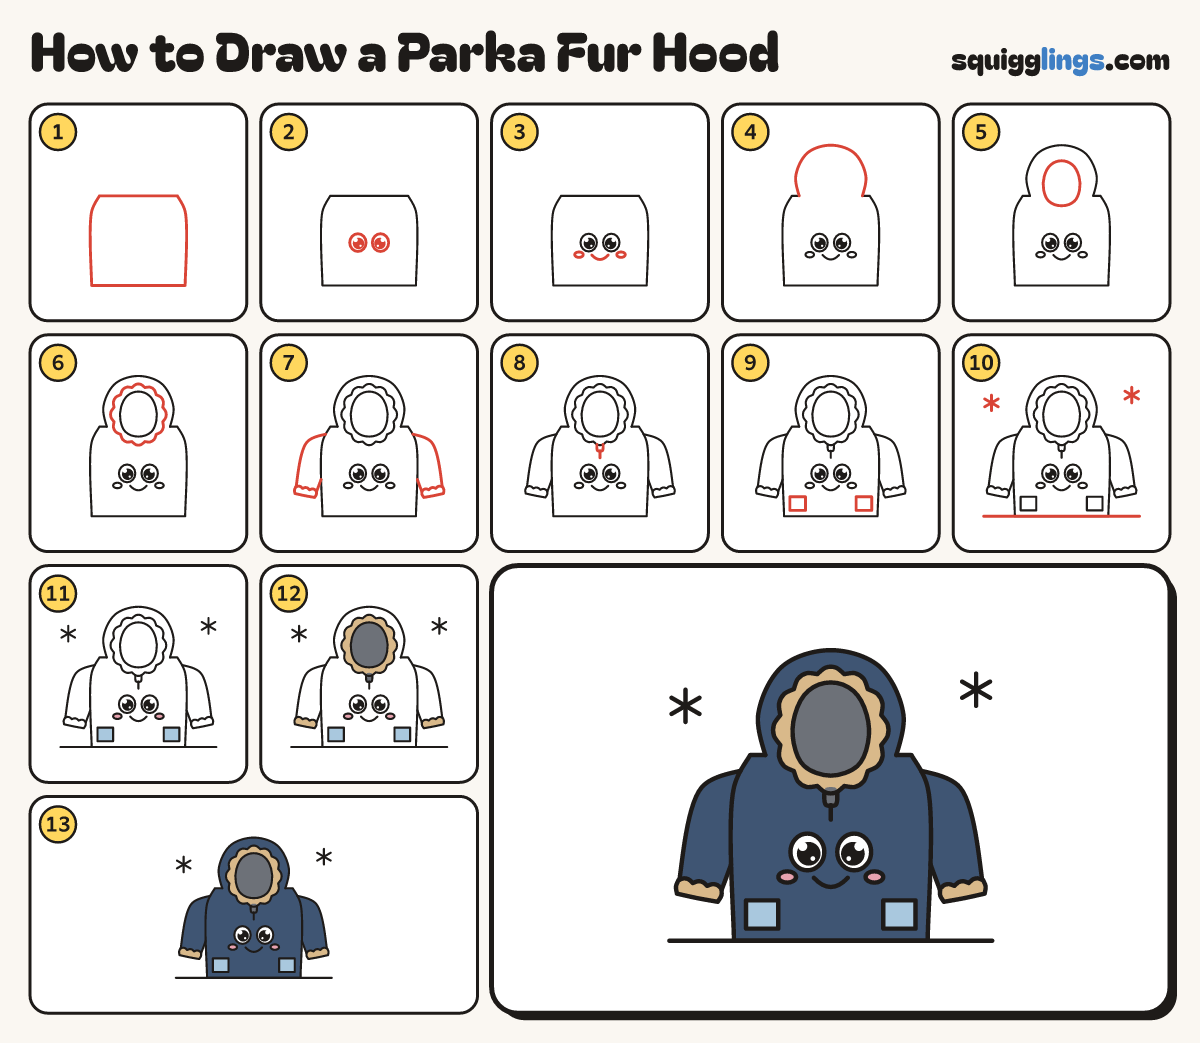
Each picture adds one red line. Draw that line, then scroll to the next picture. Rub out any dashed helper lines at the end. First up: the body.
Step 1: The body
Draw a long puffy coat body: a wide rounded box from above the middle down to near the bottom.
Tip A parka is a long warm coat with a big furry hood.
Step 2: Two big eyes
On the chest draw 2 big egg eyes an eye apart. Colour a black dot in each, leaving a shine.
Step 3: Smile and cheeks
Under the eyes draw a U smile, and a small flat oval cheek beside each end.
Step 4: The hood
On top of the body draw a big round hood from shoulder to shoulder. Rub out the line inside it.
Step 5: The hood opening
In the hood draw a tall oval opening, dipping below the coat top. Add a short seam from its top.
Step 6: The fur trim
Around the opening draw a bumpy fur ring, a little way out from it, all the way round.
Step 7: Sleeves and fur cuffs
From each shoulder draw a long sleeve hanging down, bending a little, with a fluffy fur cuff at the end.
Step 8: The zip
Under the fur collar draw a small pull tab, then a short zip line down, stopping above the eyes.
Step 9: Pockets
Draw a small box pocket low on each side of the coat, below the cheeks.
Step 10: Ground and snowflakes
Draw a ground line from left to right under the coat, and a little 6-arm snowflake high up each side.
Step 11: Sky pockets, pink cheeks
Colour the pockets sky blue and the cheeks pink. Cosy in the snow!
Step 12: Tan fur, cream inside
Colour the fur ring, both cuffs and the zip tab tan, and the inside of the hood cream.
Step 13: Navy parka
Go over your lines. Colour the parka navy around the face, pockets, fur and tab, leaving the eyes white.
Your finished drawing
Follow the steps above and this is where you end up: a parka fur hood, drawn by you.
Every step in one picture