Watch it draw itself · tap to replay
How to Draw a Paramecium
Draw a paramecium in 11 easy steps, about 8 minutes. Free, with a printable worksheet.
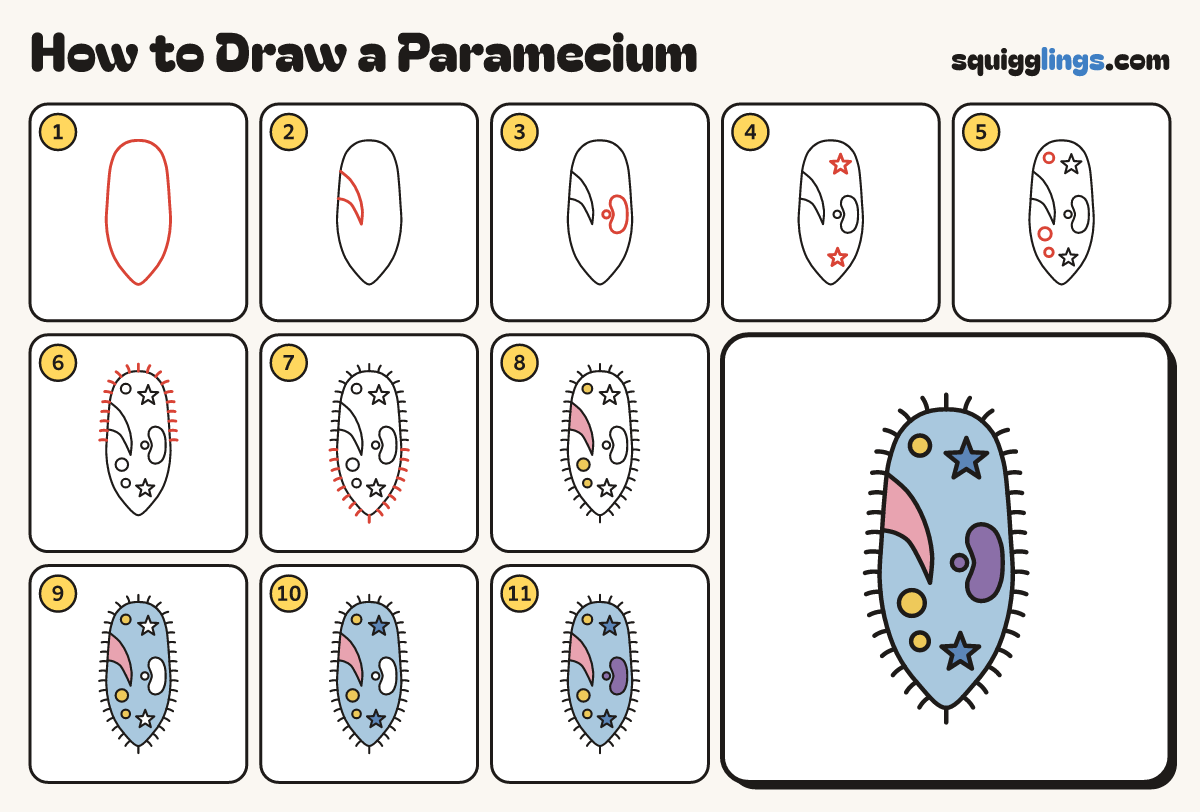
Each picture adds one red line. Draw that line, then scroll to the next picture. Rub out any dashed helper lines at the end. First up: the slipper body.
Step 1: The slipper body
Draw a tall slipper shape: round at the top, widest below the middle, a little pointed at the bottom.
Tip Make it about twice as tall as it is wide.
Step 2: The mouth groove
Start high on the left edge. Draw a curved horn pointing down into the middle. Stop on the edge below.
Tip A paramecium sweeps its food into this groove.
Step 3: The nucleus
On the right of the middle draw a big bean standing up. Add a small circle in its dent.
Step 4: Star bubbles
Draw 2 little stars: one near the top and one near the bottom.
Tip These star bubbles squeeze out extra water.
Step 5: Food bubbles
Draw 3 round bubbles of different sizes in the empty spaces, not touching anything.
Step 6: Hairs on top
All round the top half of the body draw short hairs sticking out, a finger apart.
Step 7: Hairs below
Carry on all round the bottom half, so the whole body is hairy.
Tip The hairs are called cilia. They row the paramecium through the water.
Step 8: Yellow and pink
Colour the 3 round bubbles yellow and the groove pink.
Step 9: Light blue body
Colour the body light blue, going around the bubbles, the groove, the stars and the bean.
Step 10: Blue stars
Colour the 2 star bubbles a darker blue.
Step 11: Purple nucleus
Colour the bean and its small circle purple. Go over your lines and your paramecium is done!
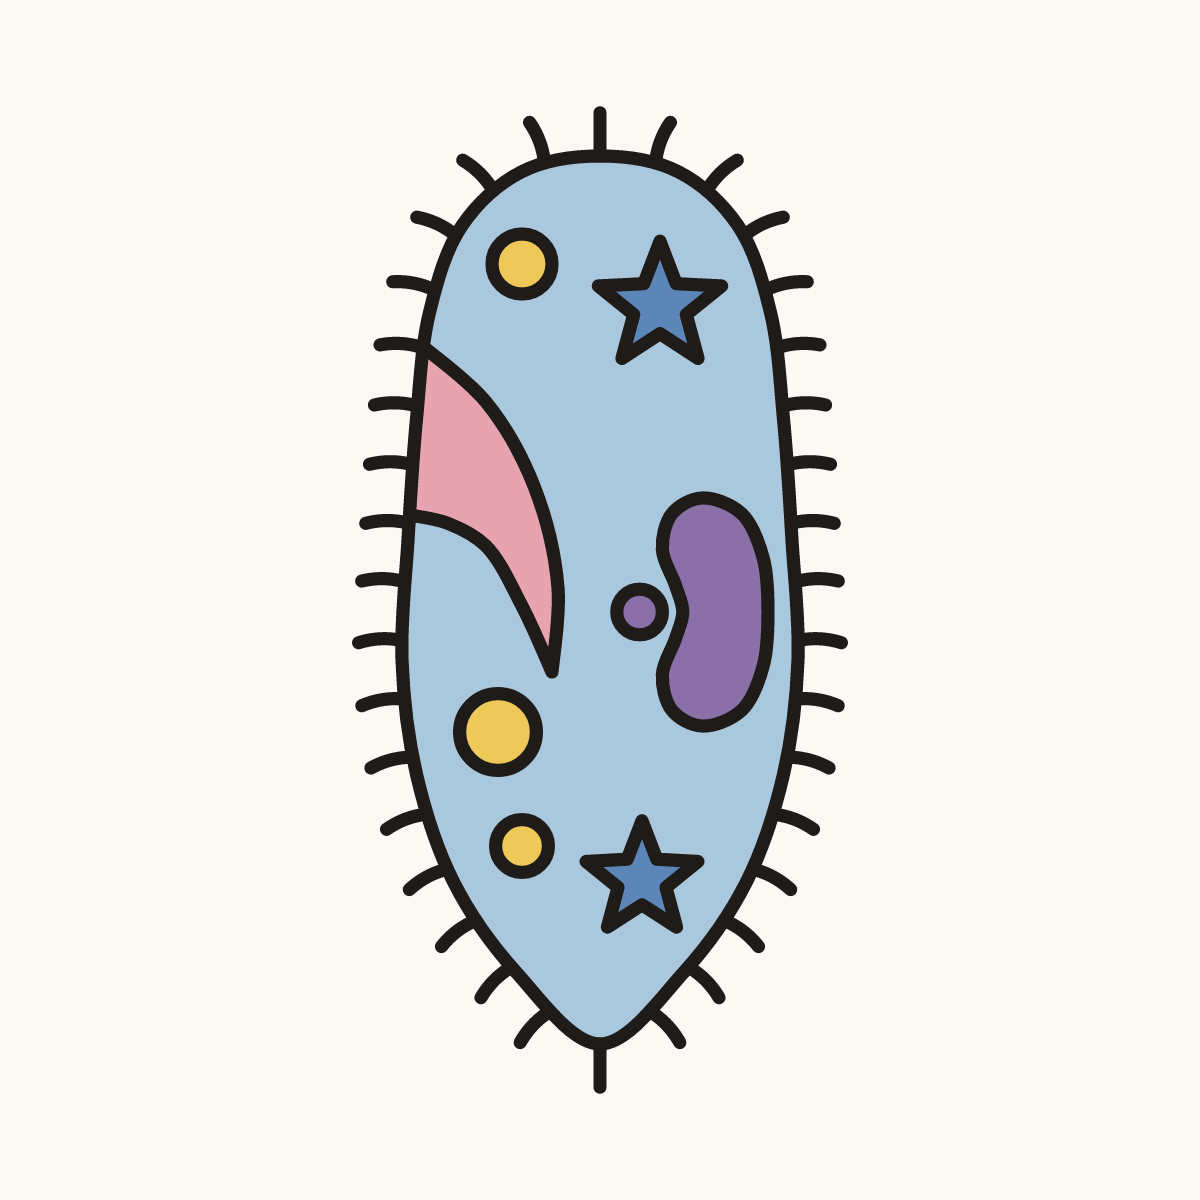
Your finished drawing
Follow the steps above and this is where you end up: a paramecium, drawn by you.
Every step in one picture