Watch it draw itself · tap to replay
How to Draw a Panther Paw
Draw a panther paw in 10 easy steps, about 8 minutes. Free, with a printable worksheet.
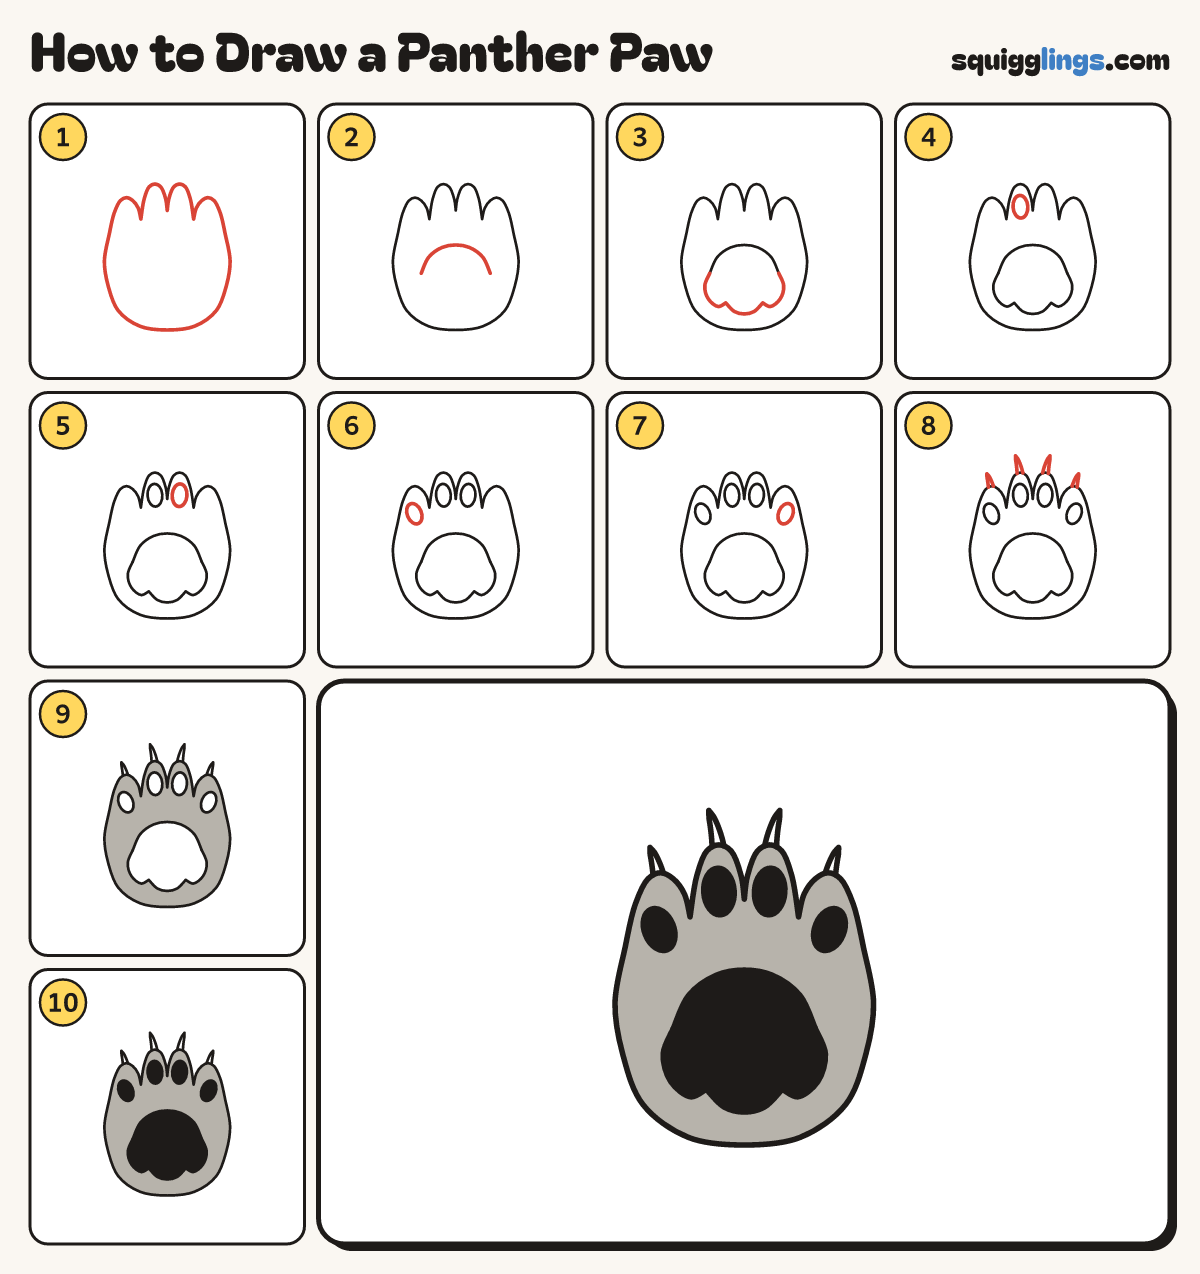
Each picture adds one red line. Draw that line, then scroll to the next picture. Rub out any dashed helper lines at the end. First up: the paw.
Step 1: The paw
In the middle of your paper, draw a big rounded paw like a fat mitten, with 4 toe bumps.
Tip The middle 2 toe bumps are taller, like the top of a cloud.
Step 2: The big pad
Below the toe bumps, draw a wide rainbow for the top of the pad. Start left and stop right.
Step 3: Three pad bumps
Start at the right end of the rainbow. Draw 3 round bumps under it, and stop at the left end.
Step 4: First middle bean
Inside the left tall toe bump, draw a small oval toe bean standing up, not touching the paw line.
Step 5: Second middle bean
Inside the right tall toe bump, draw a matching oval bean.
Step 6: Left side bean
Inside the left low toe bump, draw a smaller oval bean leaning outward.
Step 7: Right side bean
Inside the right low toe bump, draw a smaller oval bean leaning outward, the same as the left.
Step 8: Claws out
From the top of each toe bump, draw a curved claw pointing up to a sharp tip.
Tip Make the 2 side claws a little shorter than the middle 2.
Step 9: Colour the fur grey
Colour the whole paw grey around the big pad and the 4 toe beans, pressing softly.
Step 10: Black pads
Colour the big pad and the 4 toe beans black. Leave the claws white. Go over your lines. Done!
Your finished drawing
Follow the steps above and this is where you end up: a panther paw, drawn by you.
Every step in one picture