Watch it draw itself · tap to replay
How to Draw a Pack of Gum
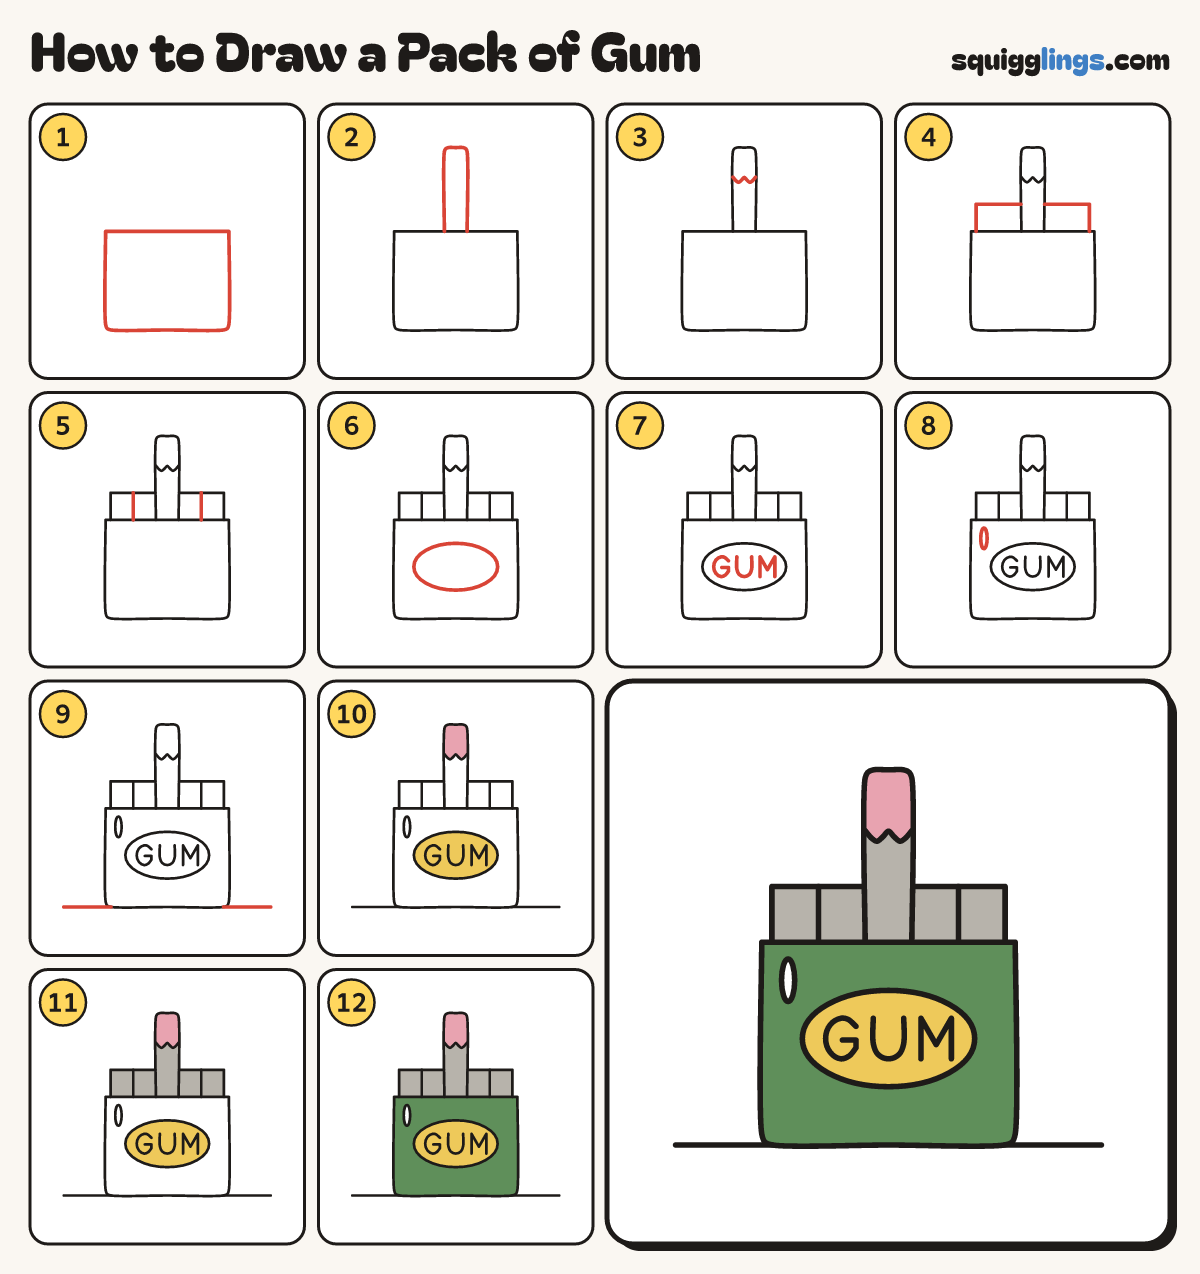
Draw a pack of gum in 12 easy steps, about 9 minutes. Free, with a printable worksheet.
Each picture adds one red line. Draw that line, then scroll to the next picture. Rub out any dashed helper lines at the end. First up: the pack.
Step 1: The pack
In the bottom half draw a wide box with a flat top and softly rounded bottom corners.
Tip Leave lots of room above it for the sticks of gum.
Step 2: The tall stick
Start in the middle of the pack's top. Draw a tall stick up, over and down. Stop on the pack.
Step 3: Torn foil
Start on the stick's left side, near the top. Draw a wavy line across. Stop on its right side.
Tip Above the wavy line is the gum. Below it is the foil wrapper.
Step 4: Short sticks
Start beside the tall stick. Draw a low box on each side: across, then down. Stop on the pack.
Step 5: Split the sticks
Start on the top of each low box, in the middle. Draw a line down. Stop on the pack.
Tip Now there are 5 sticks: 2 short, 1 tall, 2 short.
Step 6: The label
In the middle of the pack draw a big oval lying on its side for the label.
Step 7: Write GUM
Inside the label write GUM in big capital letters.
Tip Put the U in the middle first, then the G and the M each side.
Step 8: A shine
Near the top left corner of the pack draw a tiny tall oval sliver for a shine.
Step 9: The ground
Start left of the pack, level with its bottom. Draw a ground line across. Stop right of the pack.
Step 10: Yellow and pink
Go over your lines. Colour the label yellow, around the letters. Colour the gum at the top pink.
Step 11: Grey foil
Colour the foil on all 5 sticks grey, below the wavy line.
Step 12: Green pack
Colour the pack green around the label, leaving the shine white. Your pack of gum is done!
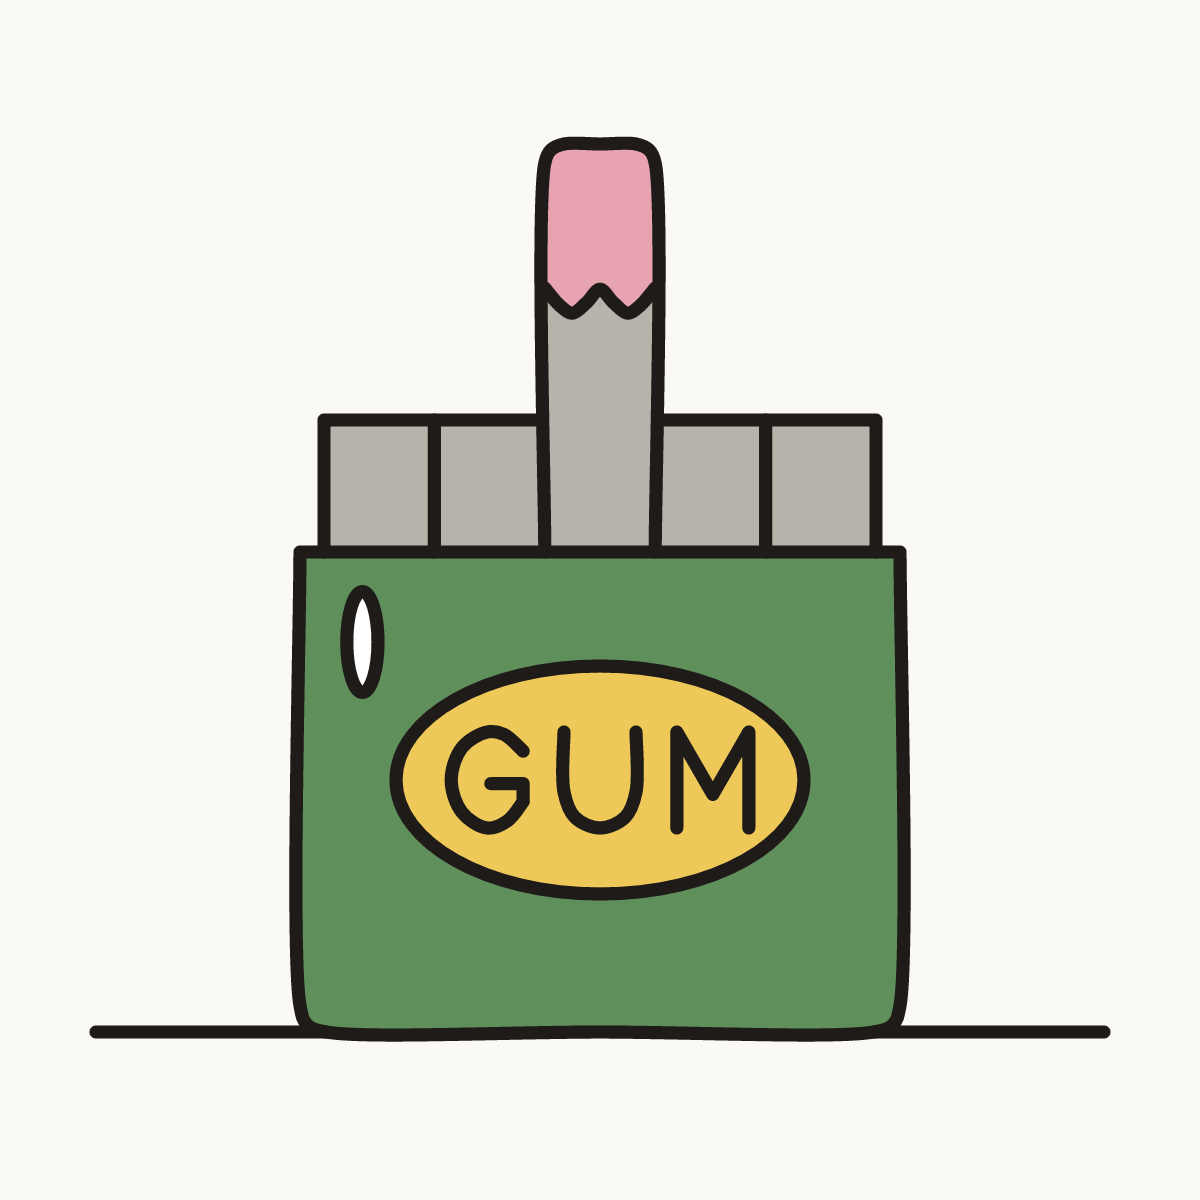
Your finished drawing
Follow the steps above and this is where you end up: a pack of gum, drawn by you.
Every step in one picture