Watch it draw itself · tap to replay
How to Draw an Osprey Flying
Draw an osprey flying in 12 easy steps, about 9 minutes. Free, with a printable worksheet.
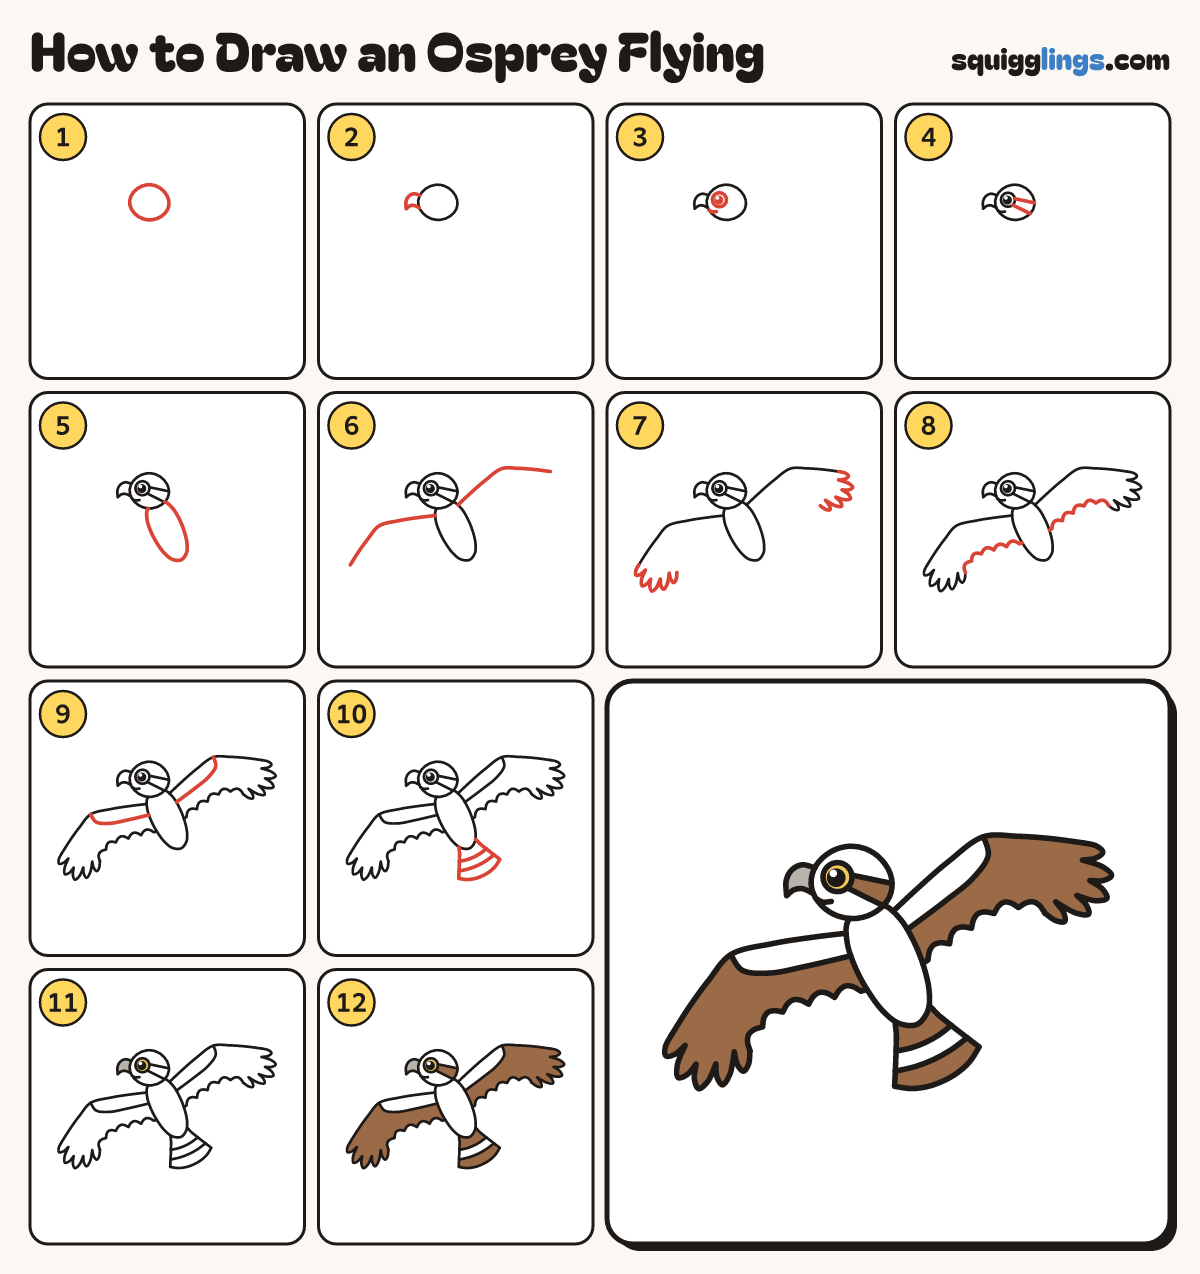
Each picture adds one red line. Draw that line, then scroll to the next picture. Rub out any dashed helper lines at the end. First up: round head.
Step 1: Round head
A little above the middle of the page, draw a round head, a bit flatter underneath.
Step 2: Hooked beak
On the left of the head, draw a short beak. Hook its tip down to a point.
Step 3: Eye and smile
Draw a big round eye with a dark pupil and a white shine. Add a tiny smile under the beak.
Step 4: Eye stripe
Start at the back of the eye. Draw 2 lines to the back of the head, spreading apart.
Tip This dark stripe through the eye is how you spot an osprey.
Step 5: Long body
Start under the head. Draw a long egg body that slants down to the right.
Tip We are looking up at the osprey as it flies over us.
Step 6: Wing tops
Start at each shoulder. Draw a long line out to a bend, then slant back a little and stop.
Step 7: Finger feathers
Start at the end of each wing line. Draw 5 feather tips side by side, the middle one longest.
Tip Count them: 5 feather tips on each wing, close together.
Step 8: Wing bottoms
Start at the last feather. Draw 5 small bumps back to the body and stop. Do both wings.
Step 9: Feather lines
Start at the bend of each wing. Draw a curved line along the wing to the body and stop.
Step 10: Banded tail
At the end of the body, draw a fan tail with a curved end. Draw 2 curved lines across it.
Tip The feet are tucked up under the tail, so we cannot see them.
Step 11: Yellow and grey
Colour the eye yellow. Colour the beak grey.
Step 12: Brown feathers
Colour the wing feathers, the eye stripe and 2 tail bands brown. Leave the head, tummy and wing fronts white.
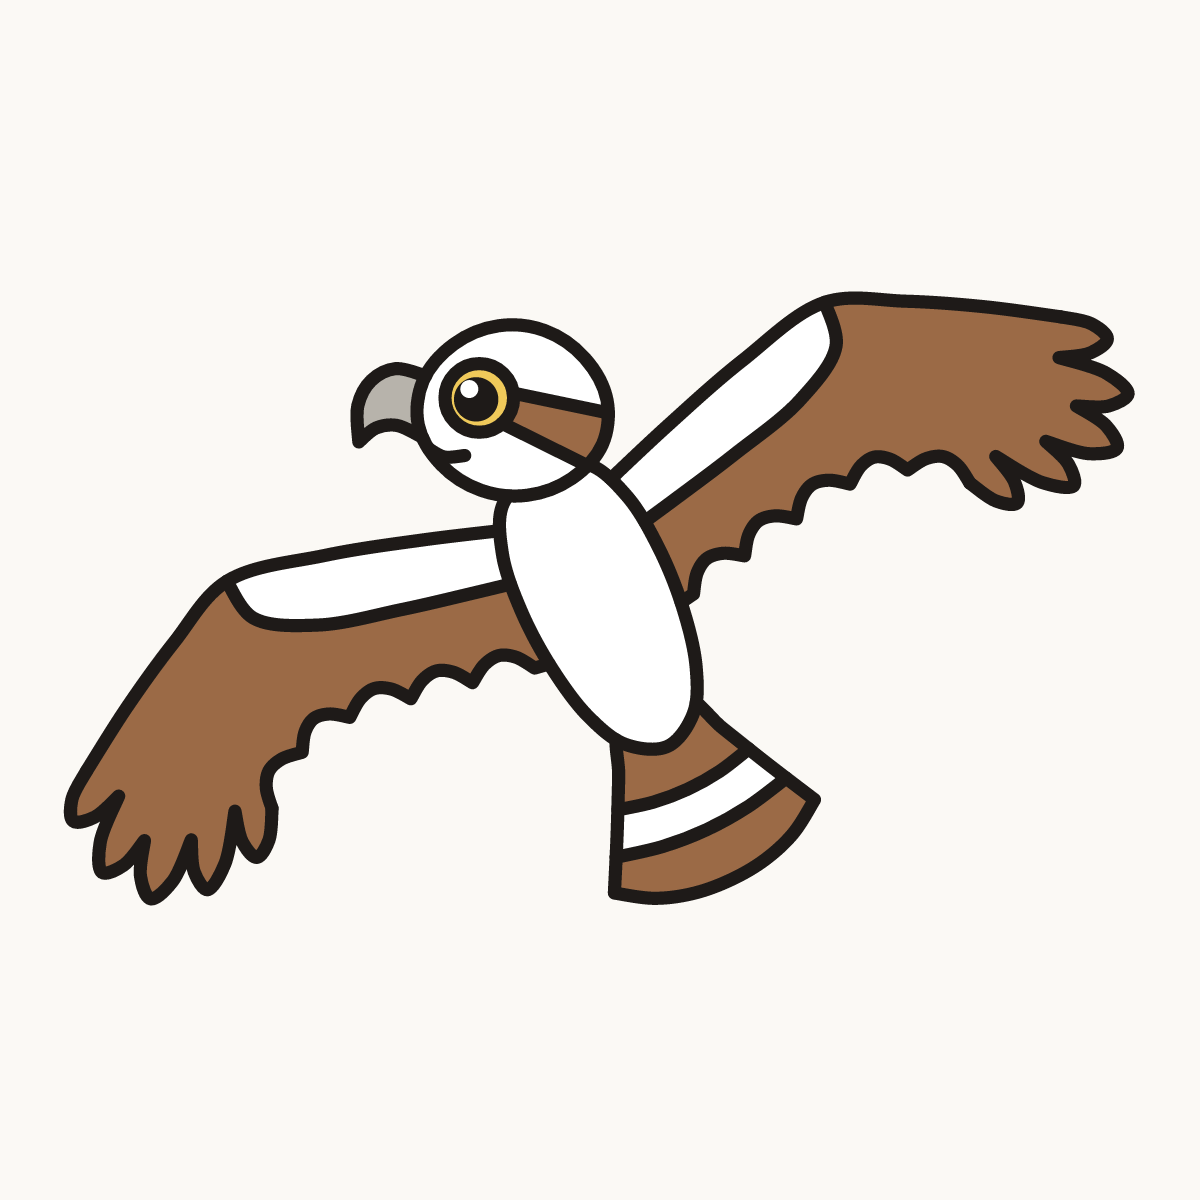
Your finished drawing
Follow the steps above and this is where you end up: an osprey flying, drawn by you.
Every step in one picture