Watch it draw itself · tap to replay
How to Draw an Organ
Draw an organ in 13 steps, about 10 minutes. Free, with a printable worksheet.
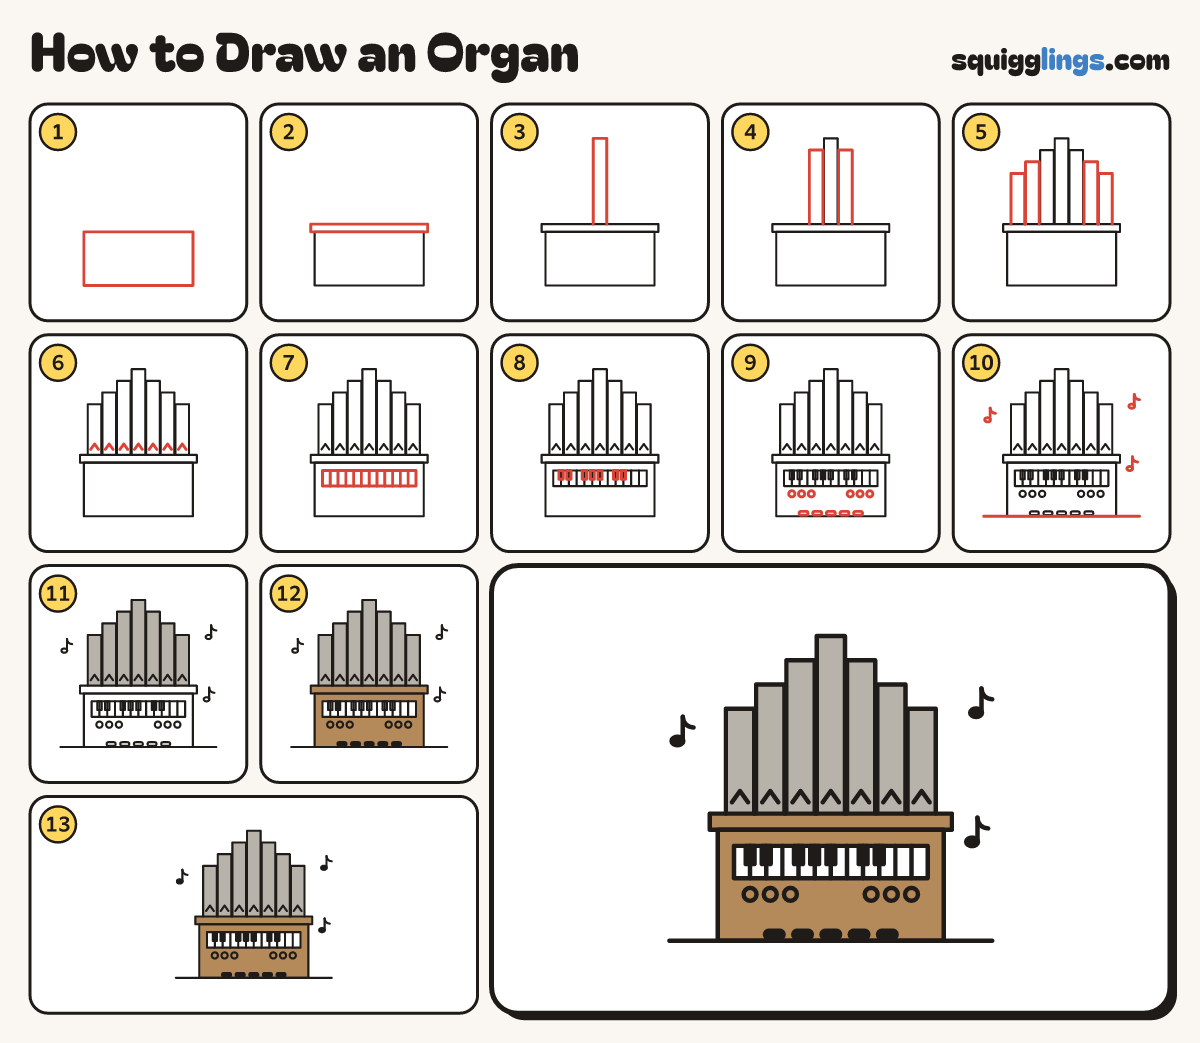
Each picture adds one red line. Draw that line, then scroll to the next picture. Rub out any dashed helper lines at the end. First up: the big box.
Step 1: The big box
Low on your paper draw a wide box standing on the ground for the front of the organ.
Tip An organ is a keyboard with a row of tall pipes standing behind it.
Step 2: The top shelf
On top of the box draw a long flat shelf, a little wider than the box.
Step 3: The tallest pipe
In the middle, behind the shelf, draw a tall thin pipe reaching up to near the top of the paper.
Step 4: Two more pipes
On each side of the tallest pipe draw a pipe a little shorter, side by side, standing on the shelf.
Step 5: The last pipes
Keep going: 2 more pipes shorter again, and 2 shorter still at the ends, so the pipes make a peak.
Step 6: Pipe mouths
Just above the shelf, draw a little upside-down V on each pipe for its mouth.
Step 7: The keys
On the box draw a long flat strip for the keyboard, with lines across it for the white keys.
Step 8: Black keys
At the top of the strip draw short fat bars for the black keys, in groups of 2 and 3.
Step 9: Stops and pedals
Draw 3 little circles each side under the keys for stops, and 5 flat pedals along the box bottom.
Step 10: Notes and ground
Draw 3 music notes in the air around the organ, and a ground line under it from left to right.
Step 11: Grey pipes
Go over your lines, then colour the pipes grey.
Step 12: Wood box, black pedals
Colour the box and the shelf brown, around the keys and the pedals. Colour the pedals black.
Step 13: Black keys and notes
Colour the black keys and the note heads black.
Your finished drawing
Follow the steps above and this is where you end up: an organ, drawn by you.
Every step in one picture