Watch it draw itself · tap to replay
How to Draw an Orchid
Draw an orchid in 11 easy steps, about 8 minutes. Free, with a printable worksheet.
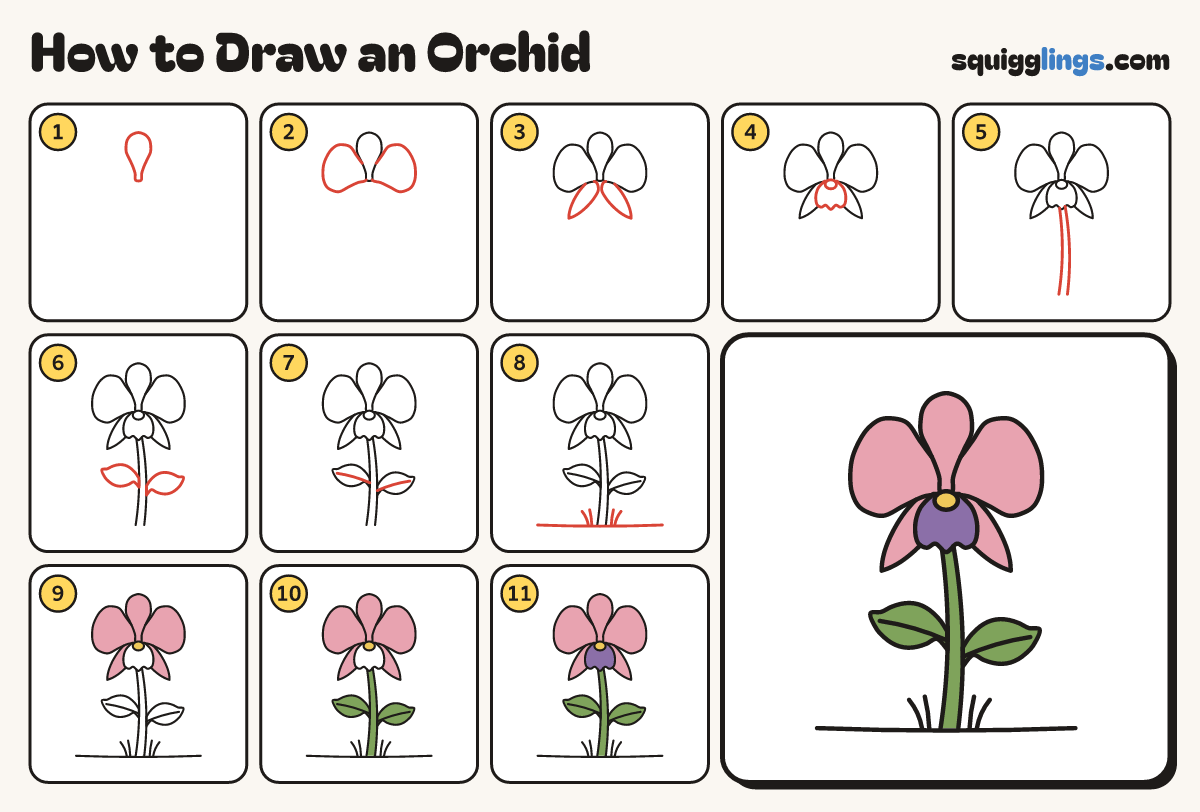
Each picture adds one red line. Draw that line, then scroll to the next picture. Rub out any dashed helper lines at the end. First up: the top petal.
Step 1: The top petal
Near the top, pick a middle spot. From it, draw a narrow petal straight up and back to the spot.
Step 2: Two wide petals
From the spot, draw a big wide round petal out to the left, like an egg. Same on the right.
Step 3: Two lower petals
From the spot, draw a narrow pointed petal down-left, then one down-right, so 5 petals make a star.
Step 4: The frilly lip
Under the spot, draw a small lip with 3 bumps along its bottom. Add a tiny oval throat.
Step 5: The stem
Start under the lip. Draw a curved line down to near the bottom. Add another a finger to the right.
Step 6: Two leaves
A hand below the flower, draw a fat leaf pointing left from the stem. Draw another lower on the right.
Step 7: Leaf veins
From the stem, draw one curved vein out along the middle of each leaf, stopping short of the tip.
Step 8: Ground and grass
Draw a soft sagging ground line across the bottom of the stem. Flick 2 grass blades up on each side.
Step 9: Yellow and pink
Colour the tiny throat yellow. Colour all 5 petals pink, going around the lip.
Step 10: Green stem and leaves
Colour the stem and both leaves green.
Step 11: Purple lip
Colour the lip purple around the yellow throat. Go over your lines and your orchid is done!
Your finished drawing
Follow the steps above and this is where you end up: an orchid, drawn by you.
Every step in one picture