Watch it draw itself · tap to replay
How to Draw an Omelette
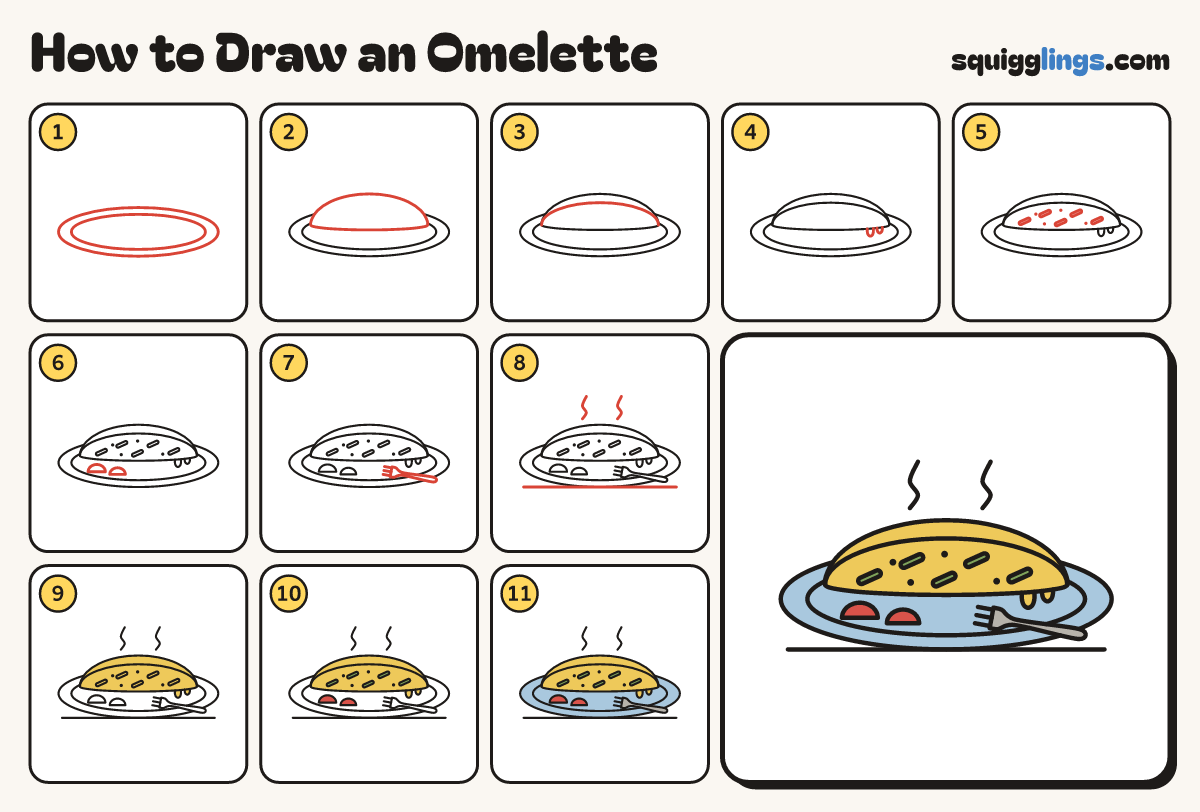
Draw an omelette in 11 easy steps, about 8 minutes. Free, with a printable worksheet.
Each picture adds one red line. Draw that line, then scroll to the next picture. Rub out any dashed helper lines at the end. First up: a plate.
Step 1: A plate
A little below the middle, draw a long flat oval plate. Add a second oval inside for the rim.
Tip The plate comes first; the food sits inside the rim.
Step 2: The omelette
On the plate, draw a long low half-moon lying down: a gentle hill with a flat bottom.
Step 3: The fold
Just under the top edge, draw a curved line from one end of the omelette to the other.
Step 4: Melting cheese
At the right end, draw 2 little U drips hanging down from the bottom edge.
Step 5: Chives and pepper
Under the fold line, draw 5 tiny slanted rods for chives and 4 tiny dots for pepper.
Step 6: Tomato halves
On the plate in front, at the left, draw 2 little domes for cherry tomato halves.
Step 7: A fork
On the right of the plate, draw a fork: a long thin handle, a wider head and 3 tines.
Step 8: Steam and table
Above the omelette, draw 2 wavy steam lines going up. Draw a long table line under the plate.
Step 9: Yellow omelette
Go over your lines. Colour the omelette and the cheese drips yellow, going around the chives.
Step 10: Green chives, red tomatoes
Colour the chives green and the tomatoes red.
Step 11: Sky plate, grey fork
Colour the plate sky blue around the food and fork, then colour the fork grey. Your omelette is done!
Your finished drawing
Follow the steps above and this is where you end up: an omelette, drawn by you.
Every step in one picture