Watch it draw itself · tap to replay
How to Draw a Money Bag
Draw a money bag in 11 easy steps, about 8 minutes. Free, with a printable worksheet.
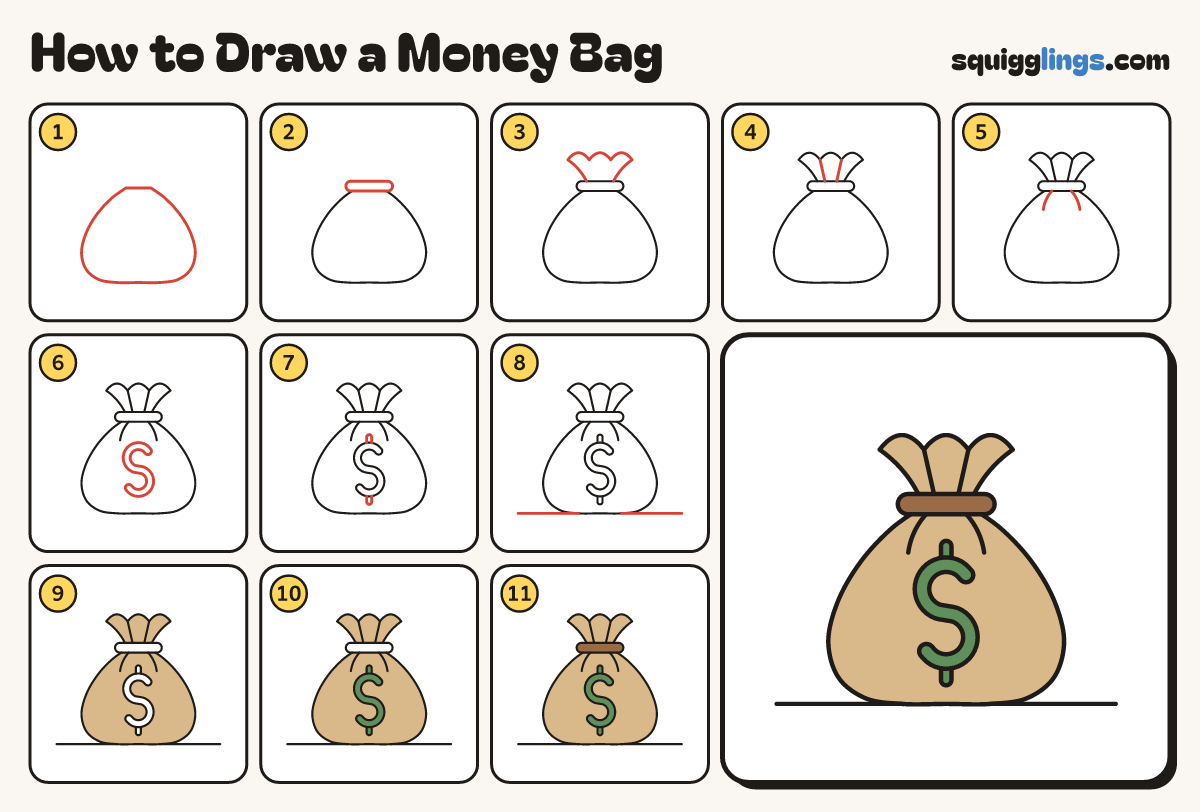
Each picture adds one red line. Draw that line, then scroll to the next picture. Rub out any dashed helper lines at the end. First up: the fat sack.
Step 1: The fat sack
In the middle of your paper draw a fat round sack with a flat bottom and a narrow flat top.
Tip Make it widest low down, like a pear, so it looks full and heavy.
Step 2: The rope tie
Across the narrow top draw a short fat band with round ends for the rope tie.
Tip Let the band poke out a little past each side of the neck.
Step 3: The ruffled top
From the tie draw 2 sides fanning up and out. Join them with 3 hill bumps.
Tip The cloth bunches up above the rope, so the top is wider than the tie.
Step 4: Gather lines
Start at each dip between the bumps. Draw a line down, stopping on the tie.
Step 5: Sack creases
Start under the tie. Draw 2 short curved lines fanning down and out, stopping a finger below.
Step 6: A big S
In the middle of the sack draw a fat bubble S with round ends.
Tip Draw a thin S first, then draw round it to make it fat.
Step 7: Dollar bars
Draw a short fat bar poking up from the top of the S, and one poking down.
Tip Line the 2 bars up, as if 1 straight bar ran behind the S.
Step 8: The table
Start left of the sack. Draw a straight line under it, stopping out past the right side.
Step 9: Tan sack
Colour the sack and its ruffled top tan. Go around the dollar sign and leave it white.
Step 10: Green dollar sign
Colour the S and its 2 bars green.
Step 11: Brown rope
Colour the rope tie brown. Go over all your lines and your money bag is done!
Your finished drawing
Follow the steps above and this is where you end up: a money bag, drawn by you.
Every step in one picture