Watch it draw itself · tap to replay
How to Draw a Marabou Stork
Draw a marabou stork in 12 easy steps, about 9 minutes. Free, with a printable worksheet.
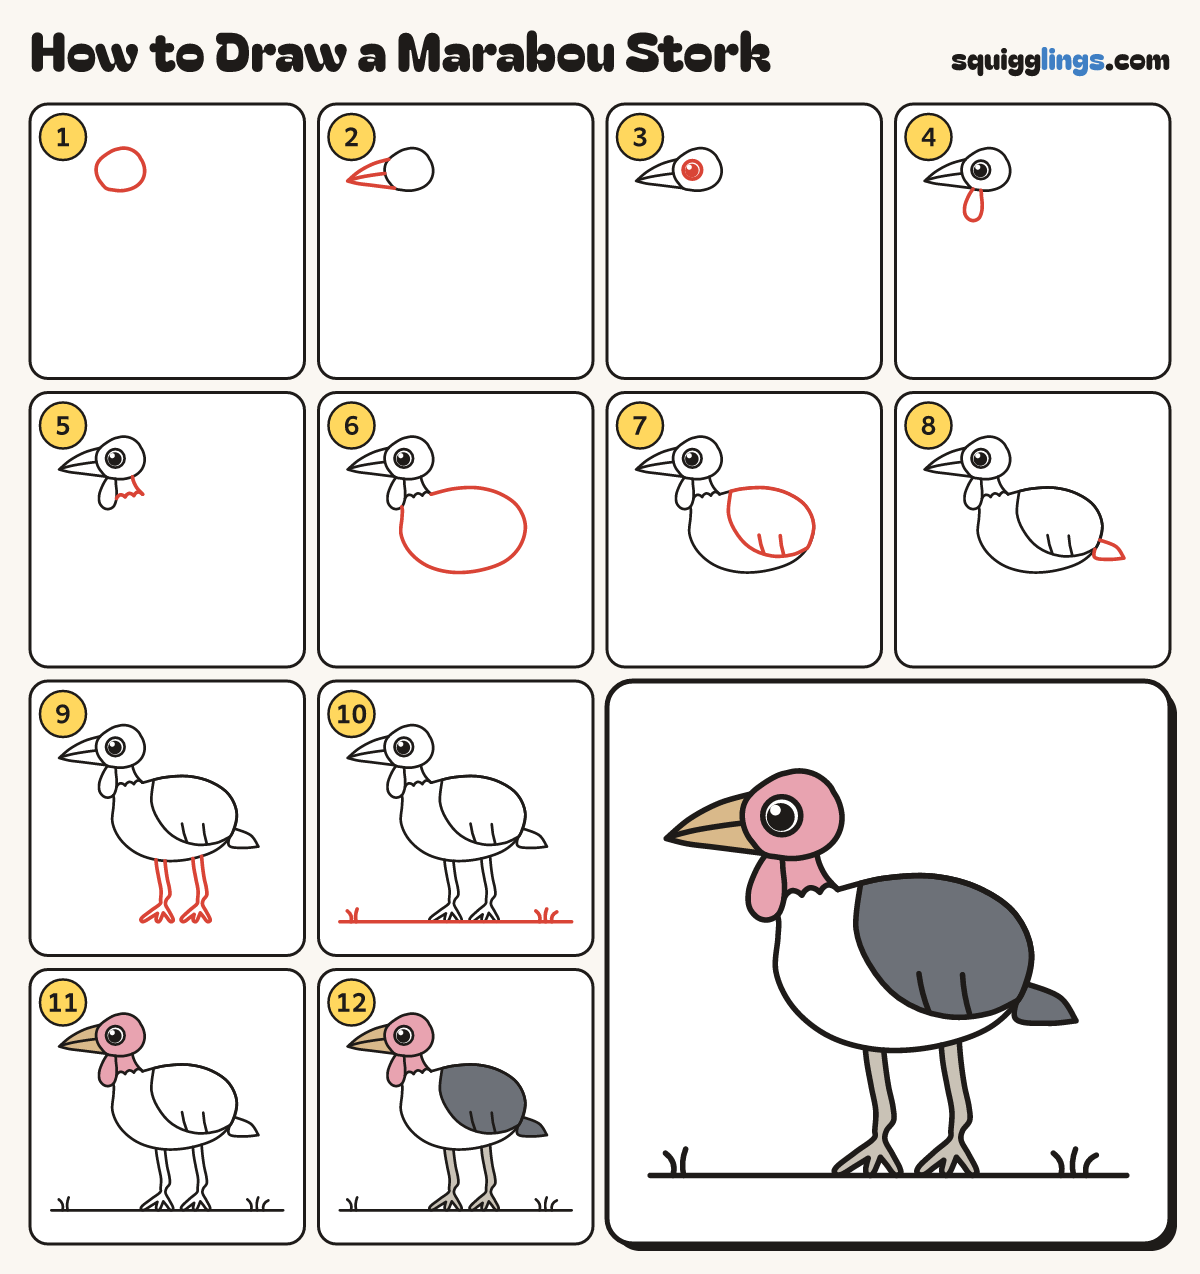
Each picture adds one red line. Draw that line, then scroll to the next picture. Rub out any dashed helper lines at the end. First up: small bald head.
Step 1: Small bald head
Near the top left, draw a small round head. Leave lots of room under it for the body and legs.
Step 2: Huge bill
Start on the front of the head. Draw a huge pointed wedge bill and stop at the chin.
Tip The bill is enormous: as long as the whole head.
Step 3: One big eye
Behind the bill, draw a big round eye. Fill it with a big black dot, leaving a white speck.
Step 4: Throat pouch
Start just under the bill. Draw a fat teardrop pouch hanging down from the throat, then back up.
Tip The dangling throat pouch is the marabou's signature.
Step 5: Short neck
From the back of the head, draw a short neck line down, then a bumpy collar across to the pouch.
Step 6: Big hunched body
Start at the bottom of the neck. Draw a big round body with a humped back. Stop at the pouch.
Step 7: Cloak wing
On the body, draw a big folded wing like a cloak over the back. Add 2 short feather lines.
Tip The wing covers most of the back; only the tummy shows.
Step 8: Little tail
Start on the body under the wing tip. Draw a little pointed tail and stop back on the body.
Step 9: Two long legs
From the tummy, draw 2 long thin legs with an ankle bump and 3 thin toes, back to the tummy.
Step 10: Ground and grass
Start at the left edge. Draw a ground line under the feet to the right edge. Add grass.
Step 11: Pink head, tan bill
Colour the head, neck and pouch pink, leaving the eye white. Colour the huge bill tan.
Step 12: Pale legs, grey cloak
Colour the legs pale grey first, then the wing and tail dark grey. Leave the tummy white.
Your finished drawing
Follow the steps above and this is where you end up: a marabou stork, drawn by you.
Every step in one picture