Watch it draw itself · tap to replay
How to Draw a Maidenhair Fern
Draw a maidenhair fern in 10 easy steps, about 8 minutes. Free, with a printable worksheet.
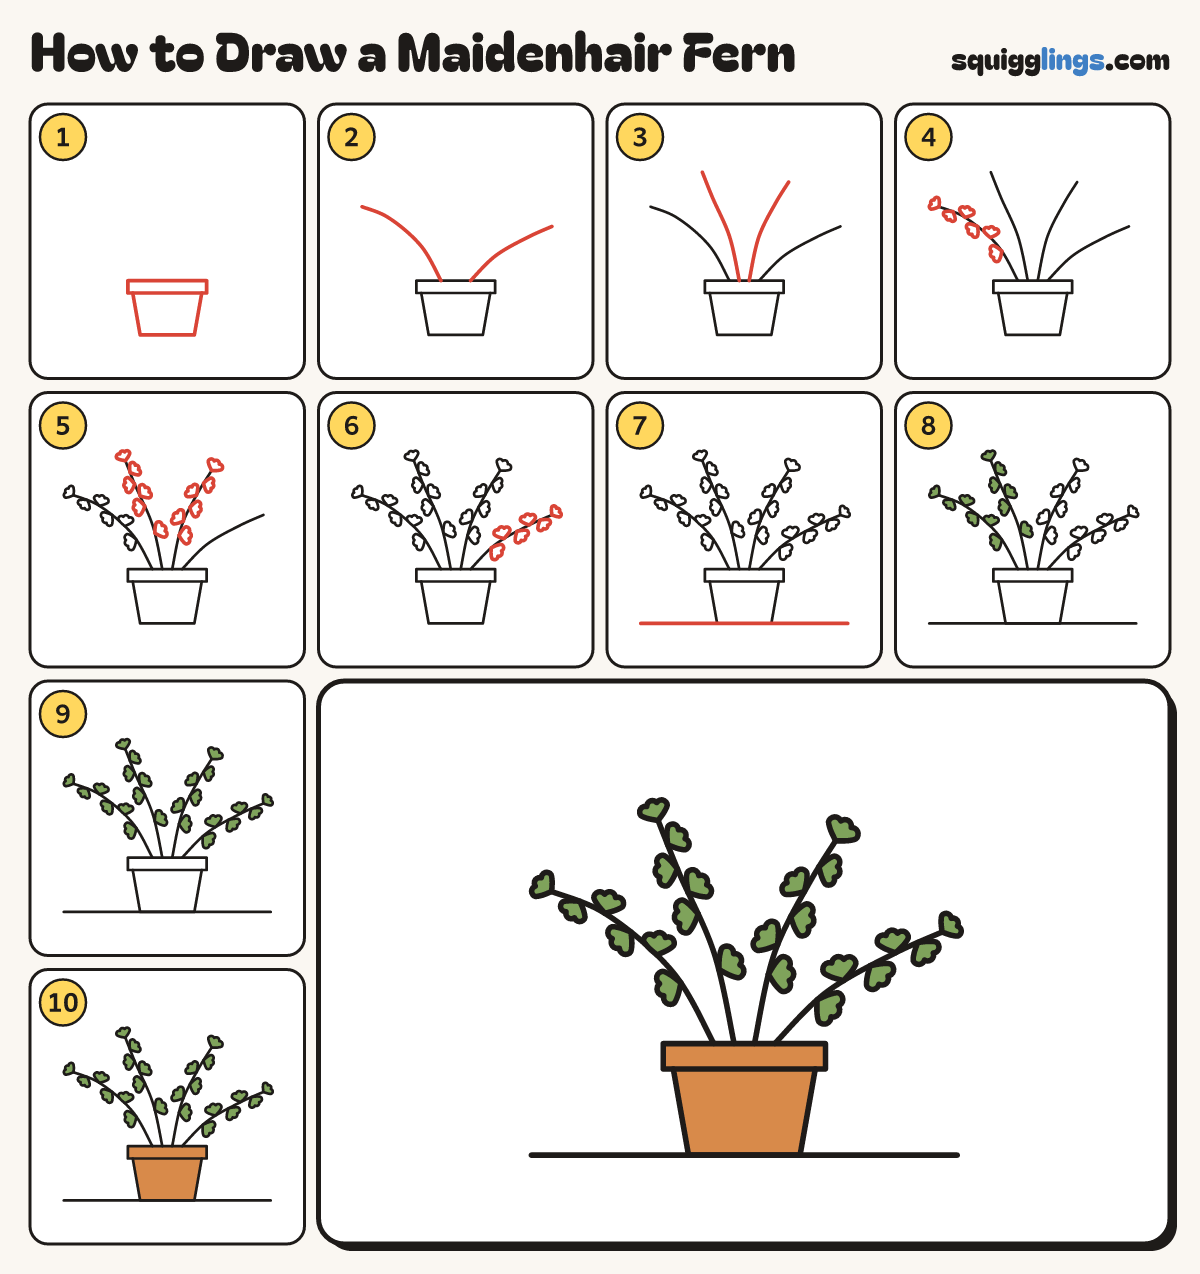
Each picture adds one red line. Draw that line, then scroll to the next picture. Rub out any dashed helper lines at the end. First up: the pot.
Step 1: The pot
Low down draw a flat rim band. From its left end draw a tub, stopping at its right end.
Tip Maidenhair fern has thin black wiry stems with little green fans along them.
Step 2: Two stems
From the rim draw 2 thin wiry stems arching out, one left and one right, stopping in the air.
Step 3: Two more stems
From the rim draw 2 taller stems between them, one arching up-left and one up-right, stopping in the air.
Step 4: Left stem fans
Along the left stem draw 6 little fans, taking turns each side. Point on the stem, bumpy edge out.
Step 5: Tall stem fans
Do the same on the 2 tall stems: 6 little fans along each, taking turns each side.
Step 6: Right stem fans
Give the right stem 6 little fans too.
Step 7: The ground
Draw the ground line from left to right through the bottom of the pot.
Step 8: Green fans
Go over your lines, then colour every fan on the 2 left stems leaf green.
Step 9: More green
Colour the rest of the fans leaf green too.
Step 10: Ginger pot
Colour the pot and its rim ginger, and your maidenhair fern is done!
Your finished drawing
Follow the steps above and this is where you end up: a maidenhair fern, drawn by you.
Every step in one picture