Watch it draw itself · tap to replay
How to Draw a Luna Moth
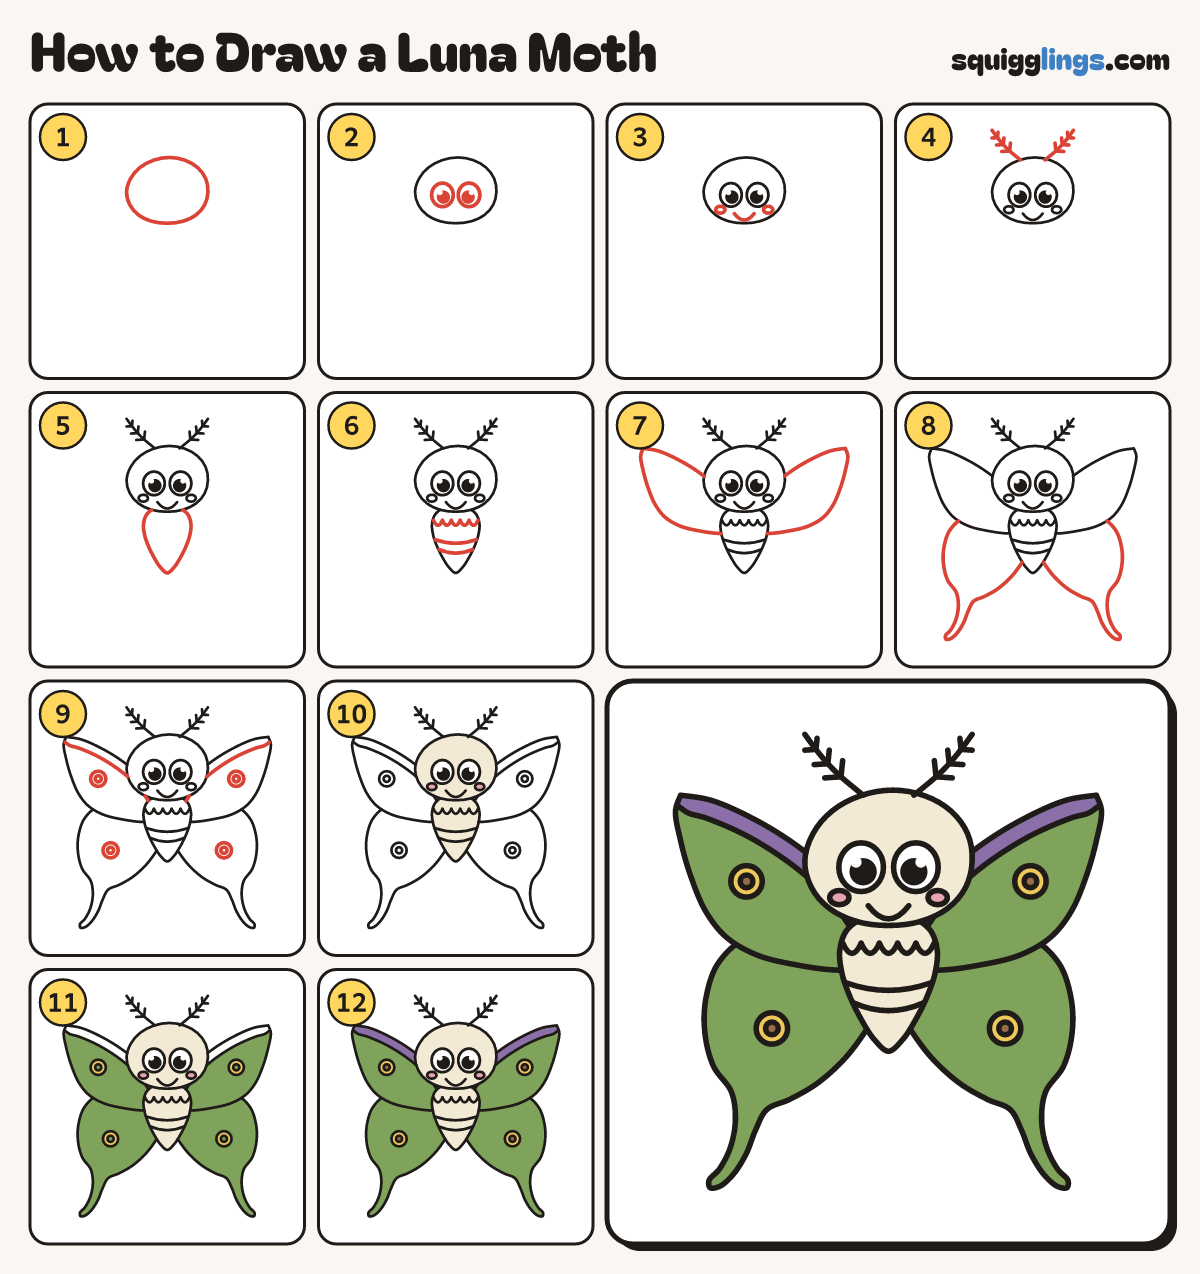
Draw a luna moth in 12 easy steps, about 9 minutes. Free, with a printable worksheet.
Each picture adds one red line. Draw that line, then scroll to the next picture. Rub out any dashed helper lines at the end. First up: the head.
Step 1: The head
A bit above the middle, draw a big soft egg for the head, wider than tall. Leave room for wings.
Step 2: Two big eyes
Below the middle of the head, draw 2 big egg eyes a finger apart, with a dot and shine.
Step 3: Smile and cheeks
Under the eyes, draw a wide U smile from eye to eye. Add a small round cheek under each eye.
Step 4: Feather antennae
From the head top, draw 2 lines out to near the page top, each with 3 V teeth getting smaller.
Tip Moth antennae look like little feathers or combs.
Step 5: A fat fuzzy body
From under the head, draw a fat round chest that narrows into a plump teardrop tummy with a soft point.
Tip A moth's body is fatter than a butterfly's.
Step 6: Fuzzy collar and stripes
Across the chest, draw a row of 5 little bumps for the collar. Add 2 smile curves across the tummy.
Step 7: Pointed top wings
From the chest, draw a wing sweeping up to a leaf point, and back to the tummy. Do both sides.
Step 8: Bottom wings with tails
From under each top wing, draw a round lobe into a long tail curling out, then back to the tummy.
Step 9: Stripe and eye spots
Along each top wing's top edge, draw a thin line. Add a spot with a dot in each wing.
Step 10: Cream body, pink cheeks
Colour the head and body cream and the cheeks pink. Leave the eyes white.
Step 11: Yellow spots, green wings
Colour each spot yellow around its dot. Colour all 4 wings soft green around the spots, not the stripes.
Step 12: Purple stripes, brown dots
Colour the top stripes purple and the dots brown. Go over your lines, and your luna moth is done!
Your finished drawing
Follow the steps above and this is where you end up: a luna moth, drawn by you.
Every step in one picture