Watch it draw itself · tap to replay
How to Draw a Leg
Draw a leg in 12 easy steps, about 9 minutes. Free, with a printable worksheet.
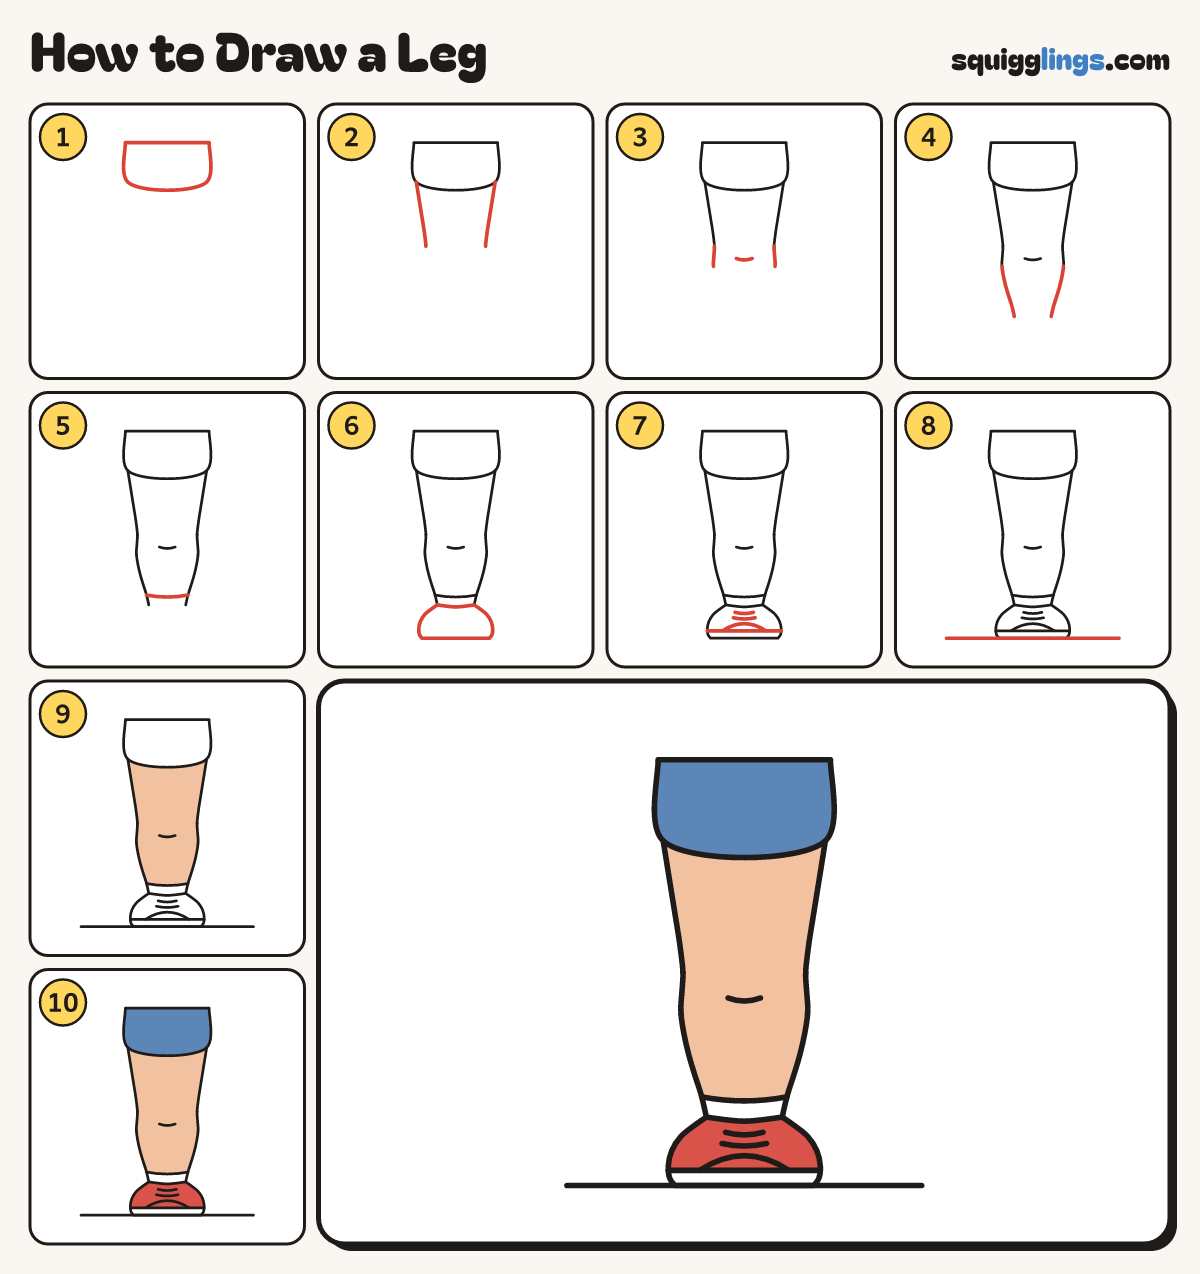
Each picture adds one red line. Draw that line, then scroll to the next picture. Rub out any dashed helper lines at the end. First up: shorts leg.
Step 1: Shorts leg
Near the top, draw the leg of some shorts: a wide box, a little wider at the bottom.
Tip The leg reaches nearly to the bottom of the page.
Step 2: The thigh
Start at each bottom corner of the shorts. Draw 2 lines down, getting closer, and stop halfway down the page.
Step 3: Knee and shin
Start under the left thigh line. Draw a round knee bump, then slope in and down. Stop near the bottom.
Tip The knee is a soft bump, not a corner.
Step 4: The calf
Start under the right thigh. Bulge out for the calf, then curve in and stop beside the shin.
Tip The ankle is the thinnest part of the leg.
Step 5: Sock top
Start on the shin a little above its end. Draw a gentle curve across and stop on the calf line.
Step 6: Ground and sole
Draw a ground line near the bottom. On it draw a long fat sole, sticking out to the left.
Tip The toe end lifts up a little.
Step 7: Toe cap
Start at the toe tip of the sole. Draw a half-dome up and over, and stop on the sole.
Step 8: The sneaker
Start behind the toe cap. Climb to the ankle, dip across, round the heel and stop on the sole.
Step 9: Laces
Start on the shoe's top near the ankle. Curve under it and stop behind the toe cap. Add 3 laces.
Step 10: Peach leg
Colour the leg peach, from the shorts down to the sock.
Step 11: Blue shorts
Colour the shorts blue.
Step 12: Red sneaker
Colour the sneaker red around the laces. Leave the sock, toe cap and sole white. Go over your lines.
Your finished drawing
Follow the steps above and this is where you end up: a leg, drawn by you.
Every step in one picture