Watch it draw itself · tap to replay
How to Draw a Kudu
Draw a kudu in 11 steps, about 8 minutes. Free, with a printable worksheet.
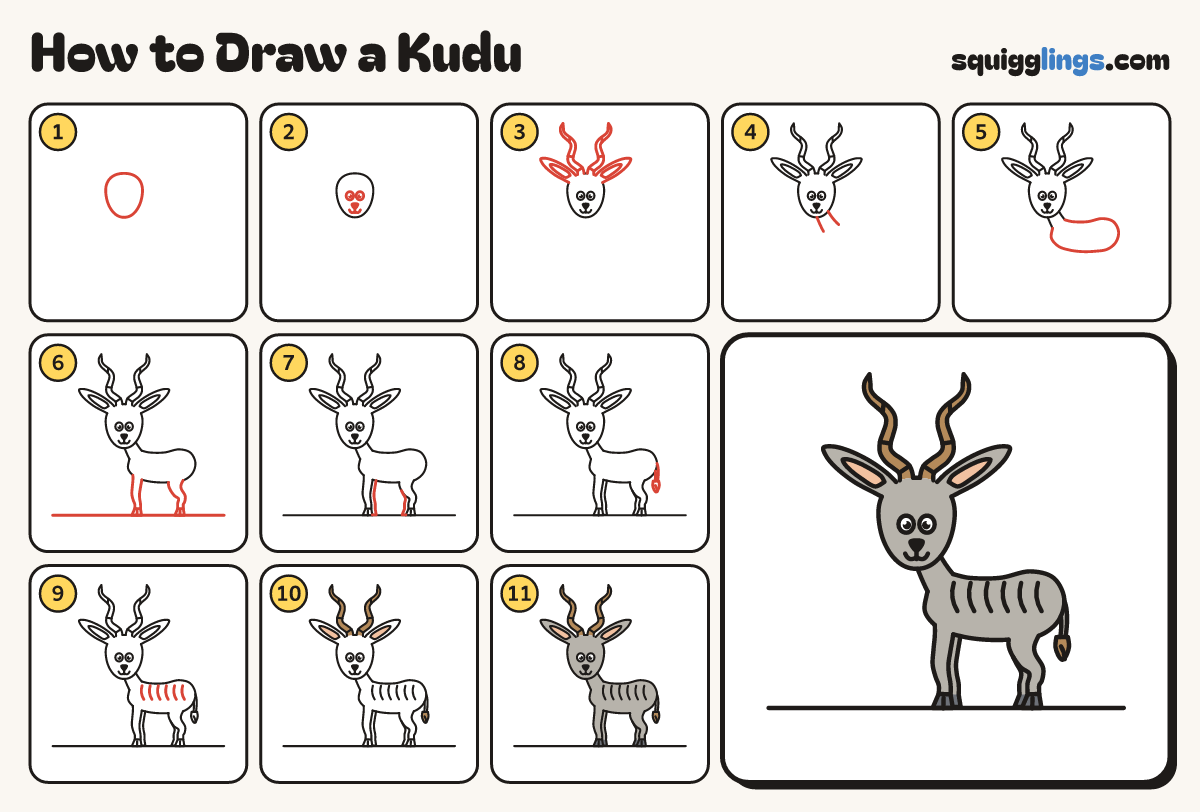
Each picture adds one red line. Draw that line, then scroll to the next picture. Rub out any dashed helper lines at the end. First up: the head.
Step 1: The head
Near the top left of your paper draw an egg head, narrower at the chin. Leave room on the right.
Tip A big head is what makes it cute.
Step 2: Eyes and nose
Draw 2 big eyes and a triangle nose below the middle. From the nose, a line down to a smile.
Step 3: Horns and ears
Draw 2 tall corkscrew horns with 3 rings each. Add a leaf ear on each side, with a leaf inside.
Step 4: The neck
Start behind the head. Slope the neck down to the right. Draw the front from chin down to chest.
Step 5: The body
From the neck draw a big bean body: a long back, a round bottom, a tummy, up to the chest.
Tip A bean, not a loaf: the bottom is rounder and higher than the chest.
Step 6: Two legs
Draw a ground line. From the chest draw a front leg down to a hoof. Add a back leg too.
Tip A hoof is a little doorstop with a split up the middle.
Step 7: The far legs
Draw 2 thinner legs peeking out behind, each from the tummy down to a hoof on the ground.
Step 8: The tail
Start on the top corner of the bottom. Draw a thin tail hanging down and stop at a leaf-shaped tuft.
Step 9: Stripes
Draw 6 thin stripes down the side of the body, from under the back to near the tummy.
Tip Markings are what make it this animal: keep them big and simple.
Step 10: Peach and wood
Go over your lines. Colour the ear insides peach, and the horns and the tail tuft wood brown.
Step 11: Colour it grey
Colour the head, ears, neck, body, legs and tail grey, around the peach. Colour the hooves slate.
Tip Leave the eyes white.
Your finished drawing
Follow the steps above and this is where you end up: a kudu, drawn by you.
Every step in one picture