Watch it draw itself · tap to replay
How to Draw a Jacob Sheep
Draw a Jacob sheep in 11 steps, about 8 minutes. Free, with a printable worksheet.
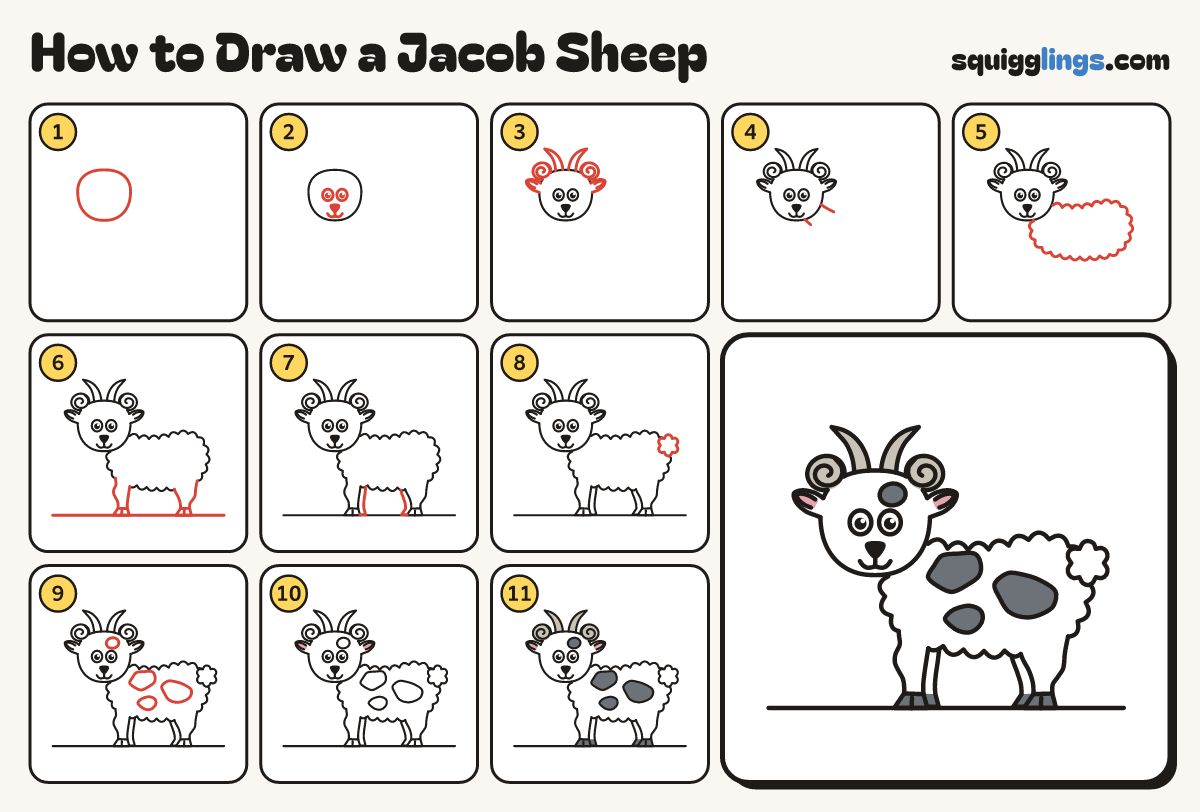
Each picture adds one red line. Draw that line, then scroll to the next picture. Rub out any dashed helper lines at the end. First up: big round head.
Step 1: Big round head
Near the top left of your paper draw a big round head, a little wider than tall.
Step 2: Eyes and nose
Draw 2 big eyes halfway down the head. From a small nose draw a line down to a w smile.
Step 3: Horns and ears
On top of the head draw 2 short curved horns. On each side add a curled horn and an ear.
Tip 4 horns: 2 curved ones on top, 2 curls at the sides.
Step 4: The neck
Start behind the head. Draw the neck down to the body. Draw the front from chin down to chest.
Step 5: Fluffy body
Start at the bottom of the neck. Draw a big fluffy cloud body and stop back at the neck.
Tip A bean, not a loaf: the bottom is rounder and higher than the chest.
Step 6: Two legs
Draw a low ground line. From the chest draw a leg with a bumpy knee. Add a bent back leg.
Tip A hoof is a flat doorstop with a split up the middle.
Step 7: The far legs
Add 2 thinner legs peeking out behind the first ones. All 4 hooves stand on the ground line.
Step 8: Pom-pom tail
Sticking out from the top corner of the bottom, draw a round pom-pom tail: a ring of 6 soft bumps.
Step 9: Patches
Draw wobbly patches: one on the shoulder, one on the bottom, one on the tummy, one on the forehead.
Step 10: Colour it white
Colour the wool white and the insides of the ears pink. Keep the eyes white.
Step 11: Grey horns and patches
Colour the horns light grey, then the hooves and patches dark grey.
Your finished drawing
Follow the steps above and this is where you end up: a Jacob sheep, drawn by you.
Every step in one picture