Watch it draw itself · tap to replay
How to Draw an Impossible Cube
Draw an impossible cube in 14 easy steps, about 11 minutes. Free, with a printable worksheet.
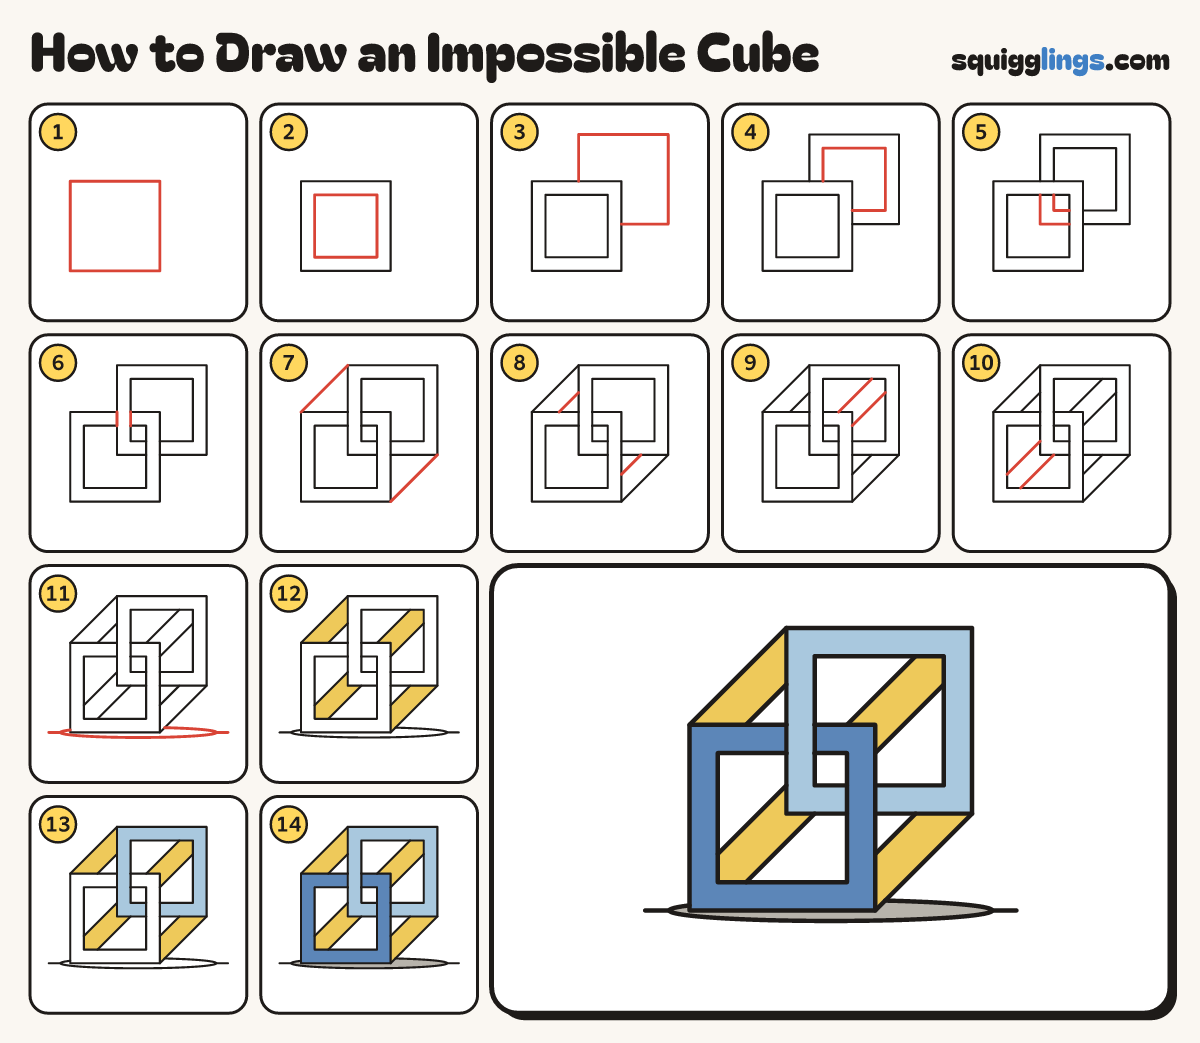
Each picture adds one red line. Draw that line, then scroll to the next picture. Rub out any dashed helper lines at the end. First up: the front square.
Step 1: The front square
Low on the left of your paper, draw a big square with 4 equal sides.
Tip Use a ruler if you like: straight sides make the trick work.
Step 2: A square inside
Inside it, draw a smaller square, a finger in from every side. Now it is a frame.
Step 3: The back square
Start on the front frame's top edge. Draw a second big square up and right. Stop on its right edge.
Tip It is the same size as the first square, half a square higher and further right.
Step 4: Its inside square
Inside the back square draw a smaller square, a finger in. Start and stop on the front frame again.
Tip Now you have 2 frames, one behind the other.
Step 5: Corner in the hole
Inside the front frame, finish the back frame's corner: 2 L shapes that start and stop on the front bars.
Tip They line up with the back frame's lines outside.
Step 6: The impossible bit
From the top, join the back frame's 2 left lines across the front bar. Rub out the front lines between.
Tip Now the back bar jumps in front here. That is the trick!
Step 7: Join two corners
From the front square's top left corner, slant a line up to the back square's. Repeat at the bottom right.
Step 8: Two slanted bars
Beside each slanted line draw a matching one, 2 fingers nearer the middle. Start and stop on the frames.
Tip Now 2 corners are joined by slanted bars.
Step 9: Top right bar
From the front frame's top right corner, draw 2 slanted lines up to the inside of the back frame's corner.
Tip One line starts a finger left of the corner, the other a finger below it.
Step 10: Bottom left bar
Inside the front frame, draw 2 slanted lines from its bottom left corner up to the back frame's corner.
Tip One line starts a finger above the inside corner, the other a finger to its right.
Step 11: Floor and shadow
Draw a flat oval shadow round the bottom of the cube, and a floor line out from each end.
Tip The front frame stands on the floor: its bottom edge runs along the middle of the shadow.
Step 12: Yellow slanted bars
Go over your lines. Colour the 4 slanted bars yellow.
Step 13: Light blue back frame
Colour the back frame light blue. Follow its left bar down across the front top bar.
Tip Leave the square holes white.
Step 14: Blue front, grey shadow
Colour the front frame blue and the shadow grey. One bar is in front AND behind. Impossible!
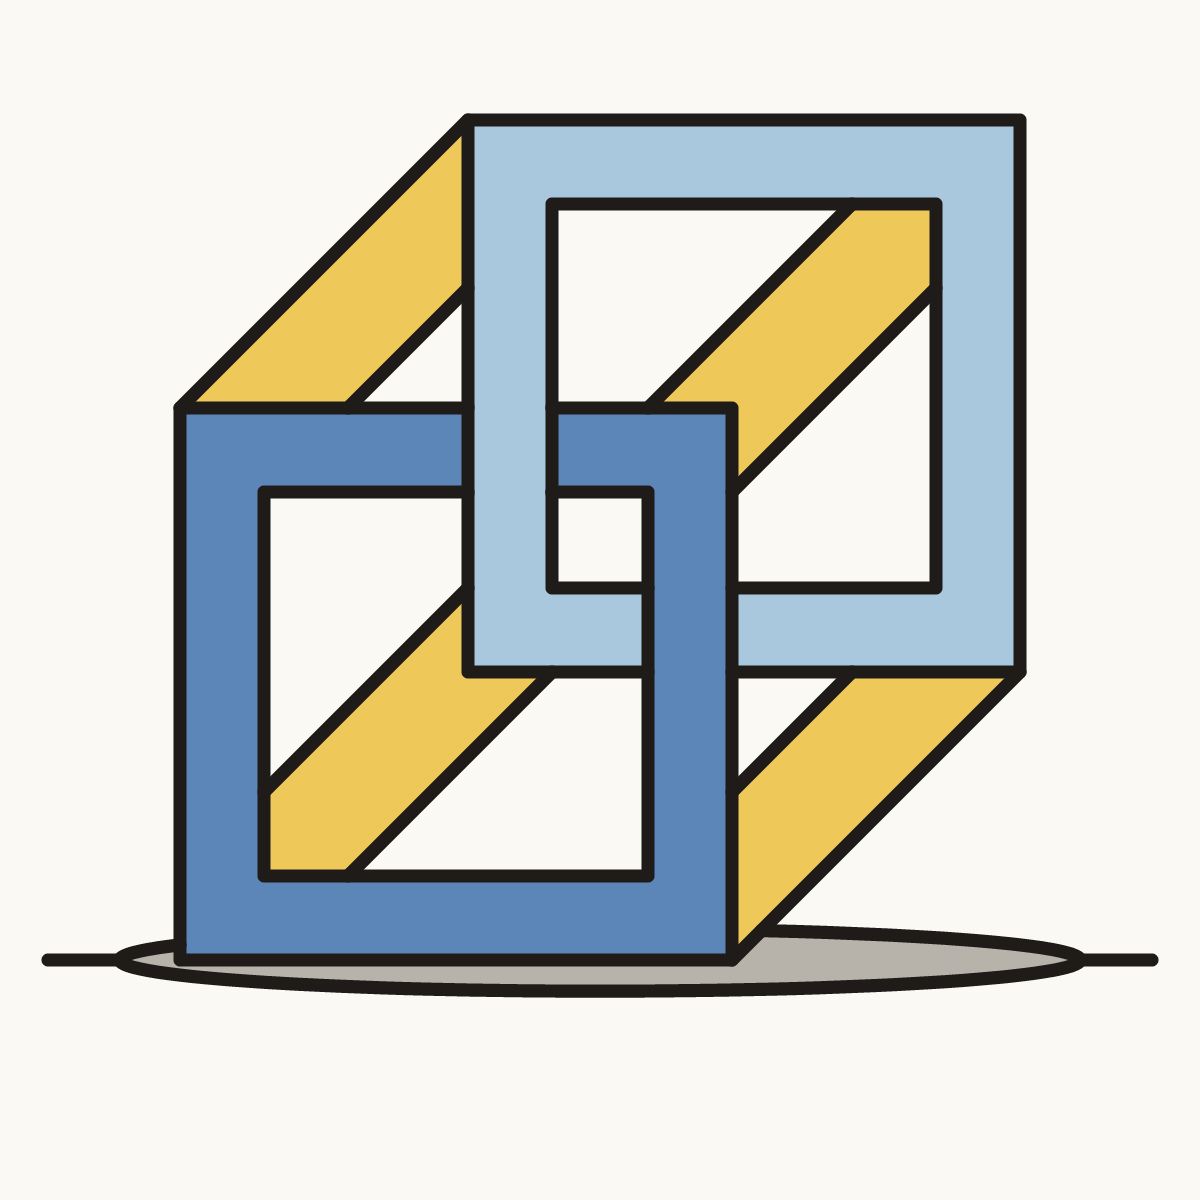
Your finished drawing
Follow the steps above and this is where you end up: an impossible cube, drawn by you.
Every step in one picture