Watch it draw itself · tap to replay
How to Draw an Iguana
Draw an iguana in 12 easy steps, about 9 minutes. Free, with a printable worksheet.
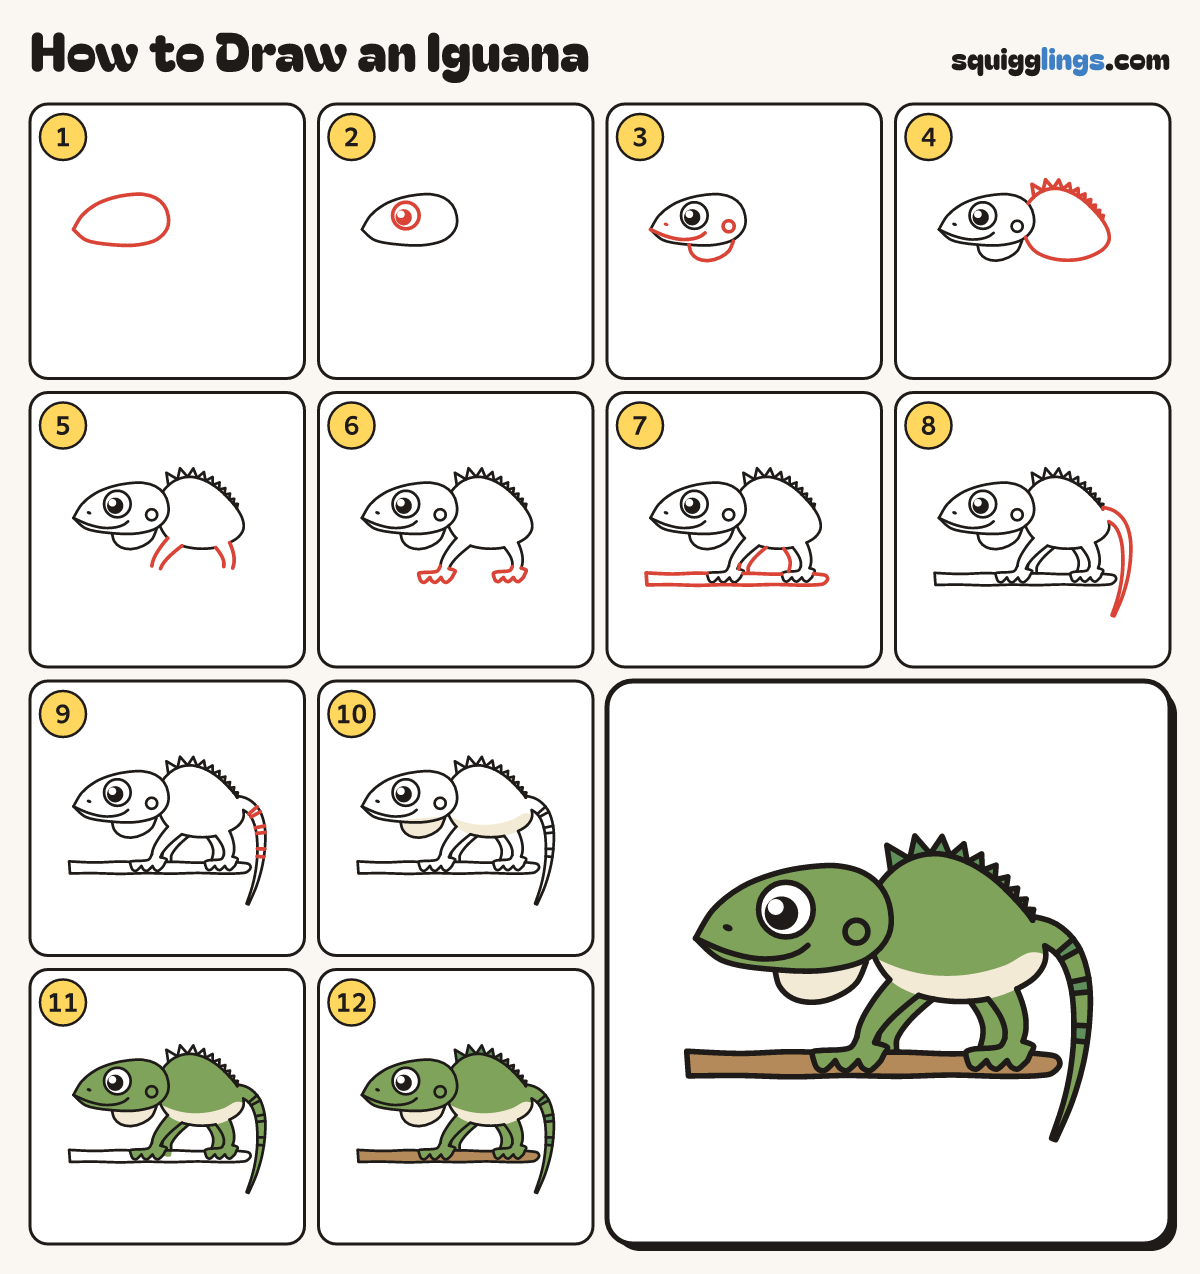
Each picture adds one red line. Draw that line, then scroll to the next picture. Rub out any dashed helper lines at the end. First up: wedge head.
Step 1: Wedge head
Start at the snout, left. Draw over a round head, down the back, under the chin, back to the snout.
Step 2: Big eye
In the front half of the head, draw 1 big circle eye. Add a big black pupil and a shine.
Step 3: Grin and chin flap
From the snout, draw a grin under the eye. Hang a U flap from the jaw, back to the head.
Step 4: Egg body and spikes
Start behind the head. Draw a hump, a round bottom, then along the tummy to the jaw. Add back spikes.
Tip Spikes are tall at the neck and tiny at the rump: that's an iguana.
Step 5: Two bent legs
Start under the chest. Draw a leg down with a soft elbow, stopping at the ankle. Same under the bottom.
Tip Fat at the tummy, thinner at the ankle. Leave the ankle open.
Step 6: Three-toed feet
Start on each ankle. Draw a flat foot forward with 3 round toe bumps, back to the ankle.
Step 7: Branch and far legs
Draw a wavy branch under the toes. Add a far leg peeking behind each leg, from tummy to branch.
Step 8: Long tail
Start on the back. Draw a long tail sweeping back and down to a point, then back to the bottom.
Tip A lizard tail is as long as the whole body.
Step 9: Tail stripes
Draw 3 pairs of short lines across the tail: near the top, in the middle, and near the tip.
Step 10: Cream tummy
Colour the chin flap and the tummy cream.
Step 11: Leaf green iguana
Colour the head, body, legs, feet and tail leaf green, around the cream and stripes. Leave the eye white.
Step 12: Dark spikes, wood branch
Colour the spikes and tail stripes dark green. Colour the branch wood brown around the feet. Your iguana is done!
Your finished drawing
Follow the steps above and this is where you end up: an iguana, drawn by you.
Every step in one picture