Watch it draw itself · tap to replay
How to Draw a Hoverboard
Draw a hoverboard in 10 easy steps, about 8 minutes. Free, with a printable worksheet.
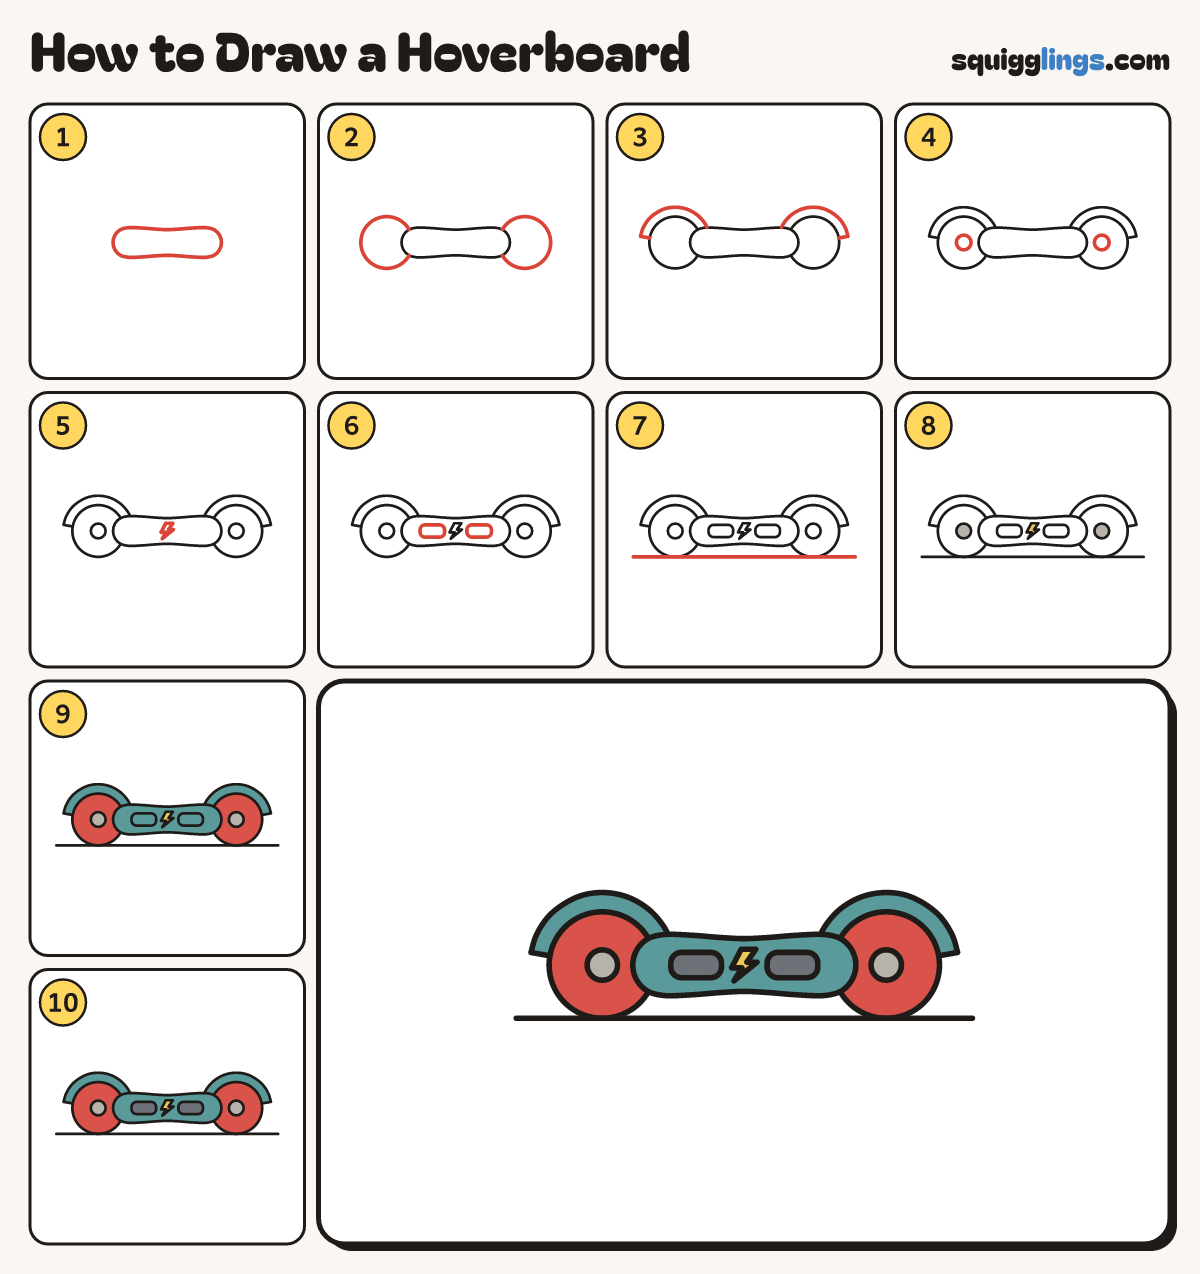
Each picture adds one red line. Draw that line, then scroll to the next picture. Rub out any dashed helper lines at the end. First up: board.
Step 1: Board
Across the middle of your paper, draw 1 long chunky pill lying down, a little thinner in the middle.
Tip Leave room at each end for a wheel.
Step 2: Two fat wheels
At each end of the board, draw 1 big round wheel. Stop the line where it meets the board.
Tip The middle of each wheel is level with the board.
Step 3: Two fenders
On top of each wheel, draw a thick rainbow arch. Start on the wheel's outside and stop on the board.
Tip The arch hugs the top of the wheel like a hood.
Step 4: Axle nuts
Draw a small circle in the middle of each wheel, just beside the end of the board.
Step 5: Lightning bolt
In the thin middle of the board, draw 1 fat zigzag lightning bolt, wide on top and pointy below.
Step 6: Two foot pads
On the board, draw 2 flat rounded rectangles, one on each side of the bolt, for the foot pads.
Step 7: The ground
Start left of the left wheel. Draw a straight line touching both wheel bottoms, stopping past the right wheel.
Step 8: Yellow bolt, grey nuts
Colour the lightning bolt yellow and both axle nuts light grey.
Step 9: Teal board, red wheels
Colour the board and fenders teal around the bolt and pads, and the wheels red around the nuts.
Step 10: Grey foot pads
Colour both foot pads dark grey, so they stand out on the teal board.
Your finished drawing
Follow the steps above and this is where you end up: a hoverboard, drawn by you.
Every step in one picture