Watch it draw itself · tap to replay
How to Draw Hook a Duck
Draw hook a duck in 13 easy steps, about 10 minutes. Free, with a printable worksheet.
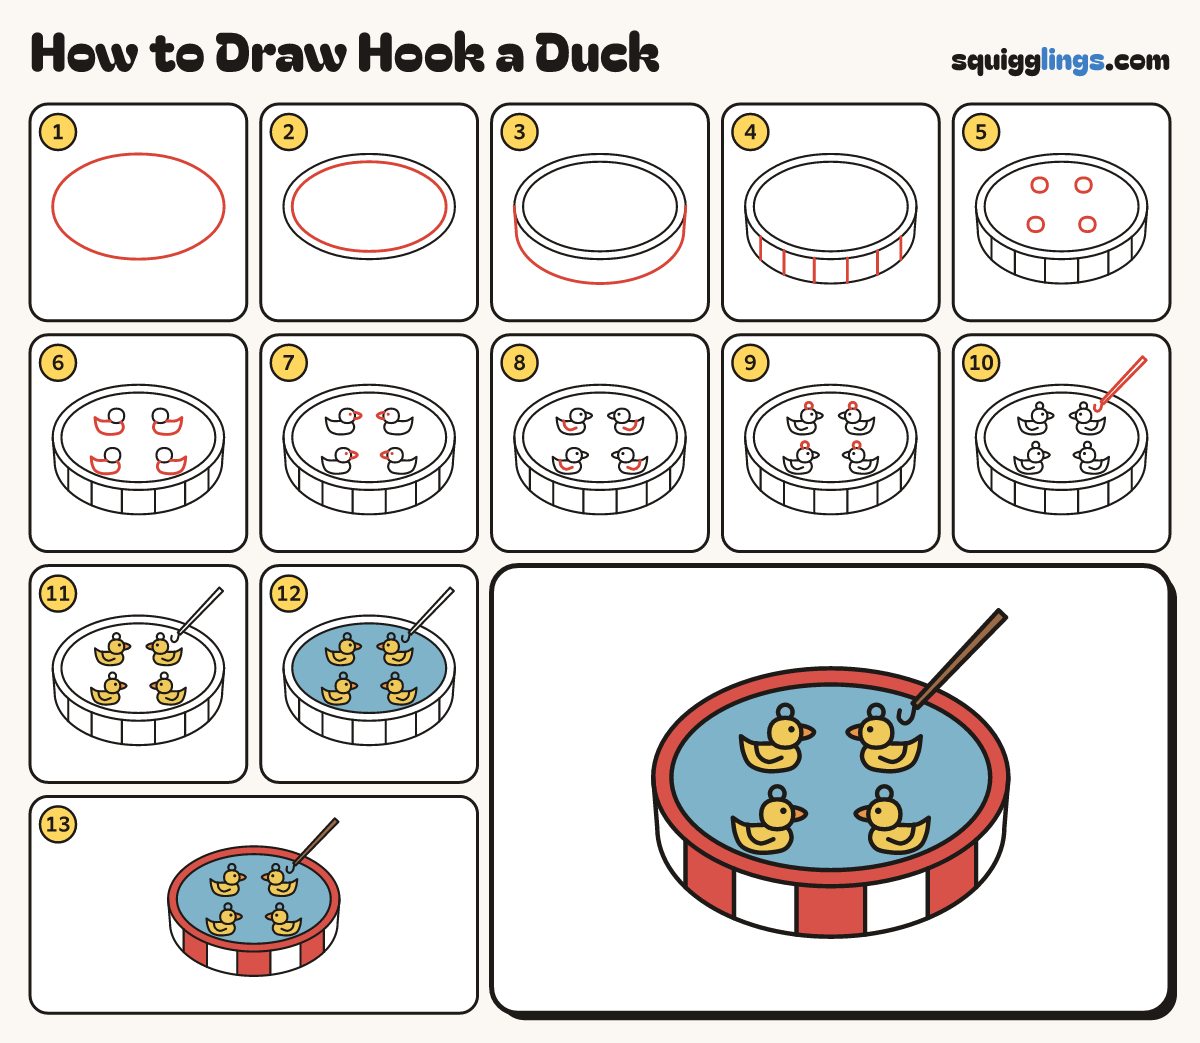
Each picture adds one red line. Draw that line, then scroll to the next picture. Rub out any dashed helper lines at the end. First up: the tub's rim.
Step 1: The tub's rim
Draw a big wide oval across the page. It is the top of a round tub.
Tip Leave a little room above it for the pole.
Step 2: The water's edge
Inside it draw a second oval, just a little smaller. The water goes in here.
Step 3: The tub's side
From each end of the big oval draw a short line down. Join them with a long curve.
Step 4: Stripes
Draw 6 lines down the side of the tub, from the rim to the bottom edge, to make stripes.
Step 5: Four heads
On the water draw 4 small round heads: 2 near the back and 2 near the front.
Tip Leave room above each head for a ring.
Step 6: Duck bodies
Under each head draw a body like a little boat, with a pointed tail tipping up on the outside.
Tip Each head sits at the end of the body nearest the middle.
Step 7: Bills and eyes
Give each duck a small bill pointing to the middle, and a dot for an eye.
Step 8: Little wings
On each body draw a wing: start on the back near the tail and curve down like a smile.
Step 9: Hook rings
On top of each head draw a small ring. The hook catches the duck by its ring.
Step 10: Pole and hook
Draw a long thin pole from the top right to the water. Add a J hook at its tip.
Tip Rub out the bits of the 2 ovals inside the pole.
Step 11: Yellow ducks
Colour the 4 ducks yellow. Colour their bills orange.
Step 12: Blue water
Colour the water blue. Go carefully around the ducks and the pole.
Step 13: Red tub, brown pole
Colour the rim and 3 stripes red, and the pole brown. Go over your lines and the game is ready!
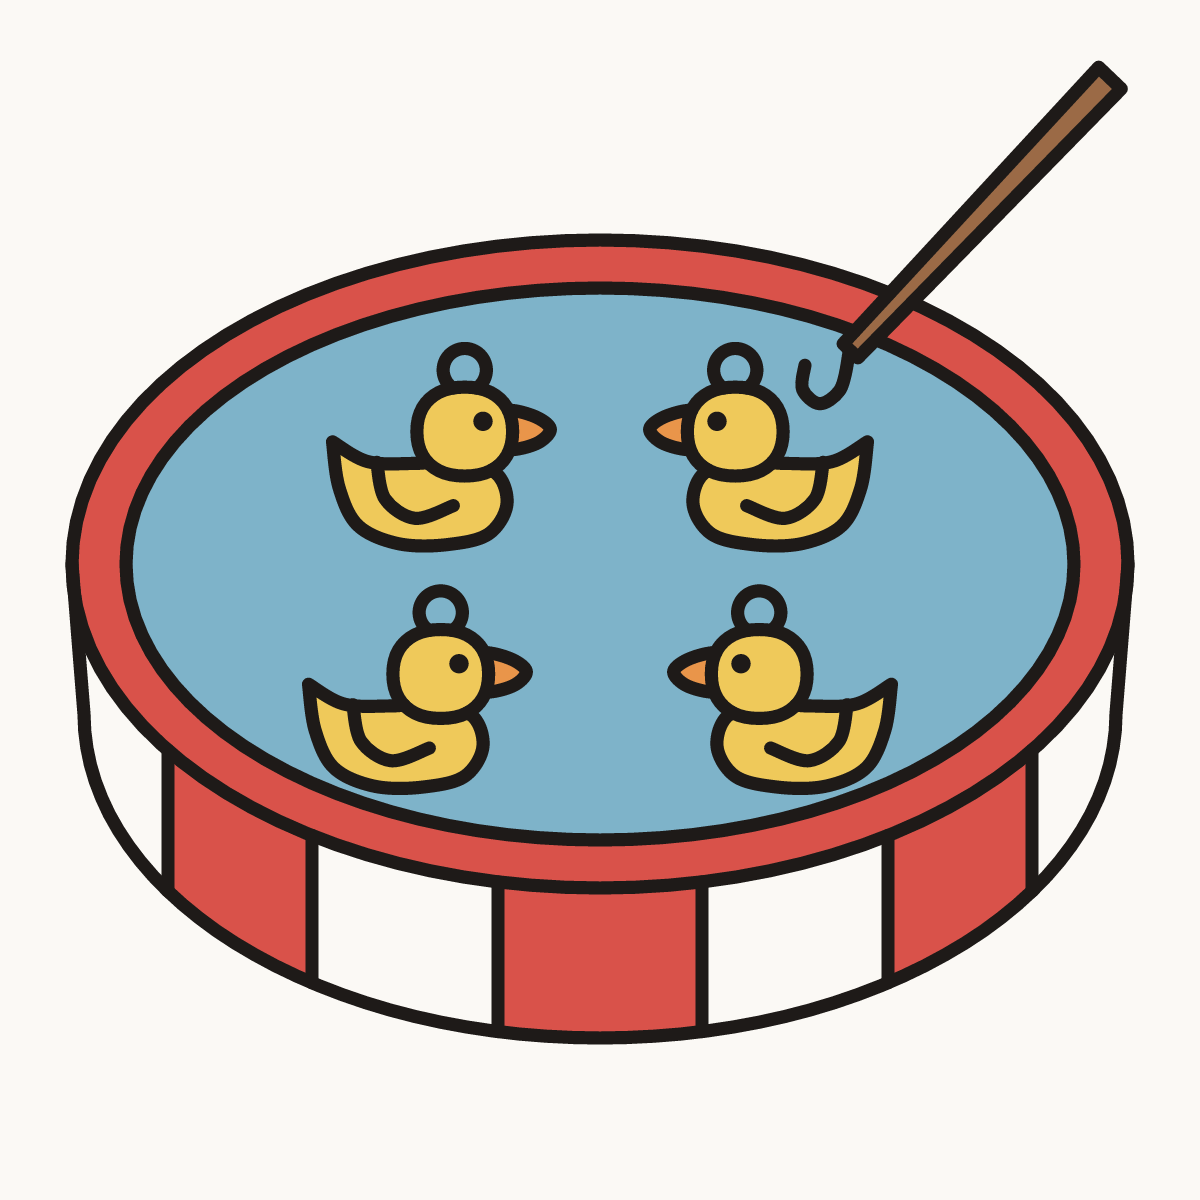
Your finished drawing
Follow the steps above and this is where you end up: hook a duck, drawn by you.
Every step in one picture