Watch it draw itself · tap to replay
How to Draw a Hockey Goal
Draw a hockey goal in 10 easy steps, about 8 minutes. Free, with a printable worksheet.
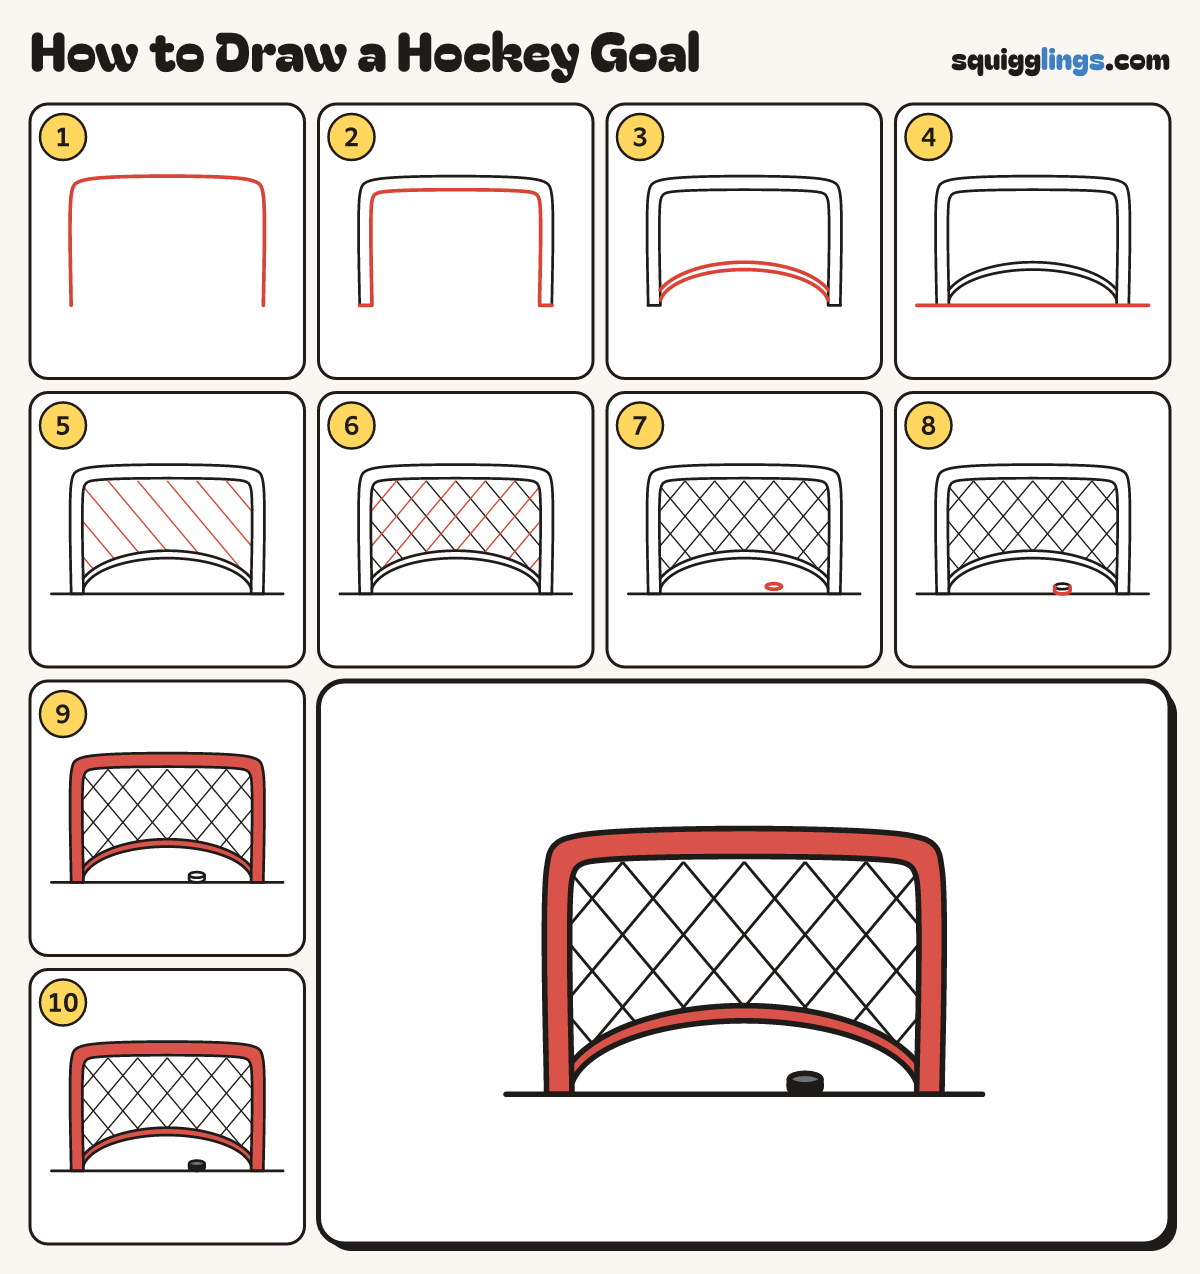
Each picture adds one red line. Draw that line, then scroll to the next picture. Rub out any dashed helper lines at the end. First up: a big upside-down u.
Step 1: A big upside-down U
Start low on the left. Draw a big upside-down U with round top corners and stop low on the right.
Step 2: The pipe
Start at the bottom of the right post. Draw a smaller U just inside, stopping at the left post.
Step 3: The base
Start at the foot of the left post. Draw 2 low rainbow curves close together, over to the right post.
Tip This is the curved base of the goal, lying on the ice at the back.
Step 4: The ice
Start near the left edge. Draw a straight ice line along the bottom of both posts to the right edge.
Step 5: Net lines
Above the base draw thin lines slanting down to the right, evenly spaced, from the frame to the base.
Step 6: Criss-cross net
Now draw thin lines slanting down to the left, crossing the first lines to make diamonds.
Step 7: The puck
Just above the ice line, right of the middle, draw a small flat oval for the top of the puck.
Step 8: The puck's side
From each end of the oval draw a short line down. Join them with a curve along the ice.
Step 9: Red frame
Go over your lines, then colour the pipe frame and the base red.
Step 10: Black puck
Colour the side of the puck black and its top dark grey. Leave the net white.
Your finished drawing
Follow the steps above and this is where you end up: a hockey goal, drawn by you.
Every step in one picture