Watch it draw itself · tap to replay
How to Draw an Herb Garden
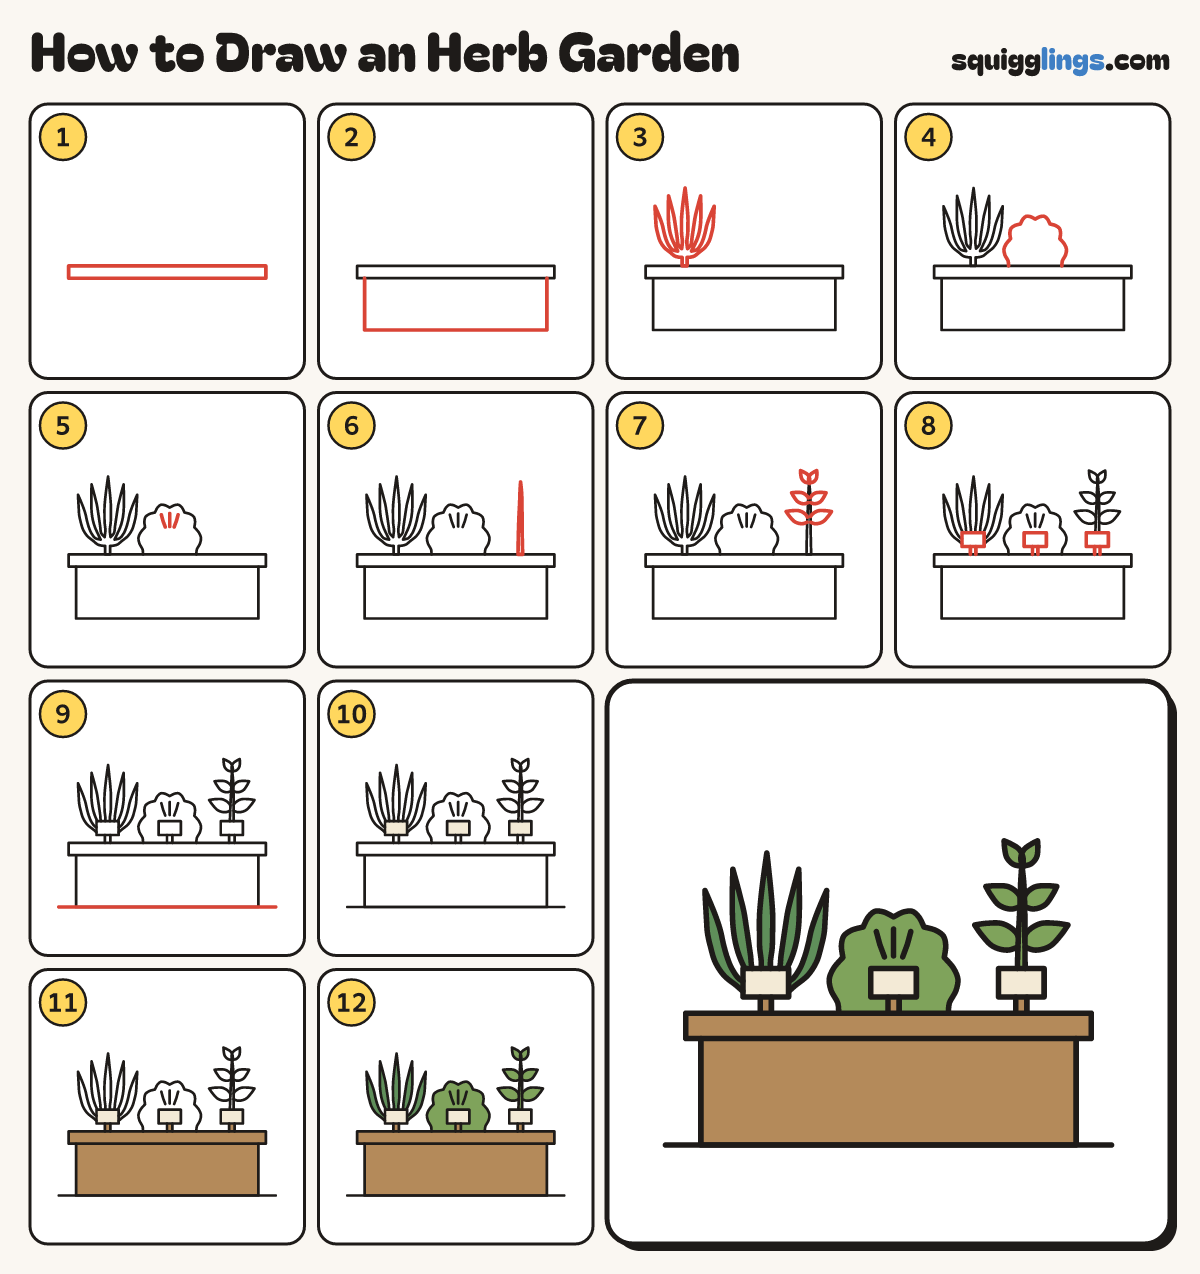
Draw an herb garden in 12 easy steps, about 9 minutes. Free, with a printable worksheet.
Each picture adds one red line. Draw that line, then scroll to the next picture. Rub out any dashed helper lines at the end. First up: the box lip.
Step 1: The box lip
Below the middle draw a long flat box, almost edge to edge and a finger tall, for the planter's lip.
Step 2: The planter box
Start under the lip near the left end. Draw a line down, across the bottom, and up to the lip.
Step 3: Spiky chives
On the left draw 5 thin grass blades fanning up from one spot on the lip, the middle one tallest.
Step 4: A round basil bush
Start on the lip in the middle. Draw a round bush of soft bumps, stopping back on the lip.
Step 5: Basil leaf lines
Inside the bush draw three short lines fanning up from the middle, for the leaf stalks.
Step 6: A mint stalk
On the right, draw a tall stalk up from the lip, getting thinner, stopping well above the box.
Step 7: Mint leaves
On the stalk draw 2 pairs of pointed oval leaves, one each side, then a little pair at the top.
Step 8: Name tags
In front of each herb draw a name tag: a little box on a stick poking up above the lip.
Step 9: The table
Draw a long straight table line along the bottom of the box, from far left to far right.
Step 10: Cream tags
Go over your lines. Colour the three tags cream.
Step 11: Wood box
Colour the planter box, its lip and the tag sticks wood brown.
Step 12: Green herbs
Colour the chives, the basil bush and the mint green, around the tags. Your herb garden is done!
Your finished drawing
Follow the steps above and this is where you end up: an herb garden, drawn by you.
Every step in one picture