Watch it draw itself · tap to replay
How to Draw a Hawk Moth
Draw a hawk moth in 11 easy steps, about 8 minutes. Free, with a printable worksheet.
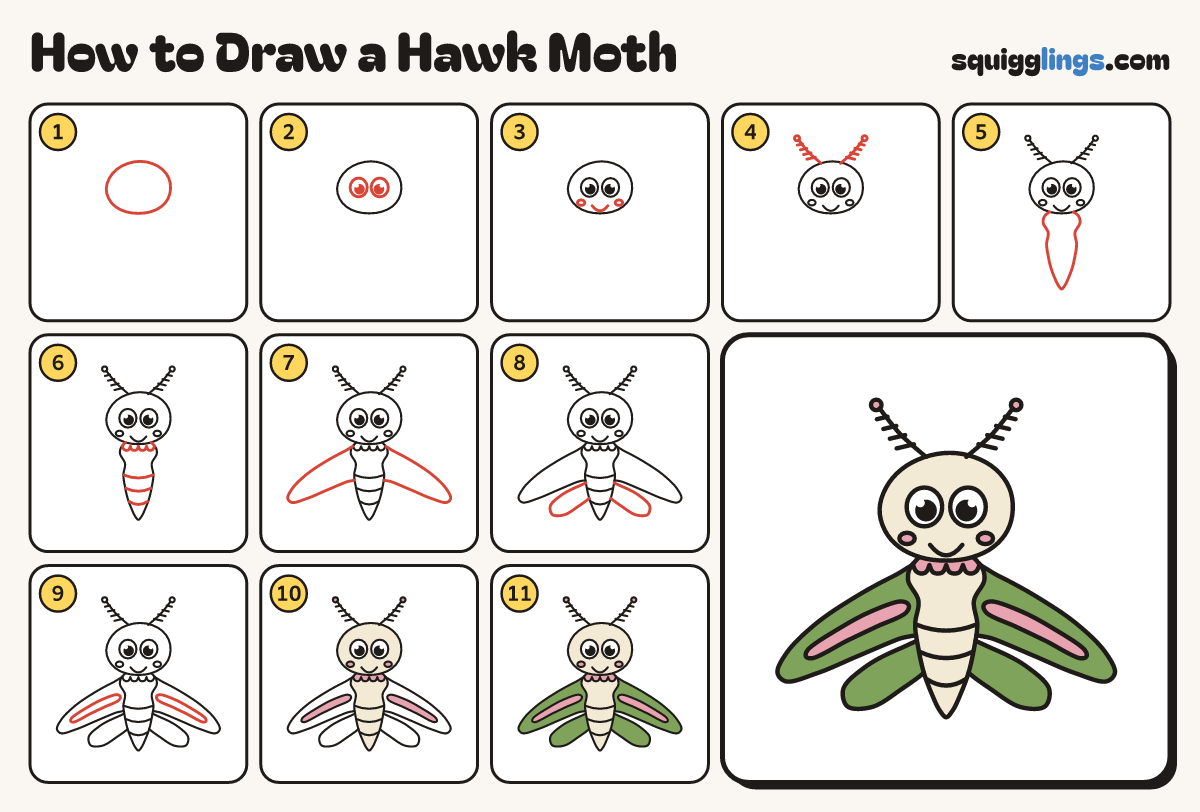
Each picture adds one red line. Draw that line, then scroll to the next picture. Rub out any dashed helper lines at the end. First up: the head.
Step 1: The head
In the middle of your paper draw a big soft egg head, wider than tall. Leave room each side.
Step 2: Two big eyes
Halfway down the head draw 2 big egg eyes a finger apart. Add a dot with a shine.
Step 3: Smile and cheeks
Start under the left eye and draw a wide U smile to the right eye. Add round cheeks.
Step 4: Feather antennae
Start on the head near the top. Draw a thin line up and out to a dot. Add comb teeth.
Tip Moth antennae look like little feathers or combs.
Step 5: A long thick body
Start under the left of the head. Draw a fat chest and a long cigar tummy, back to the head.
Tip A hawk-moth body is long and thick, like a little rocket.
Step 6: Fuzzy collar and stripes
Under the head draw 4 soft bumps across the chest for a collar. Add 3 smile curves on the tummy.
Step 7: Swept-back wings
Start under the head on the left. Draw a long dart wing to a point, and back to the tummy.
Step 8: Tiny bottom wings
Start on the tummy under each top wing. Draw a small wing to a point, and back to the tummy.
Step 9: Wing stripes
Inside each top wing draw a long skinny leaf stripe. Start near the body and stop near the wing tip.
Step 10: Cream and pink
Colour the head and long body cream. Colour the collar, cheeks, stripes and antenna tips pink. Leave the eyes white.
Step 11: Green wings
Colour all 4 wings leaf green around the pink stripes.
Your finished drawing
Follow the steps above and this is where you end up: a hawk moth, drawn by you.
Every step in one picture