Watch it draw itself · tap to replay
How to Draw a Happy Birthday Text
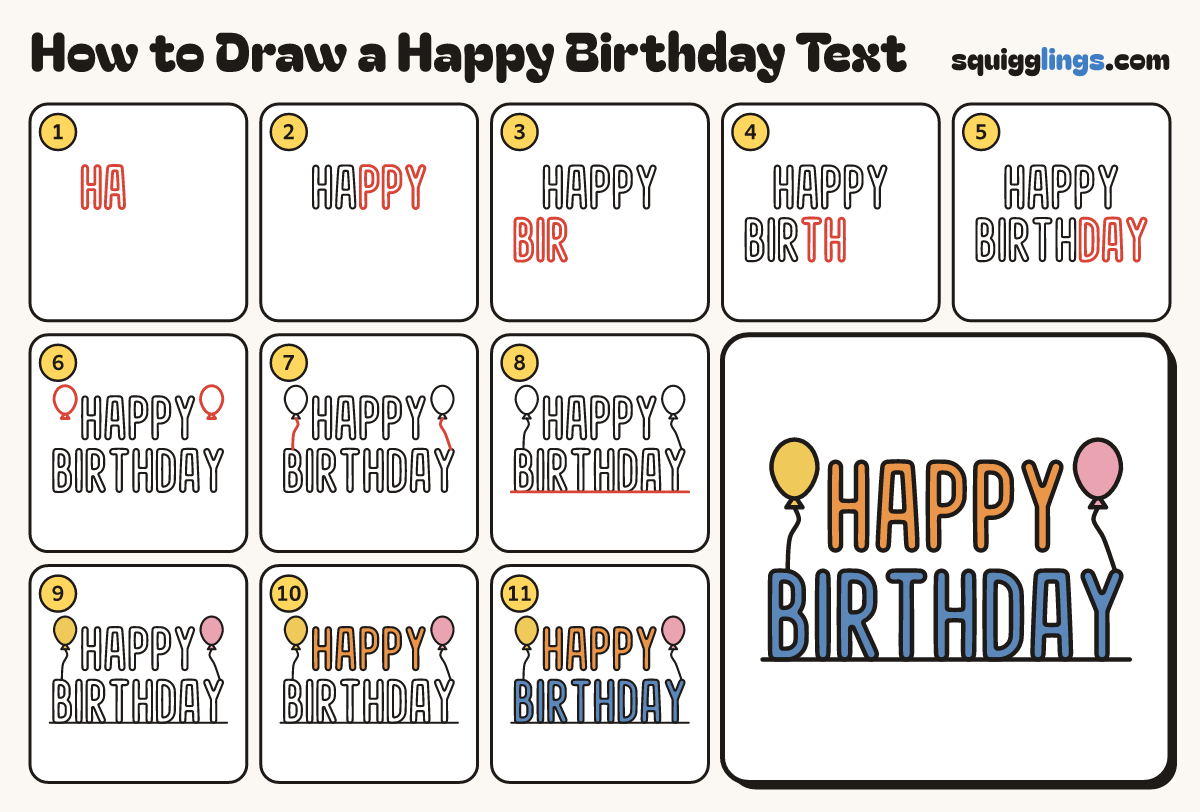
Draw a happy birthday text in 11 easy steps, about 8 minutes. Free, with a printable worksheet.
Each picture adds one red line. Draw that line, then scroll to the next picture. Rub out any dashed helper lines at the end. First up: h and a.
Step 1: H and A
Above the middle, in from the left, draw a fat bubble H, then a fat A with a hole.
Tip Bubble letters are fat sticks with round ends.
Step 2: P, P and Y
Leave a gap, then draw 2 fat P's with a hole in each, and a fat Y to finish HAPPY.
Step 3: B, I and R
Under HAPPY, starting further left, draw a fat B with 2 holes, a thin I and a fat R.
Tip BIRTHDAY has 8 letters, so keep them close together.
Step 4: T and H
Leave a gap, then draw a fat T and a fat H, as tall as the others.
Step 5: D, A and Y
Finish BIRTHDAY with a fat D with a tall hole, an A and a Y.
Step 6: Two balloons
On each side of HAPPY draw an egg-shaped balloon. Add a tiny triangle knot under each one.
Step 7: The strings
From each knot draw a wavy string down to the top of the letter below it.
Tip The strings tie the balloons to the B and the last Y.
Step 8: The floor
Draw a straight floor line under BIRTHDAY, from left to right, so the letters stand on it.
Step 9: Yellow and pink balloons
Colour the left balloon and its knot yellow. Colour the right balloon and its knot pink.
Step 10: Orange HAPPY
Colour the 5 letters of HAPPY orange, keeping inside their outlines. Leave the holes white.
Step 11: Blue BIRTHDAY
Go over your lines, then colour the 8 letters of BIRTHDAY blue. Your HAPPY BIRTHDAY sign is done!
Your finished drawing
Follow the steps above and this is where you end up: a happy birthday text, drawn by you.
Every step in one picture